
Localize Learning Path Content with XLIFF v 2.0 Format
You can localize the content in the controls you create in Learning Path so that they are displayed to users in the language they have selected for Dynamics 365. To localize your controls, you can simply export them, localize the strings that are displayed to users, and then import the control that includes the localized content. You can import the control into the same organization, or into another organization as desired. You can localize the same control into multiple languages and then just import the specific languages into specific organizations that support user with that language selected. Localization support in Learning Path follows the OASIS XML Localization Interchange File Format (XLIFF) 2.0 standard. There are tools and tutorials freely available for working with this common format. For more information, see XLIFF Version 2.0.
For more information about user language settings in Dynamics 365, see Set personal options.
Follow these steps:
- Select the control you want to localize in the Content Library.
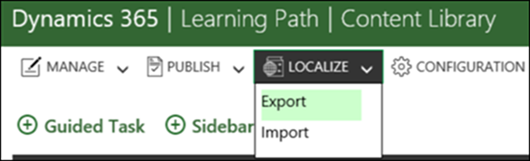
- Click Localize and then click Export.
- Select the option you want to use for saving the generated .zip file, and then select a file name and location.
Note: The default file name for the .zip file is the same each time you export, so you’ll want to use a unique name to avoid overwriting files previously exported.
Important! The exported file is in XLIFF v2.0 format and you must use a tool that supports XLIFF v2.0 for translation.
- After you’ve localized the content, verify the following:
At the top of each topic, the target language (trgLang) tag must contain the localized language culture name. For example, if you have localized the content to Spanish – Spain, ensure that the target language is “trgLang = es-ES”.
Before localization:
<xliff srcLang="en-US" version="2.0" xmlns="urn:oasis:names:tc:xliff:document:2.0">
After localized to Spanish-Spain:
<xliff srcLang="en-US" trgLang="es-ES" version="2.0" xmlns="urn:oasis:names:tc:xliff:document:2.0">
Use the language culture names from Table of Language Culture Names, Codes, and ISO Values Method.
- Go to Content Library, click Localize and then click Import.
- Click Browse to select the previously exported file that you want to import, or drag the file to into the Drag controls here box on the dialog.
Caution: When you import a control it will overwrite and replace any version of the same control that is already in the library, even if the existing control is newer.
- Confirm that the file name displayed is the file you want to import, and then click Import.
- Click OK on the confirmation dialog displayed.
- Publish the localized control to the desired publishing environments to make the localized control available to your users. The localized content will automatically be displayed to users that have selected the same language for their user interface.
For more information, see Create your own guided help (Learning Path) for your customers.