Customizing the warehouse mobile app: multi-scan pages
Introduction
This is another blog post in the series about warehouse mobile devices in Dynamics 365 for Finance and Operations. In the last blog post, the difference between customizing for WMDP and the warehouse mobile app was discussed. This blog post will be walking you through a new control scheme that was recently released, explaining how it unlocks new potential for partial offline processing in the warehouse mobile app. This new functionality is called “multi-scan” and it enables a user to perform a series of offline scanning operations and then return them all to the server in one round trip operation. The goal for this control scheme is to allow for very quick scanning operations (many scans per second as an example) in high transactional warehouses where the standard model of a server round trip after each scan will not scale. Especially in sequential operations where the user does not need to look and verify on the device after each scan, but rather just need to register all scans in one go.
Multi-scan Functionality
If you download the latest version of the warehouse mobile app, you will have some new capabilities in the demo-mode which shows how this new control pattern works. Once you have enabled the demo mode you should see the following menu:
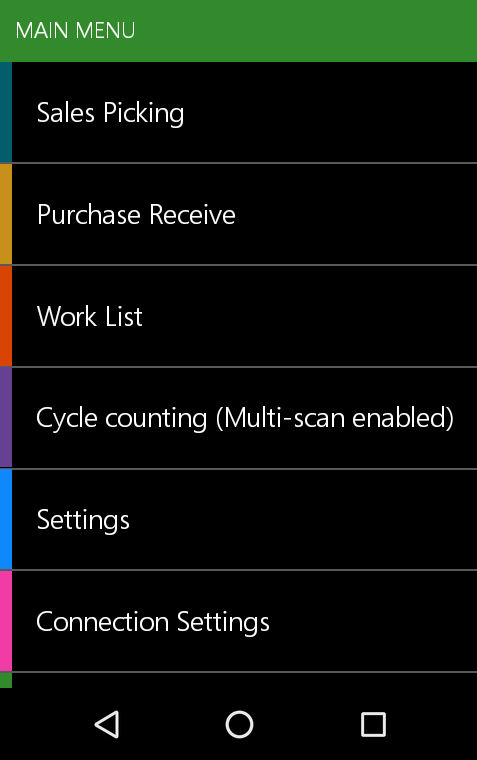
Cycle counting is the flow we have enabled in the demo with multi-scanning to demonstrate the new capabilities. It is designed to simulate a user performing a spot cycle count at a location in a warehouse or retail store where there are many items to scan. Currently this in only available in demo mode of the app, there is no support for this functionality when connected to a Dynamics 365 for Finance and Operations environment.
The first screen that is displayed is a location scanning screen – you can enter (or scan) anything in the demo mode here to move to the next screen.

Once you have scanned the location, the app enters the multi-scanning mode. This is the new control that is being introduced in this release, so let’s go through the different UI elements that have been introduced to support this new flow.

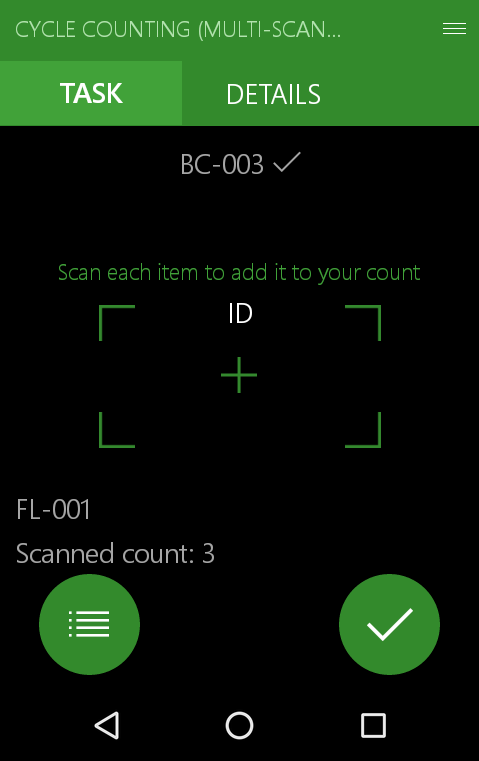
This is the initial screen – you can tell it is the multi-scanning interface because of the new list icon in the bottom left corner; clicking the list icon will show you the list of items you have scanned so far. The checkbox icon in the bottom right is used to report to the app that you are done scanning and it is the only time the processing returns to Dynamics 365 – everything else will take place within the app locally on the device.
Once a worker starts to scan barcodes (or enter data manually into the app) the UI will change slightly. Every item scanned will be added to an internal buffer and the number of items scanned will be displayed in the main UI. For example – after a few scans the UI will now display the scanned count of three:
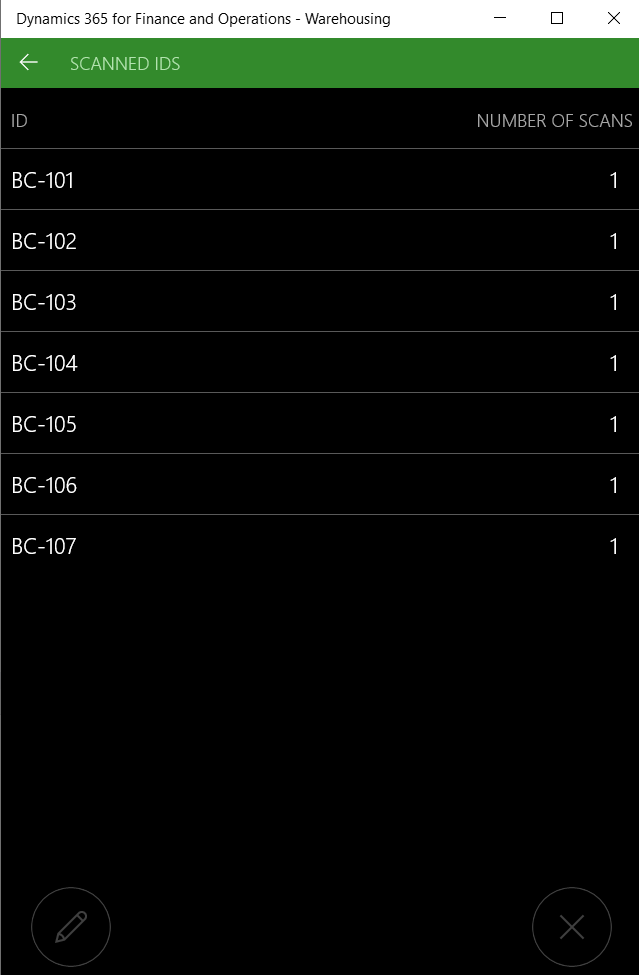
At any time, the user can click the list icon in the lower left, which will then display the list of items that have been scanned (in this example perhaps product barcodes in the location). The UI for this looks like the following:
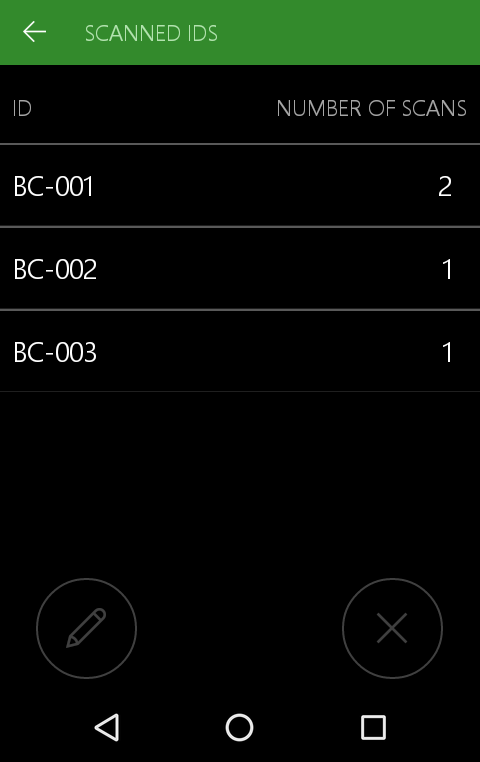
This lists the barcodes that have been scanned as well as a count of the times they have been scanned by the user. This is very useful in the counting scenario, as a user can simply scan each product’s barcode to generate a count of items at that location.
You might note that there are two disabled buttons at the bottom of the screen. These become active when a row is selected by the user in the list – as you can see below:

The edit icon on the left allows you to manually change the number of scans for the selected row. The icon on the right with the “X” deletes the selected row in case something was scanned accidentally.
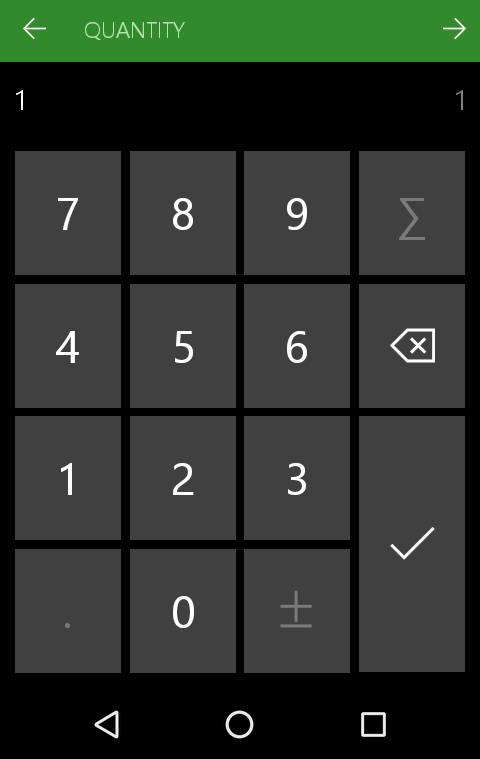
The edit icon will open a new screen with the numeric stepper UI allowing the user to quickly increment or decrement the number of scans or click on the value to open the numeric keyboard:
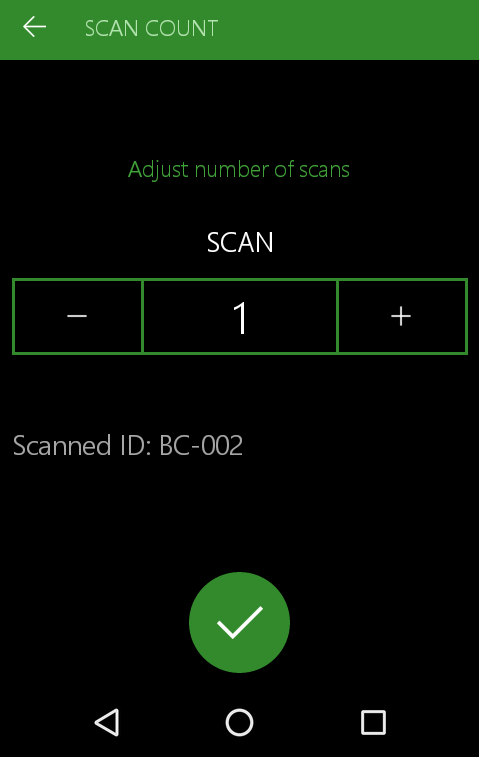
When clicking on the value, the numeric keyboard will open. As the number of barcodes cannot be negative, or integers, buttons that aren’t relevant for this use case has been disabled:
Returning to the main screen (by clicking the back button in the upper left corner) we are ready to submit the scanned list of items and their counts to the server. We do this by clicking the checkbox button in the bottom right – this is when we finally make the round-trip to the server and communicate with Dynamics 365. Later in the blog post the API will be explained and how to consume the scanned items and their quantities in X++ code.
In the demo flow, the next screen that is displayed is the following list of items which are not present in the location:

This is the second control pattern that we have introduced as part of this release – it allows a workflow to display a list of items (for example barcodes or product UPCs) and then allow the user to “scan to remove” from the list. In this demo example we are displaying the items that were found in the cycle count but are not currently registered as on-hand for this location; the intention is that the warehouse worker would double check this list and scan any items that were indeed found as an extra validation check. Scanning “T0001” in the above screen would then remove this from the list – and remember that this is all done client-side at this point. It is also possible to click on any value in the list and remove it. Then when the user clicks that checkbox/submit button the new list of items would be submitted to the server for processing through a X++ workflow.
Custom Workflow
Hopefully that walkthrough gives you some idea of the capabilities we have added with these two new client-side control screens. It is important to know that we have not currently added any multi-scan capabilities to the core product yet – the above cycle counting workflow is just a demo inside the app. The goal of introducing these new control screens is to enable partners and customers to build new workflow-based solutions in the mobile app that support client-side driven scanning operations. As such let’s walk through a simple customization example to show how the new control screens can be utilized in a real workflow.
Page Patterns
The way to enable the multi-scan screen is through a Page Pattern. This might not be something you are aware of in the mobile app, as most of the time this is handled for you by the standard framework. The Page Pattern is what tells the mobile app what type of UI to display on the device itself. If you look at the WHSMobileAppPagePattern Enum you can see the different options available:
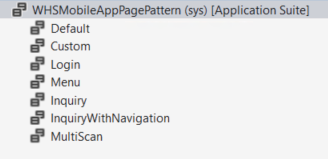
- Default
- This is the page pattern used for 90% of the screens in the app. It displays a primary scanning UI and a set of controls in the secondary tab – of which a few can be promoted to the first screen. An enter and cancel button and an optional set of additional buttons in the menu are supported.
- Custom
- This Page Pattern is not used in many places in the core mobile flows – it is designed to allow partners to convert their old WMDP pages into the new model. Using this pattern will render the controls as it was done in WMDP – each control simply vertically stacked in a single screen.
- Login
- This is used for the initial login page.
- Menu
- The Menu screens are rendered with this Page Pattern.
- Inquiry
- This Page Pattern support the workflows that allow the user to search for something and then see the results – such as LP or Item lookup screens.
- InquiryWithNavigation
- This is the Page Pattern that supports the Worklist view in the app. It is similar to the Inquiry pattern, except that includes some sorting options as well as the tiles are navigable.
- MultiScan
- This is the new pattern that has been added which will display the multi-scan UI shown in the demo above.
- < MultiScanResult>
- Note that as of the 8.1.1 release there is one missing and will be added in an upcoming release. If you want to enable a workflow to use the second screen described above – the “result list” of items, you would need to add a new Enum and return the value MultiScanResult.
The actual job of returning the Page Pattern to the app is done through a class which derives from WHSMobileAppServiceXMLDecorator. This abstract class has a “requestedPattern” method that can be overridden to return the specific Page Pattern that is necessary. This is typically done through a workflow-specific factory class that understands the correct workflow steps and thus can return the correct XMLDecorator class depending on the stage in the state machine.
For example – here is the standard factory class for the Work List functionality. You can see that it typically will return the WHSMobileAppServiceXMLDecoratorWorkList object – which will render the work list Page Pattern as you would expect, however if the user has switched to the edit filter view then we need to display a different Page Pattern – thus the factory has the context to make this switch.

Multi-Scan API
Now that we know how to enable the Multi-Scan UI through a Page Pattern, we need to understand the basic API for passing the scanned items back and forth. Once the MultiScan Page Pattern is requested, the first input control registered on the page will be used for the multi-scan input. Remember that most of the UI interaction is all done client-side – so the only thing the server X++ code needs to do is define this control and the data that it contains.
When the user clicks that “submit” check box and sends the multi-scan data back to the X++ code, this is formatted in a very specific way. The actual parsing of the data is done using the same interaction patterns as before – it will be stored in the result pass object for the specific control defined as the primary input of this page. But the data will be passed in this format:
<scanned value>, <number of scans>|<scanned value>, <number of scans>|…
Thus, in my demo example above the data that the server would receive would be the following:
BC-001,2|BC-002,1|BC-003,1
In the X++ code you would then be responsible for parsing this string and storing the data in the necessary constructs. We will see a simple example in a moment of how to parse this data.
Asset Scanning
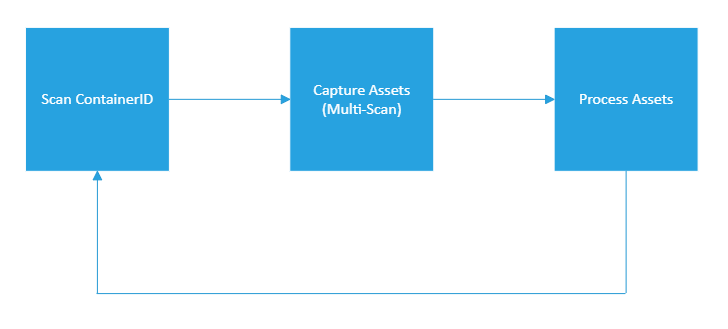
The workflow I will demonstrate is very similar to some of the WHS workflow demos we have described in previous blog posts. In this flow we will be scanning a container and then capturing all the “assets” that are stored in that container. Imagine that these assets are very numerous and thus are stored outside of the standard batch tracking mechanisms in AX – they are implemented in the sample as a simple asset table associated with a container. The assumption here is that scanning assets needs to be extremely quick and thus the offline “multi-scan” mode is the perfect solution.
The state machine for this workflow is similar to our previous examples – we will have an initial scan container screen, which will transition into the multi-scan enabled “Scan Assets” state – and finally when the list is returned we process the assets and return to the initial state.
You can see this reflected in the core displayForm method below. We will not be covering some of the lower-level details of the code – please review the earlier blog posts for details on the enums and control classes necessary to facilitate the new workflow. All the code necessary for the solution can be downloaded at the end of the post if you want to dig into the details.
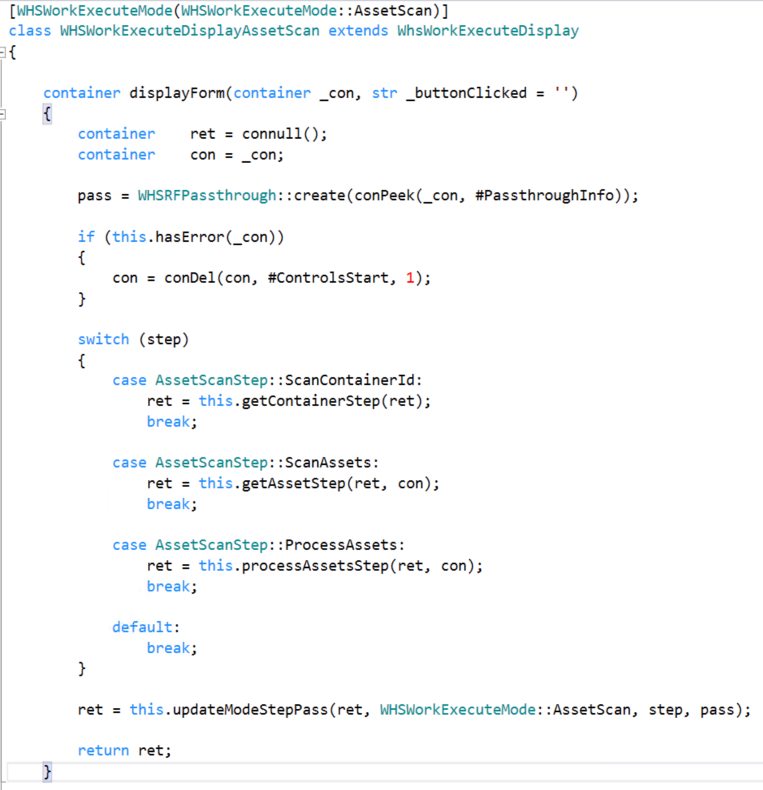
The getContainerStep is identical to our previous examples – it simply shows a simple UI and grabs the container ID from the user. The getAssetStep method validates this container ID and calls the buildGetAssets method – which is where the UI for the multi-scan screen is built. This is copied below:

As you can see this does not look much different that standard WHS code we have done previously. The first input control (in this case the Asset ID field) will be used as the multi-scan field, but this code does not need to be modified in any way to support the multi-scan Page Pattern. Instead what we need to do in ensure the correct Page Pattern is returned to the app during the correct workflow step. To make this happen I have added a new DecoratorFactory class which will return a WHSMobileAppServiceXMLDecoratorMultiScan object at the appropriate step for my workflow – which in turn is what renders the Page Pattern to the app.

Please note the attribute at the top of this class – it is the same WHSWorkExecuteMode mapping attribute used for the WHSWorkExecuteDisplayAssetScan class in the code sample above. This is how the framework knows that this specific decorator factory class is used for this work execute mode – the enum-based attribute ties these classes together through the sysExtension framework. The key point here is that if you need a custom decorator factory to define when exactly to switch to multi-scan mode, the above example is how you will enable this.
In the final workflow step we need to process the incoming multi-scan results. As mentioned before these are returned to the server in the same way as normal data – it will simply look like a specially formatted string in the value of the input control. Recall the discussion above with the format of the string being <scanned value>, <number of scans>|… In my simple example below, I am parsing this string using X++ and saving the assets to a new table associated with the Container. In this case I am not making use of the second piece of information in the collection – the number of scans was not necessary in this case.
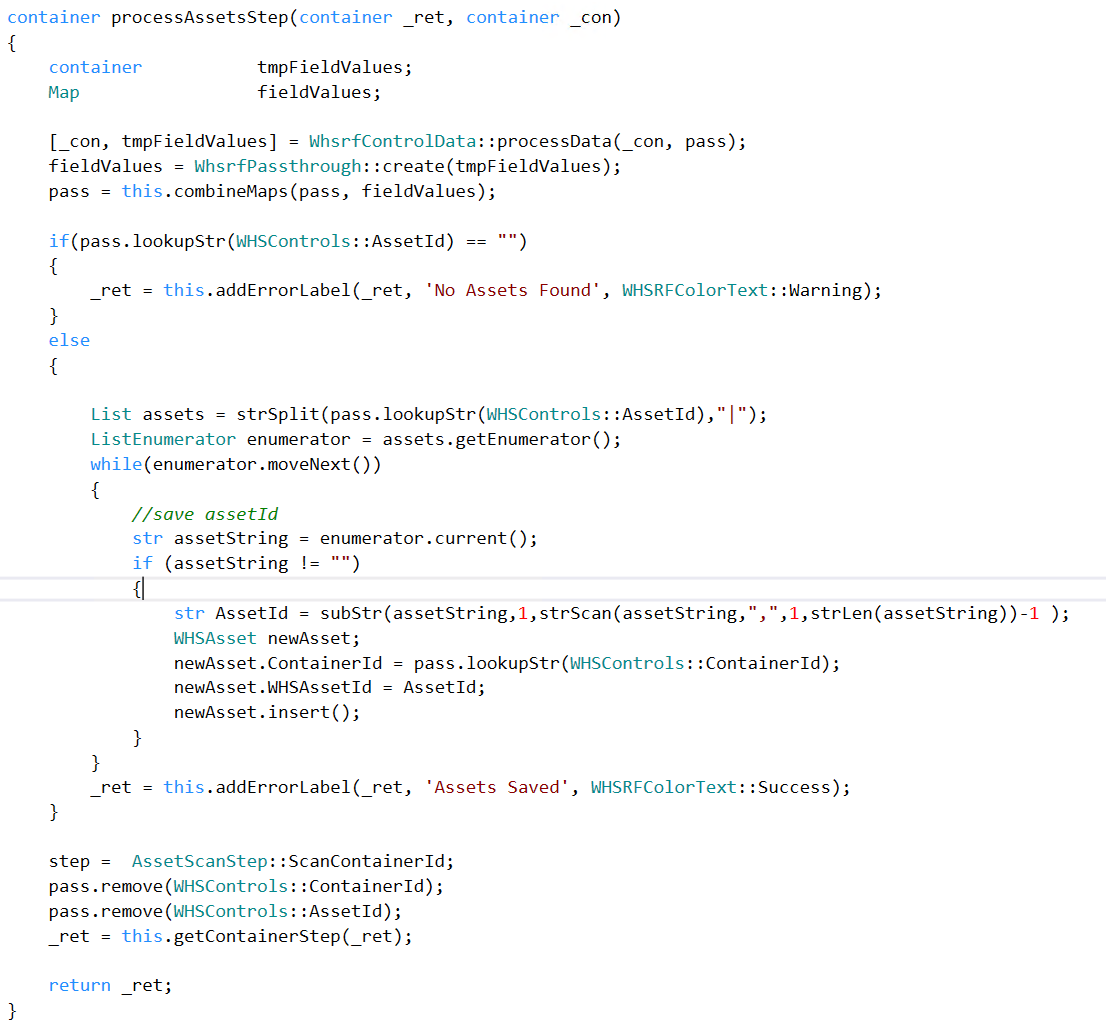
Hopefully it is clear how we loop through all the scanned assets and save each one to the new table. After this is complete, we reset the workflow and move back to the first stage in the state machine.
Example Workflow
Now that you have seen the code to enable this in a custom workflow, let’s walk through this demo. You can download the complete code for this project in the link at the bottom of this post – you just need to get it up and running on a dev environment and configure the necessary menu items to enable the workflow for your system.
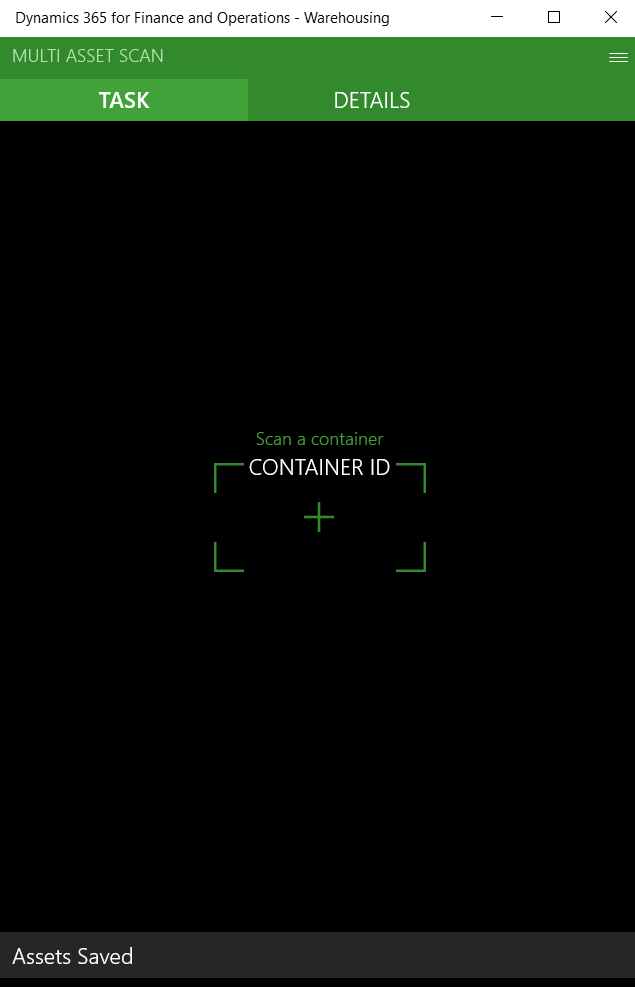
The initial screen shows the Container ID scanning field. Not that in the sample project I have included the necessary class to default this to the scanning mode – however you will need to set these up in Dynamics as defined here.
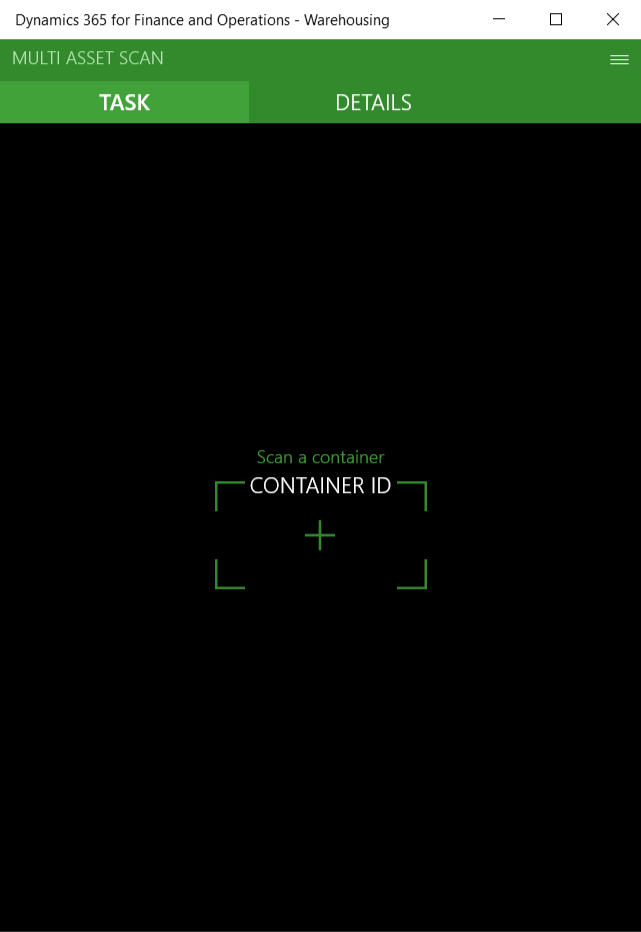
Scanning a container id (CONT-000000001 works if you are in USMF in the Contoso demo data) will navigate you to the next screen and enable the multi-scan Page Pattern.

Here you can enter any number of assets and the app will store them into the local buffer. As we described above you can view the scanned assets by clicking the icon in the lower left. After a few scans we would see the UI updated:
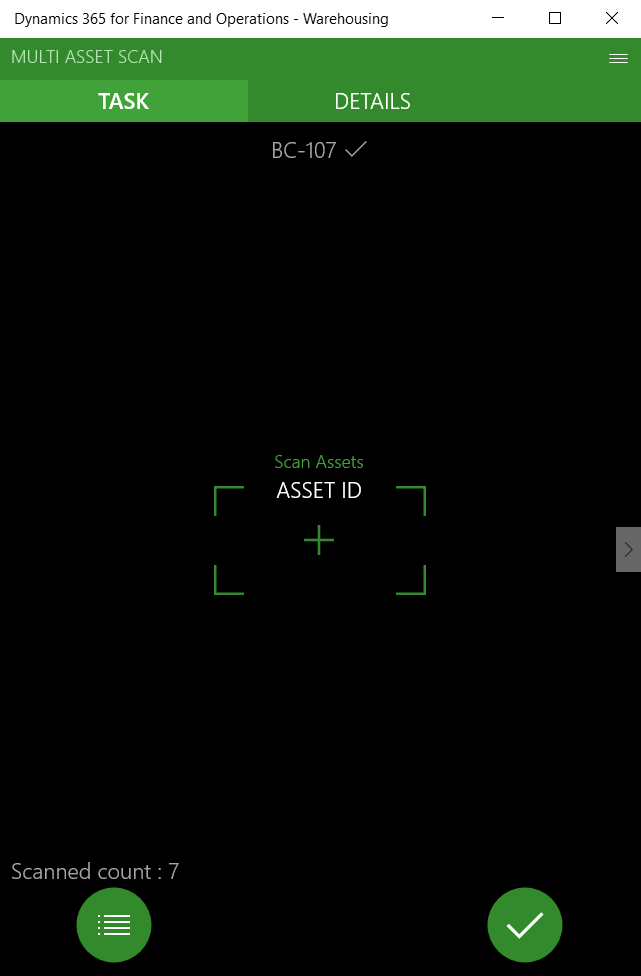
Clicking the list icon would show us the scans we have performed offline:
Finally clicking the “submit” button on the main screen will push the items to the server, which will then be saved to the custom table we have and the UI will display the success message.
Conclusion
Hopefully this help you understand the new control scheme that was added and how it can enable fast scanning operations. The code used for this demo is available to download here – please note that this code is demonstration code only and should not be used in a production system without extensive testing.