Important changes for the Business Central connector for Microsoft Flow and PowerApps
An update to the Dynamics 365 Business Central connector for Microsoft Flow, Logic Apps and PowerApps will be released in the coming week. The existing triggers and actions were modified to improve the overall performance in the connector as well as adding support for multiple environments, including multiple sandbox and multiple production environments.
For more information about multiple environments, see https://docs.microsoft.com/en-us/dynamics365-release-plan/2019wave2/dynamics365-business-central/multiple-production-environments.
Your existing Flows and Logic Apps will continue to work until December 31, 2019. However, any existing PowerApps that have been built using the Business Central connector, will need immediate attention.
Note: This change does not apply to the default Business Central Flow templates unless you have added additional Business Central related actions to the default Flow template.
Call to action
Update any existing Microsoft Flows, Logic Apps, or PowerApps that were created using the Business Central connector.
Before editing any existing Flows, Logic Apps or PowerApps, verify you have the latest version of the connector and Business Central.
Business Central Connector Version
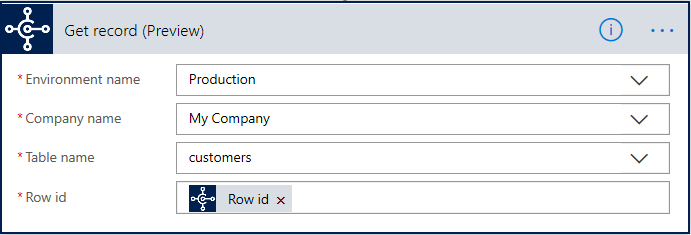
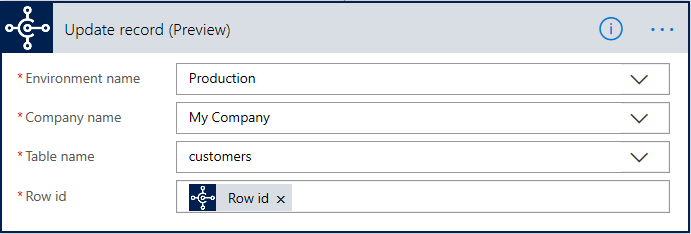
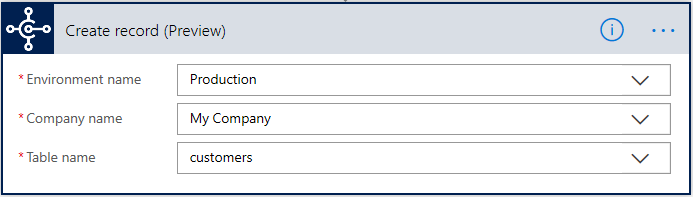
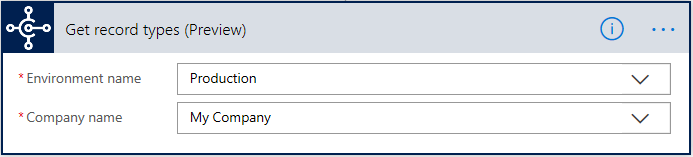
The Business Central connector does not display a version number. To verify you have the latest version of the connector, navigate to My Flows, edit an existing Flow that uses the Business Central connector, add a Business Central action to your Flow. The new action should have a reference to Record in the name instead of Item. The newest connector will also include a new Environment parameter. See examples below.
Business Central Tenant Version
Your tenant version can be found by navigating to Help and Support within Business Central. You will find your version in the Troubleshooting section. The version below is the minimum version that will support the updated connector.
Version: Platform 14.0.34821.0 + Application 34444 (US Business Central 14.3)
Microsoft Flow
In order for the Flow to take advantage of the updated connector, you must create a new Flow. The following steps provide an example how to create the new Flow from an existing Flow.
-
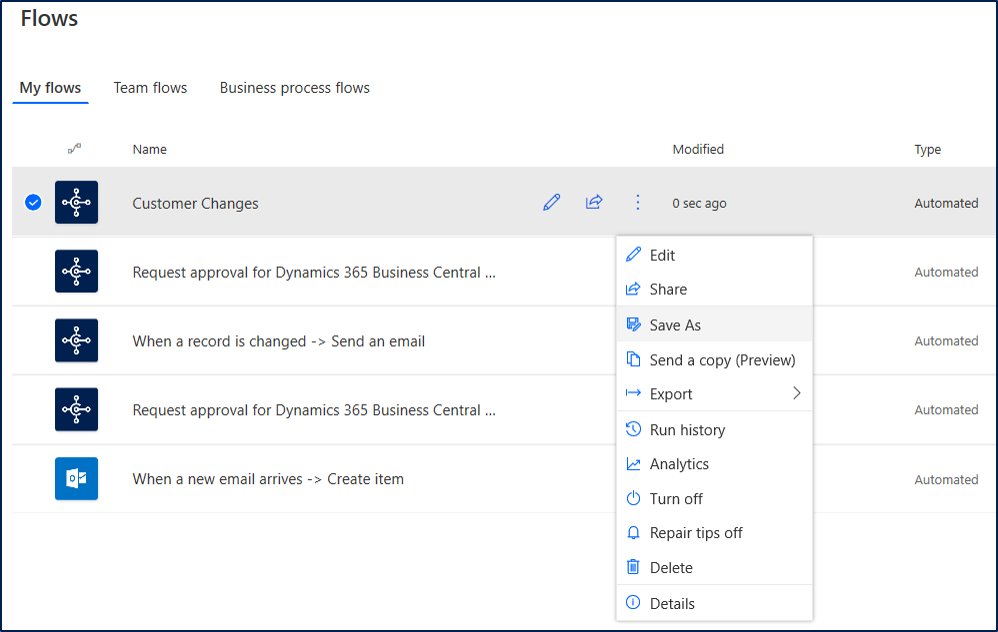
- Find the Flow you want to edit and select Save As.
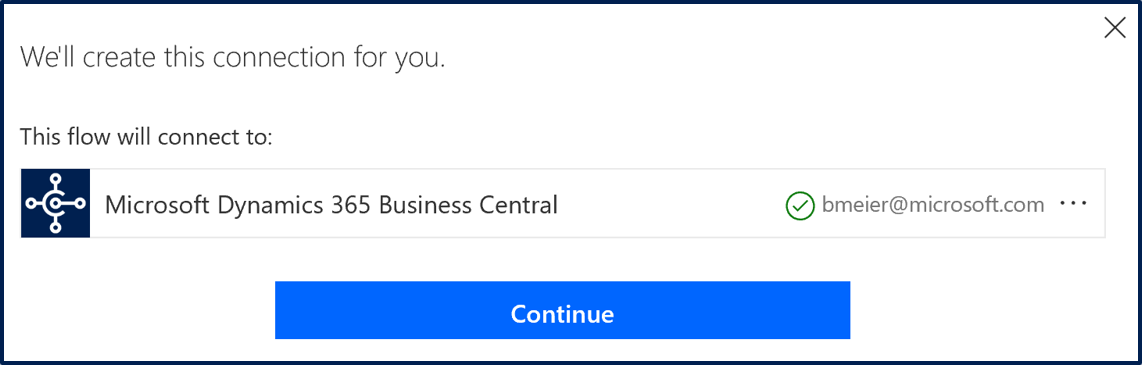
- Create the connection to your Business Central data by selecting Continue.
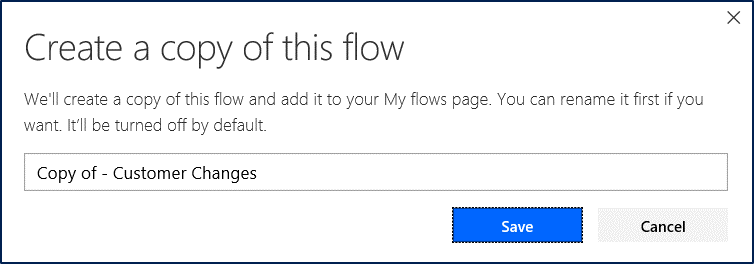
- Define a name for your Flow and select Save. By default, your new Flow will be turned off after it is created.
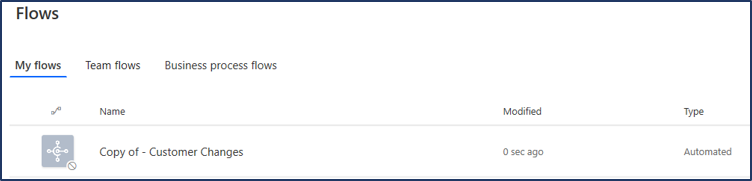
- Select to Edit your new Flow
- Reselect the parameters for the Flow trigger. The name will appear the same as the existing Flow, but the parameters must be selected again in order for the Flow to begin using the updated functionality.
- Replace any Get Item actions in your Flow with Get Record
- Replace any Update Item actions in your Flow with Update Record
- Replace any Create Item actions in your Flow with Create Record
- Replace any Get Item Types actions in your Flow with Get Record Types
- Replace any Delete Item actions in your Flow with Delete Record

- Save the Flow
- Test the Flow and, when ready, turn the new Flow on and turn the original Flow off. Do not delete the original Flow until all in-progress Flows are completed.
- Find the Flow you want to edit and select Save As.
PowerApps
For the PowerApp to take advantage of the updated connector, you must update your existing PowerApps that use the updated Business Central connector. The following steps provide an example how to update a PowerApp.
-
-
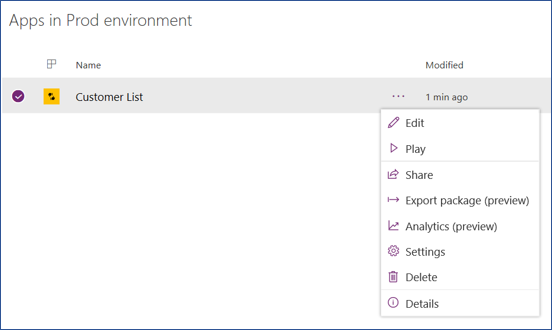
- Select an existing PowerApp and choose the Edit action.
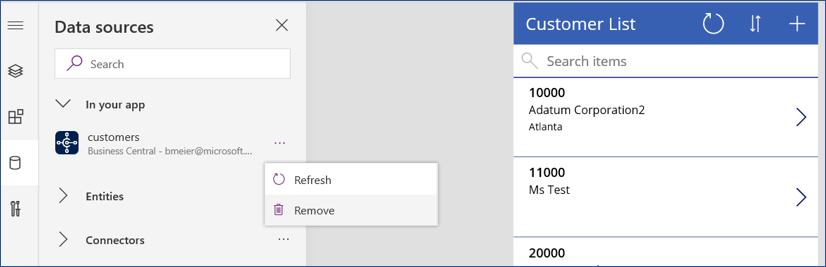
- Once the PowerApps opens with your app displayed, select View and Data sources from the menu. Remove the Business Central connector.
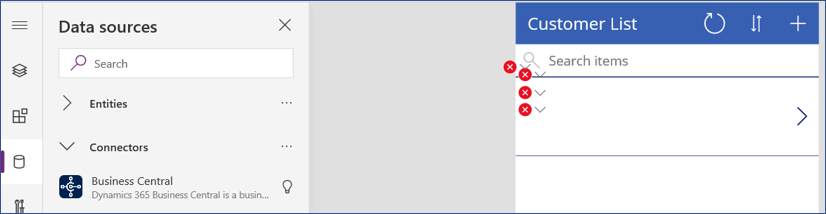
- Expand the Connectors group and select the Business Central connector.
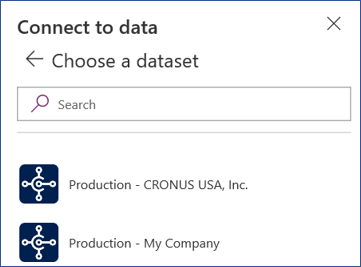
- The connector will present a list of Environments & Companies you have access to. Select the environment and company that contains the data you want to connect to.
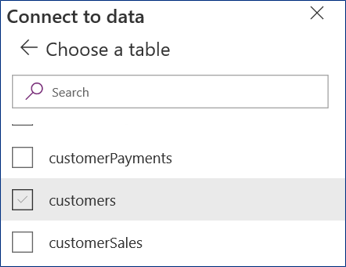
- The connector will display a list of tables, or end points, available. Choose the same table(s) you used to create your PowerApp and select Connect.
- The PowerApp should refresh automatically and display the data from your updated connector.
- Save your PowerApp.
- Select an existing PowerApp and choose the Edit action.
-