Using Power Platform Dataflows to extract and process data from Business Central – Post 3
This is the third post in a blog series about how you can use Power Platform Dataflows to get data out of Business Central in a form where it can be accessed by other applications.
The first post covered a basic integration between Power BI and Business Central.
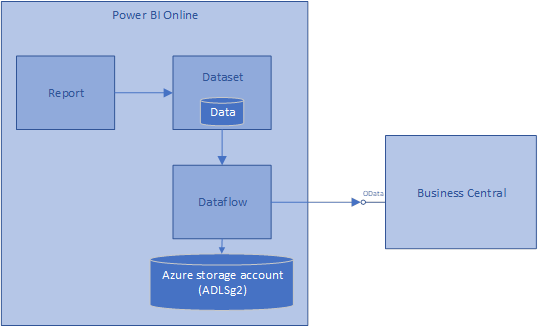
The second post introduced Power Platform Dataflows, and data was stored in a hidden Azure storage account (also known as Azure Data Lake Store gen 2). Illustrated like this:
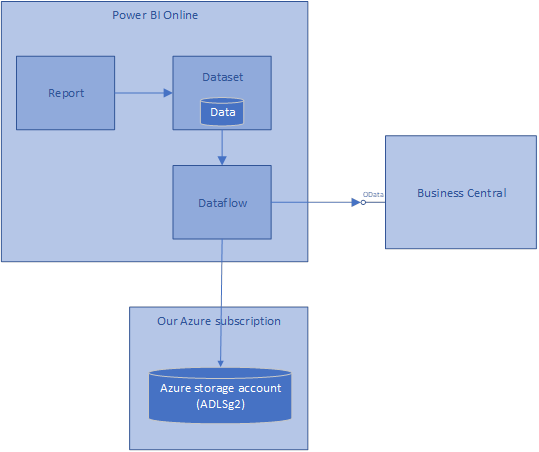
In this post, we reconfigure our Power Platform Dataflows to store the data in our Azure storage account. Illustrated like this:
Once the data is in our storage account, we can access it directly and use it for a variety of purposes.
Much of the material in this blog post is based on the documentation for Power Platform Dataflows, in particular these pages: https://docs.microsoft.com/en-us/power-bi/service-dataflows-connect-azure-data-lake-storage-gen2.
Prerequisites
We need a few things before we can accomplish the goals:
- We need an Azure subscription, so you can create the storage account.
- The Azure subscription and the Power BI subscription should be linked to the same Azure Active Directory (AAD) tenant. Power BI needs to authenticate to our Azure storage account, and they use AAD for this authentication (OAuth). Put a bit simplified, we need to log into https://powerbi.com with the same account (e.g. susan@contoso.com) that we log into https://portal.azure.com with.
- We need to be an administrator of the Power BI account, so that you can reconfigure the dataflows.
Create an Azure storage account (Azure Data Lake Store Gen 2)
The first step is to create an Azure storage account.
A word about terminology; we will create an Azure storage account, but a special type of storage account called “Azure Data Lake Store Gen 2”. In the documentation for Dataflows, you will often see the latter term. Sometimes it is abbreviated to ADLSg2.
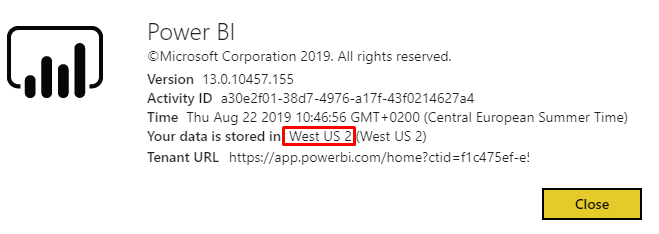
The storage account needs to be in the same Azure region as your Power BI tenant. To determine where your Power BI tenant is located, go to Power BI online and open “About Power BI” via the “?” menu at the top. It will show a picture like this, including the Azure region:
To create the storage account, follow these steps:
- Go to the Azure portal at https://portal.azure.com and click “Storage accounts” in the navigation pane.
- Click “Add”.
- Create a new resource group called “CdmStorage”.
- Specify the name of the storage account as “cdmstorage1” (or similar – the name must be globally unique).
- Specify the location of your Power BI tenant.
- Leave the remaining settings at their defaults.
- Click “Next: Advanced” at the bottom.
- Enable “Hierarchical namespace” under “Data Lake Storage Gen2”.
- Click “Review + Create” and click “Create”.
Now you have the storage account.
You also need a so-called “file system” inside your storage account. You may be familiar with “blob containers”. A “file system” is similar to a “blob container”, but it’s also different because it’s a truly hierarchical like the file systems we are used to from PCs.
First, download and install Azure Storage Explorer from https://azure.microsoft.com/features/storage-explorer. Launch Azure Storage Explorer and log in by clicking “Add Account” in the left-hand ribbon. Click “Next”. Sign in with your usual account. Now you should be able to see your newly created storage account.
Next step is to create a file system, which must be called “powerbi”. Azure Storage Explorer still calls it a “blob container” in the UI, so that’s what you should look for.
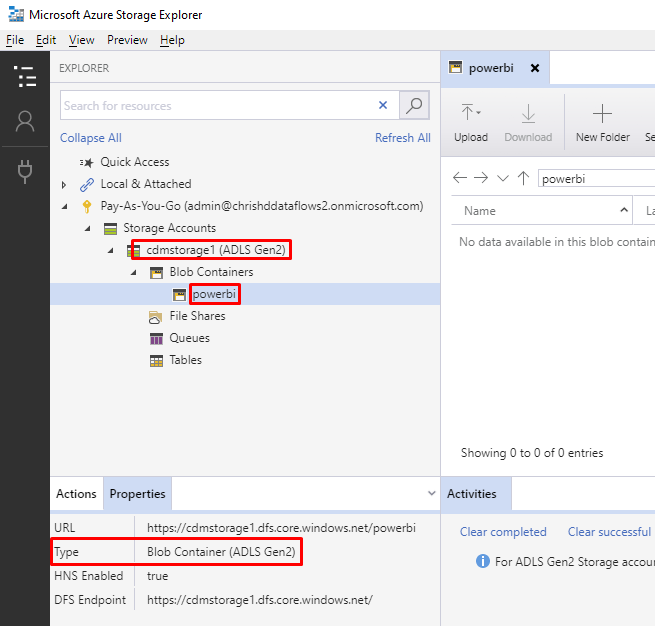
You should now have this:
Give Power BI permission to read/write to the storage account
We want Power BI (really, our dataflows) to be able to read and write to our storage account, so we need to give Power BI the right permissions.
This is done in two steps.
Step 1 is to assign the “Reader” role to Power BI for your storage account. In the Azure portal, select the storage account and click “Access control (IAM)”. Then click “Add role assignment”:
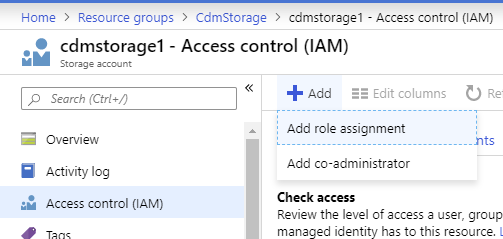
In the dialog, choose the “Reader” role, and then search for “Power BI Service”:
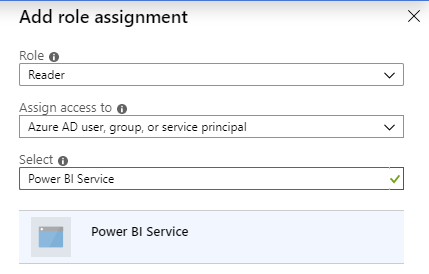
Select the search result and click “Save”.
Step 2 is to assign read/write permissions to the “powerbi” file system that we created earlier.
Switch to Azure Storage Explorer again. Right-click the “powerbi” file system and click “Manage Access”. You should see a page like this:
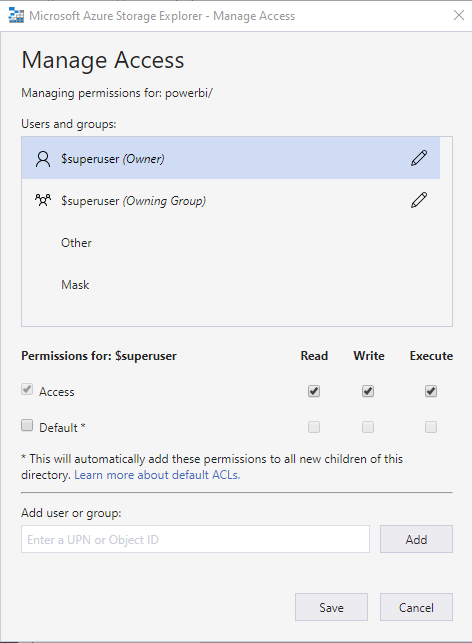
You need to add some rows to this list, but which? To answer that, we need to look inside Azure Active Directory.
Switch back to the Azure portal and select “Azure Active Directory” in the navigation pane. Click “Enterprise applications”, select Application Type = “All Applications”, and then click “Apply”. Now enter “Power” in the search field and you should see something like this:
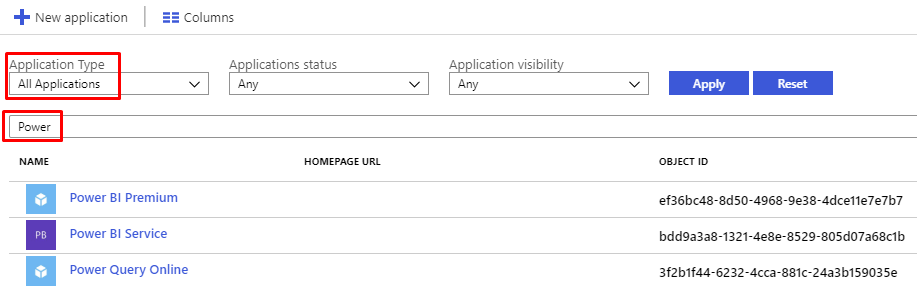
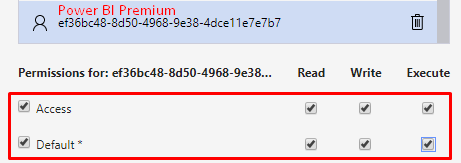
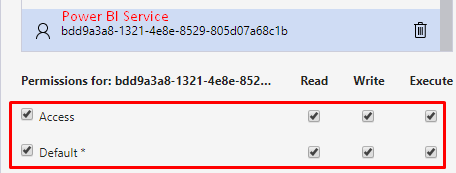
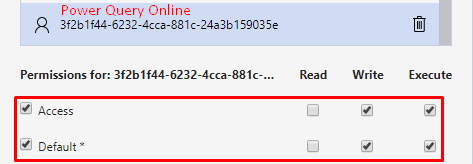
Notice the Object IDs. It is those that we need. But beware – yours will be different from the ones in the screen shot above.
Now switch back to Azure Storage Explorer and add the three applications, as shown:
And
And
Click Save.
Now we have created the storage account and configured security for it. It was a lot of steps, but fortunately it only has to be done once.
Configure Power BI to save dataflows to the new storage account
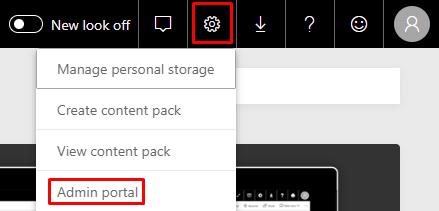
The next step is to configure Power BI to use the new storage account. Go to Power BI online, click the settings cog in the upper-right corner, and select “Admin portal”:
Under “Dataflow settings”, you should see this screen:
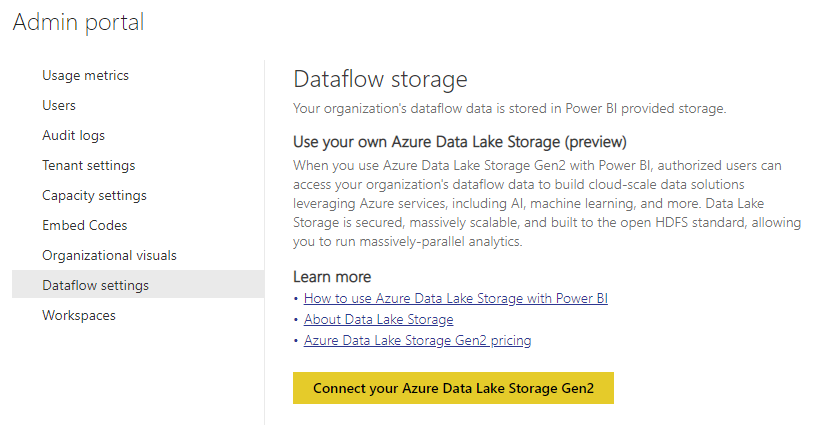
The text explains that – currently – your dataflow data is stored in a storage account that Power BI provides, and which you can’t access directly. This is what we used in blog post 2 in this series.
Obviously, we need to connect Power BI to our storage account. So click that yellow button and fill out the fields with your values. These are my values:
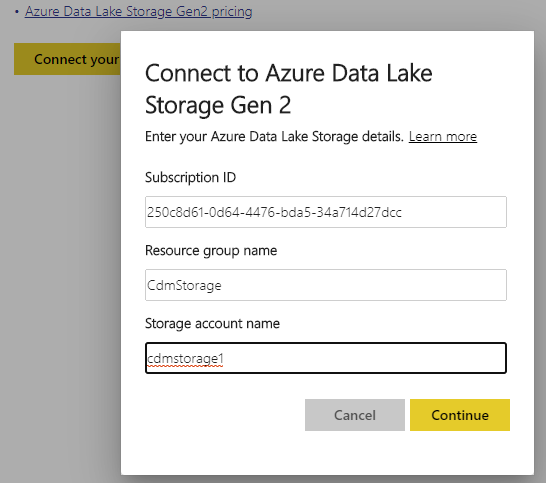
Click “Continue”. Power BI now verifies that it can access the storage account. If all goes well, you should see this page:
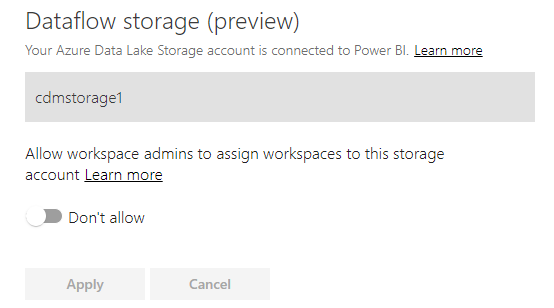
Flip the toggle to allow workspace admins to use the storage account:
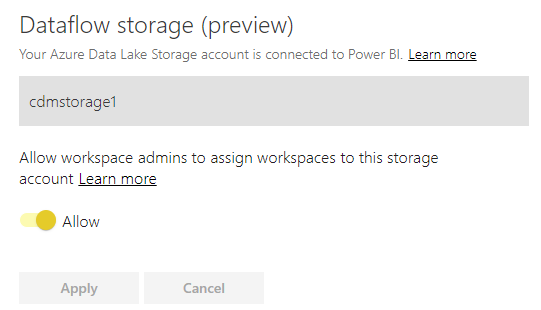
That’s it for configuration of Power BI and Azure!
Saving dataflows to our own storage account
The workspace that we created in blog post 2 still saves data in Power BI’s internal storage account. Let’s switch it to save data in our storage account.
Open the workspace settings:
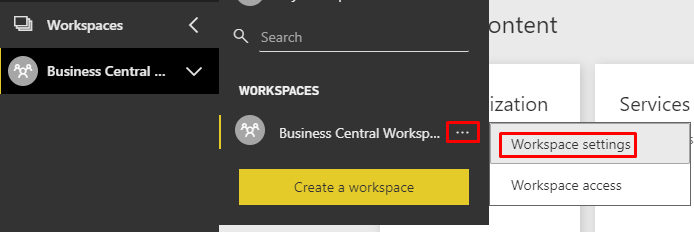
And toggle this setting:
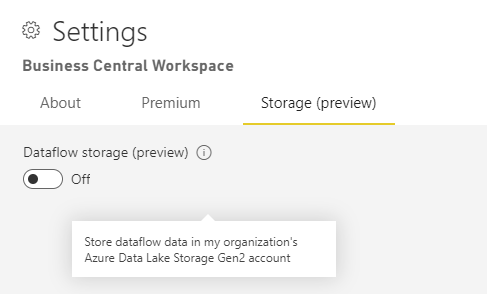
Click “Save”.
Existing dataflows will continue to save to wherever they were saving when they were initially created. So we need to recreate the dataflow in blog post 2. Once you have done that, try to refresh the dataflow a couple of times.
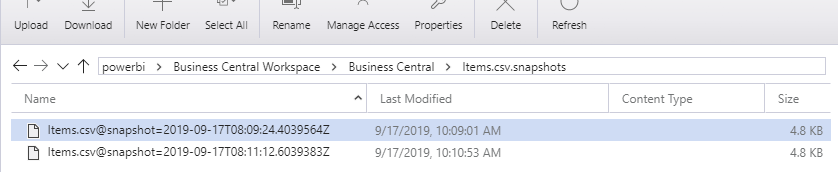
Now switch to Azure Storage Explorer and refresh the “powerbi” file system. You should see that the data has been saved there!

Inside the Items.csv.snapshots folder, you will find the actual data in CSV format, one file for each time we refreshed:
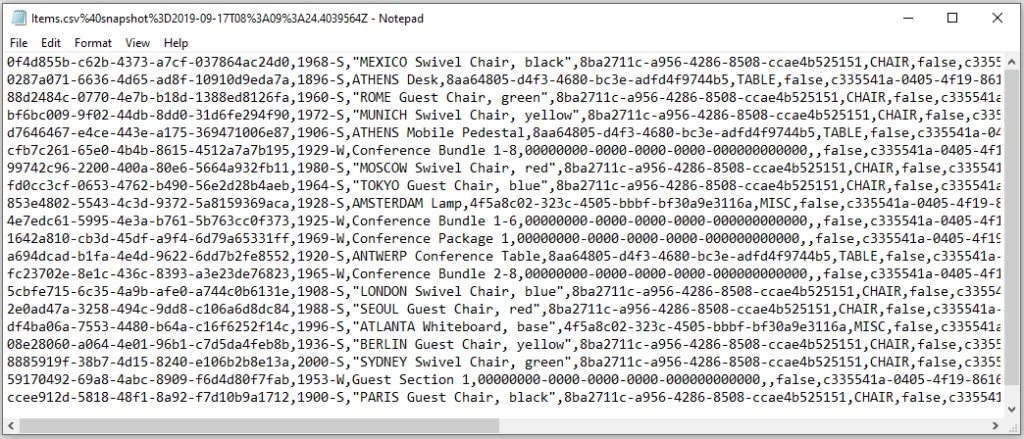
Open one of the files in Notepad, and you will see the actual data:
The described file structure, with a model.json at the root and subfolders for different entities containing the actual data snapshots, is based on the Common Data Model (CDM) format. CDM is a format that is used by more and more services from Microsoft and other companies, and which enables reuse of data and tools in different domains. For example, suppose that you want to analyze the item data in Azure Databricks, this is straightforward because Azure Databricks can read CDM data. You can read more about CDM here: https://docs.microsoft.com/common-data-model/data-lake.
That’s it for this blog post! We now have the data in a location that can be accessed from other tools!
In the next blog post, we will look at how you can access the CSV files programmatically.
If you have questions, or if you have ideas for future blog posts in this area, I’m happy to discuss further. Feel free to write in the comments section or privately via email (chrishd@microsoft.com).
