Importing two or more entities from a Single File
This post talks about a feature in Microsoft Dynamics CRM 2011 through which you can Import data from a single source file into multiple entities. For example, if you have a single CSV file that has data that you want to split across the Contact and Account entities. You can now do so in a few simple steps.
Let’s start with a basic CSV file that contains data for both Contact and Account entities. Our example file looks like this:
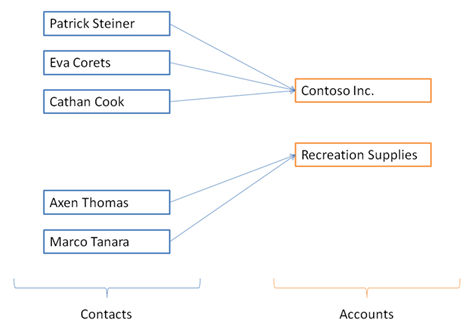
You can think of it like this:
You will observe that the file has some columns that belong to the Contact Entity in CRM 2011 and some columns that belong to the Account Entity. Also observe that multiple contacts belong to the same account. That means when this data is imported into CRM there should be 5 contact objects and 2 Account objects. This is what the relationships can be visualized.
Creating such structure by hand is tedious to say the least and normally to Import such data you will have to manually split the data into separate files and cleanse the data of any duplicates (in the Accounts file) before attempting to the Import the data. Using the CRM 2011 Single File Multi Entity feature all this can be accomplished in a few clicks!
To use the feature follow the steps detailed below.
Step 1 – Start the Import Wizard.
You can start the Import Wizard by clicking the “Import Data” button on the main menu on the grid of any Importable Entity.
Alternatively Navigate to Workplace à Imports and click “Import Data” on the ribbon menu.
Step 2 – Upload the File
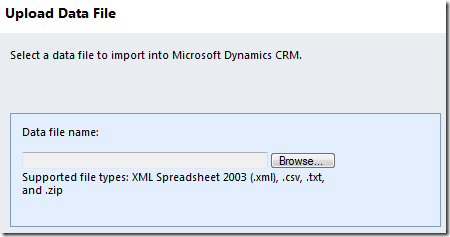
When the Import Wizard launches, you will see the following screen.
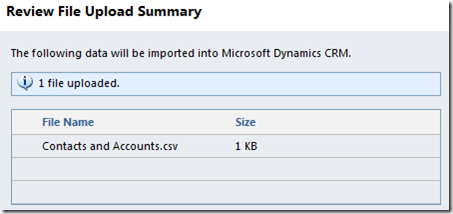
Click the “Browse” button and select your file. Click Next to go to the next page. You will see a file upload summary.
Click “Next” to proceed.
Step 3 – Select the Map
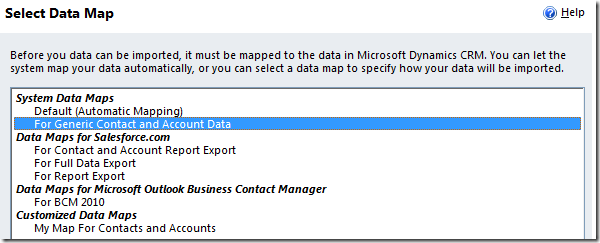
You will come to a screen that prompts you to select a predefined map. To use the Single File Multi Entity feature select the map named “For Generic Contact and Account Data”. Click next to proceed.
Step 4 – Map the data columns to CRM fields
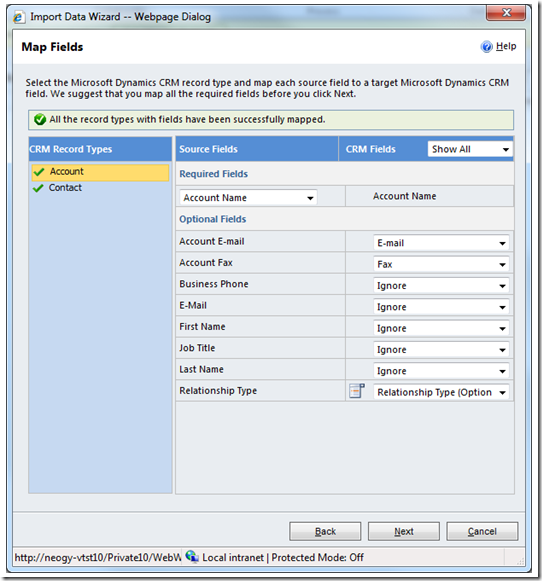
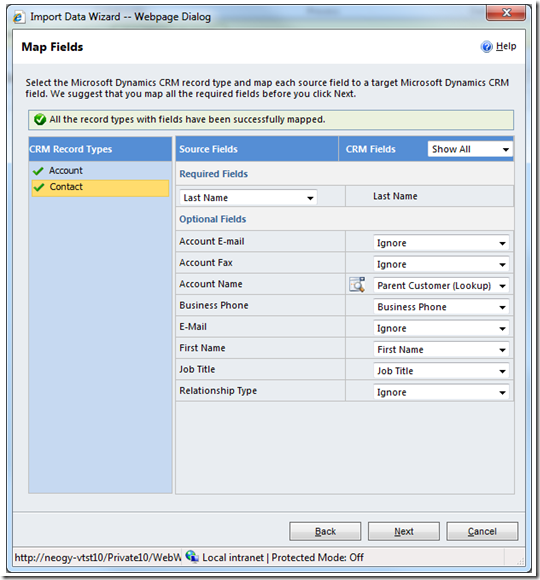
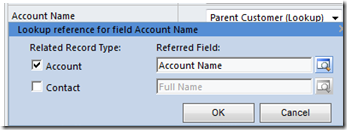
In the next page, you will be asked to be asked to map the columns in the data file to the attributes of the Contact and Account entity. Make sure that you map only the relevant columns for each account and contact. Rest should be marked as “Ignore”. Also, note the mapping for “Parent Customer” for the Account entity. This mapping drives the relationship between the entities. See below for the mappings.
Mapping Tip #1: You can map the same data column to both entities. Just make sure that there is no data column mapped to Account that has unique values. For example, DO NOT map the “Business Phone” column to Account. This will interfere with the duplicate cleansing logic and result in creation of duplicate accounts.
Mapping Tip #2: The order of the columns does not matter. In the example shown data columns belonging to Contact and Account are bunched together to facilitate understanding of the scenario.
Step 5 – Submit the Import Job
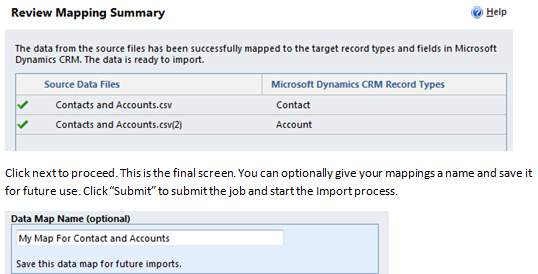
Once all fields have been mapped, click “Next” to proceed. You will be shown a summary screen.
Click next to proceed. This is the final screen. You can optionally give your mappings a name and save it for future use. Click “Submit” to submit the job and start the Import process.
Final step – Verify your Import
Once the job has been submitted, go to the Import grid to see the progress of your job. (Workplace à Imports). In some time you should see that your job has completed.
Check in the Accounts and Contacts grid. You should see your newly created records.
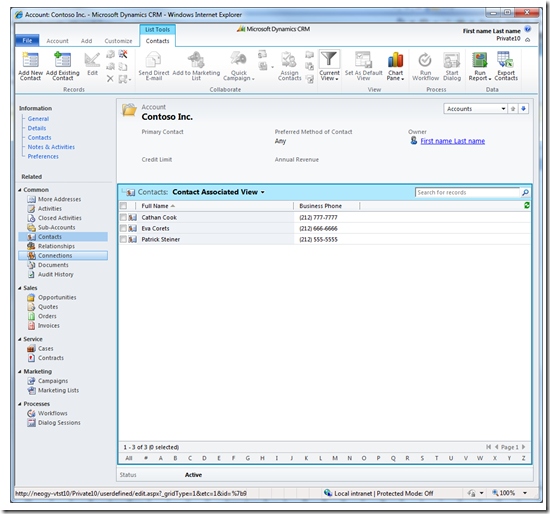
Open up an account and verify the relationships have been properly established.
That’s it. You are done!
I will be covering some advanced topics on the Single File Multi Entity feature in another blog post. I plan to cover more about map authoring, duplicate elimination mechanics and troubleshooting.


