New Customization capabilities of Social Pane
Applies to: Microsoft Dynamics CRM 2013 and Microsoft Dynamics CRM Online Fall ’13
In the CRM Online December 2012 release, you may have noticed the social pane which was introduced to enhance business interactions. The social pane is where you can see all business interactions related to that a specific record (account, contact, lead, and so on.) It shows the activity feeds, associated activities, notes and Yammer (if configured) tabs. For more information, you can read more about it in this blog post: New simplified experience to view and associate activities.
You might have different requirements for different entity types. For some you might want Activities to show as the default tab, while in others notes, activity feeds or Yammer could be more important. With the release of CRM 2013, we have added customization capabilities. Now you will be able to set the default tab for each form. Whenever the form is launched, that tab will be shown as default. You have the option to choose the default tab for a particular form using the form editor. In this blog, we are going to discuss more on how to achieve this.
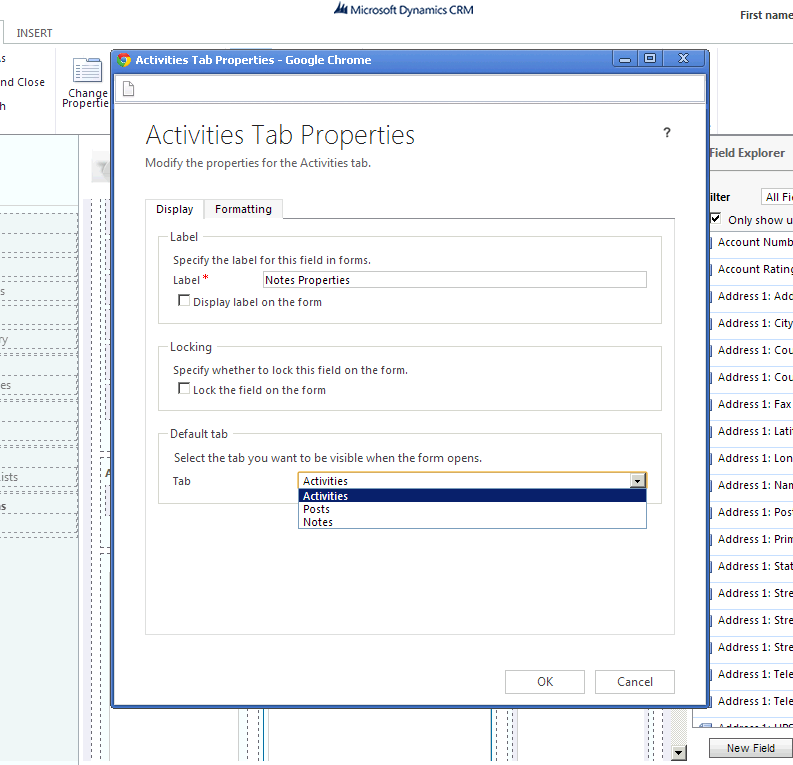
Using form customization enables you to prioritize what data you want to see first. To customize the social pane, you can go to the form for the entity. Click on “Social Pane” and then click on “Change properties” to open up the properties for the social pane.

Once you have opened up properties, you will notice a new option at the bottom of the window, which allows you to select the default tab for the “Social Pane”. You can select any of these options and the specified tab will be opened by default, when the entity form loads up. The default tab is per form and you can specify a different default for each entity using configuration.
One thing to note here is we can set the default tab for the social pane and by default that tab will load. But, the ordering will always be the same and it will not change according to this setting.
For more information on customizing forms, see the Customization Guide, found within the Implementation Guide download.
Hoping this helps!
Regards,
Anshuman