
AX 2012 R2-R3 – Creating a new Retail product and syncing this to an existing Online Store
The intent of article is to provide you with a high level overview on the flow of creating a new Retail product and syncing this to an existing Retail Online Store channel. This assumes that the Retail Online Store has been previously configured and you are simply looking to add new items to the online store pages that are derived from the published catalogs. I have included links to TechNet articles that contain more detailed information on each step.
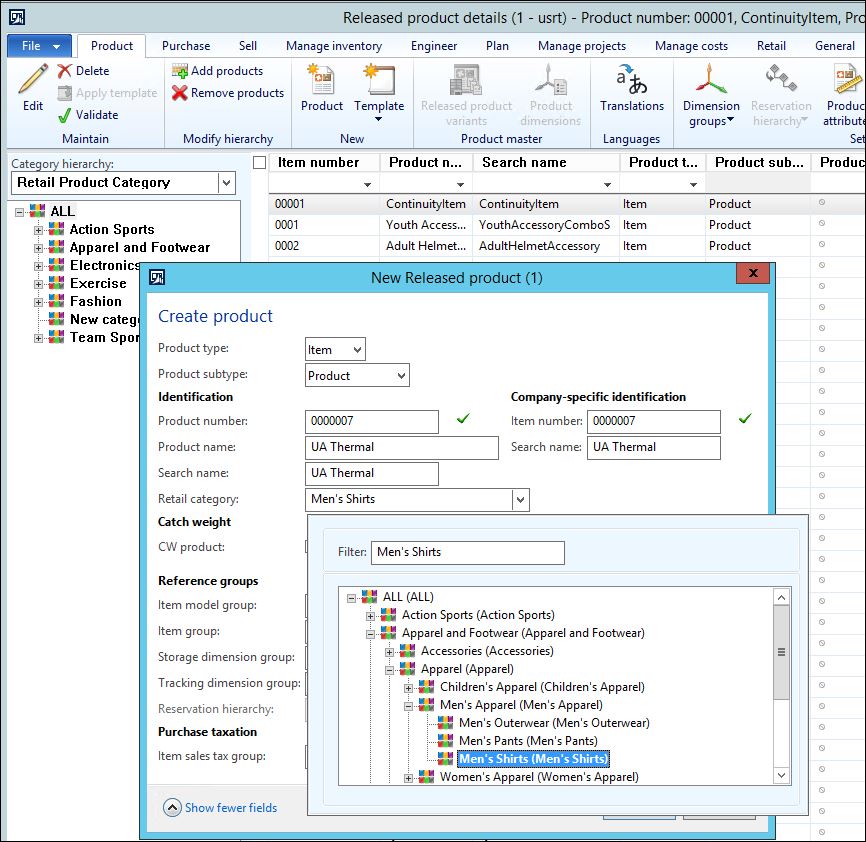
Create a New Product: Link
1. Go to: Retail >> Common >> Products >> Released products by category >> click New Product
2. Complete the form and ensure that the Retail category is selected.
a. This will ensure that the item is configured as being available in Retail windows and will associate this to “Retail Product Hierarchy“.
b. OPTIONAL: On the product record go to the General tab >> Product categories and add any other subcategories needed, or the Retail Product Hierarchy if it was missed.
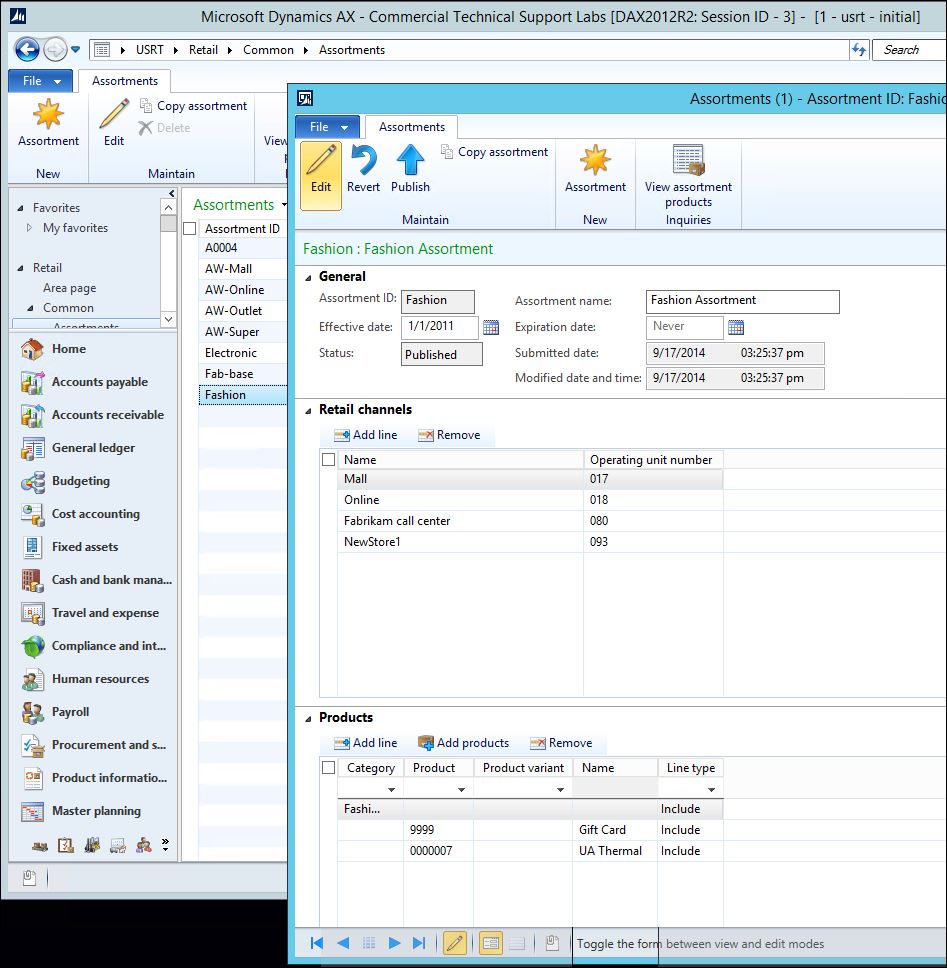
Process Assortments: Link
1. Go to Retail >> Common >> Assortments >> Check or create Assortments so the store and item is part of the correct assortment.
a. Publish assortment if anything was changed
2. Go to: Retail >> Periodic >> Process assortments (if batch is selected, ensure the batch processes before continuing)
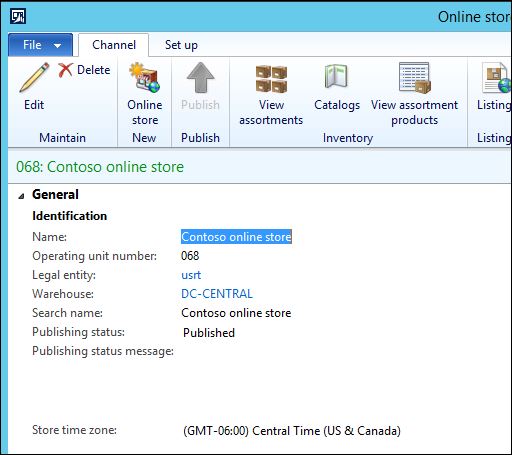
3. Go to: Retail >> Common >> Retail Channels >> Online stores >> on the menu bar click “View assortment products”
a. Verify that the new product(s) shows up in the assorted list for the store.
b. Verify that this Online Store has a Publishing Status of “Published”. If the Publishing status is set to “In Progress” then you’ll need to click Publish, run the 1070 (Channel configuration) job, and wait for SharePoint to send back the “Published” status before proceeding. See the TechNet article titled Set up an online store for more information.
Edit Catalogs: Link
1. Go to: Retail >> Common >> Catalogs >> Catalogs >> select the catalog you want to modify and click Edit.
a. Click Add products, select the product(s) you want to add, and click OK.
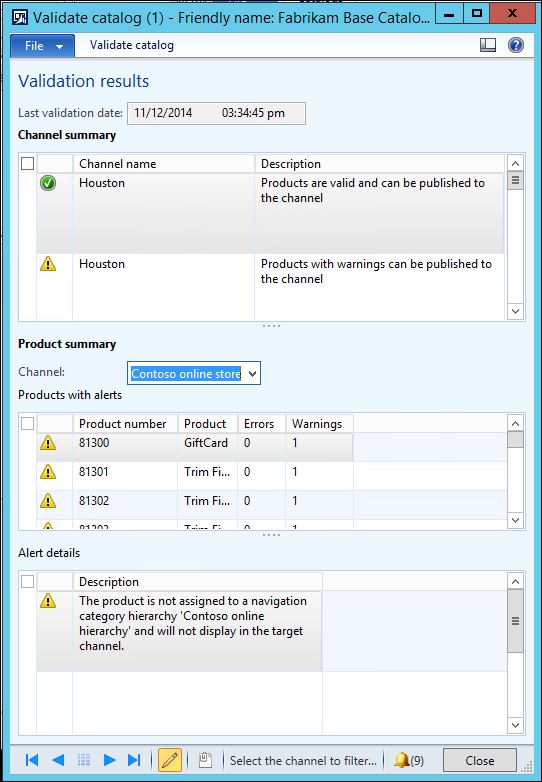
b. Click “Validate catalog”, click “Validate catalog” on this form, this will check that the catalog configuration is correct
A. Fix any errors or warnings that are generated and Validate this again until there is a successful validation.
c. Click on the “Submit” button to send this to workflow. Complete the approval of the catalog changes before proceeding.
d. Click “Publish”, select a publish option from the dropdown menu, and click OK to run the batch job.

Data Distribution
1. Go to: Retail >> Periodic >> Data distribution >> Distribution schedule >> Run the 1040 (Products) and 1150 (Catalog) jobs.
Syncing with the Online Store
1. This will now sync the updated data to the online store. Check the job history in the Central Admin for the online store to verify the sync occurred. More information on the Online Store
2. Check for the item in the website navigation or in the Uncategorized list in SharePoint.


