AX for Retail: Size Barcode setup and creation with number sequence
Below are steps to create a barcode for an item that tracks the Size variant and use a number sequence to automatically create the new barcodes.
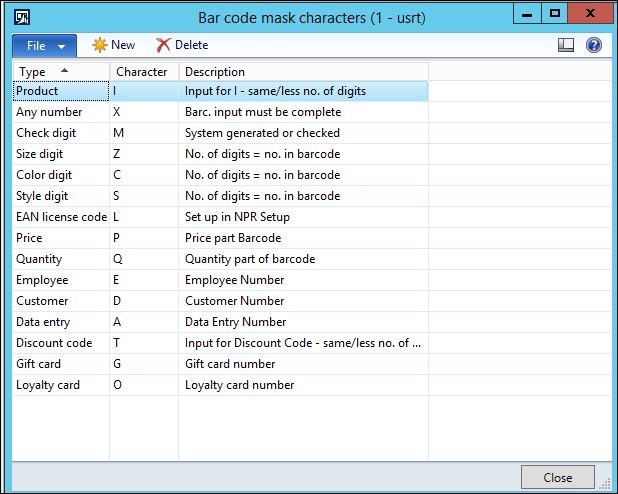
1. Set up the bar code Mask characters:
Retail >>Setup>>Bar codes and labels>>Mast characters
a. Product = I
b. Size = Z
2. Set up the Bar Code Mask Setup for “Size”:
Retail >> Setup >> Bar codes and labels >> Bar code mask setup
NOTE: The total calculated length must be within the length limits of the Bar code setup in Step 3.
NOTE: When using “Functions>>Create bar codes from number sequence” in Step 10, because Number Sequences will be used to generate the bar code, this Bar code mask setup is not actually used. If you choose “Functions >> Create/Update bar codes”, then this assigned Bar code mask setup is used. Either way this MUST be assigned to the Bar codes in the next step otherwise general AX code will fail due to this field being blank.

3. Set up the Bar codes:
Retail >> Setup >> Bar codes and labels >> Bar code setup
NOTE: Any changes made to the linked Bar code mask setup will blank out the Mask ID on this form. You will need to open this form again and repopulate the field.

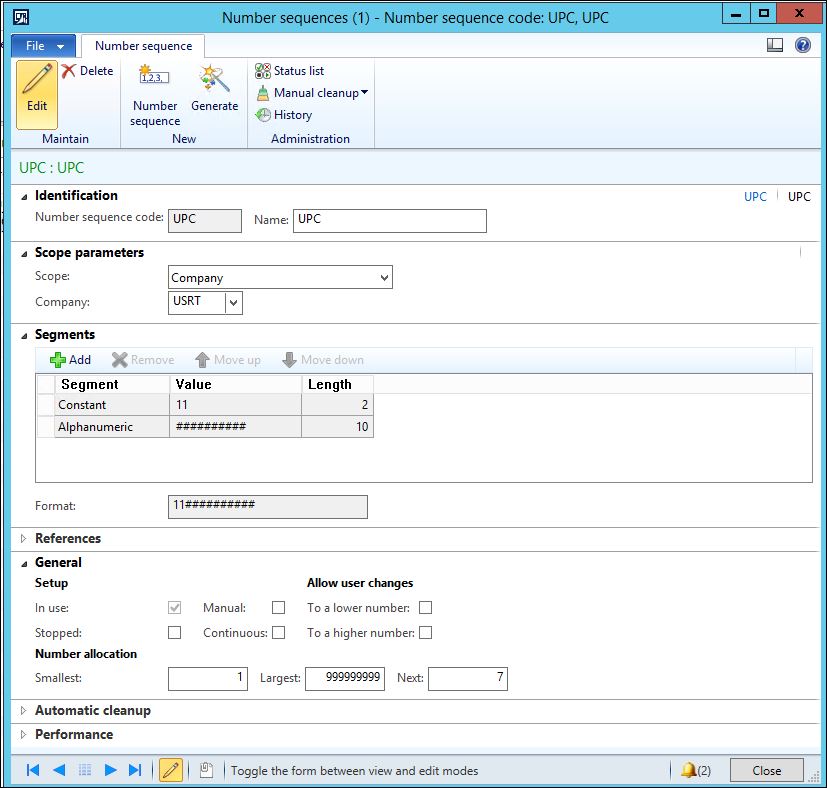
4. Set up the Number Sequence:
Organization administration >> Common >> Number sequences >> Number sequences
a. Create a new number sequence for UPC (this will tie into a Vendor account)
If you normally have a prefix for bar codes, then you would add a constant along with the alphanumeric auto-generated number.
NOTE: The total length of the Number Sequence segments must be 1 digit less than the maximum length of the Bar code. This is due to a check digit being to the bar code after the number sequence during bar code creation.
In our scenario the Bar code length must be 13, so the total length of the number sequence segments must be 12.
2 + length of constant
10 + length of alpanumeric
12 = length of number sequence
1 + check digit
13 = total for bar code
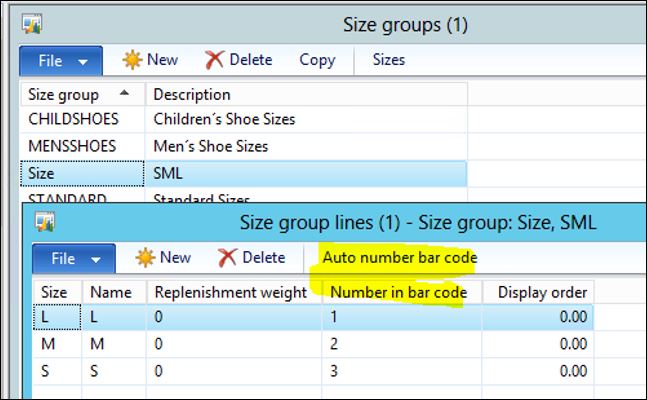
5. Create a new Size Group to auto-populate the dimensions:
Retail >> Setup >> Variant groups >> Size groups
a. Select Auto number bar code
NOTE: You must assign the Variant Groups prior to creating the Item. This is required during the number sequence bar code creation. You can add product dimensions directly to the product, but the barcode creation requires a variant group.
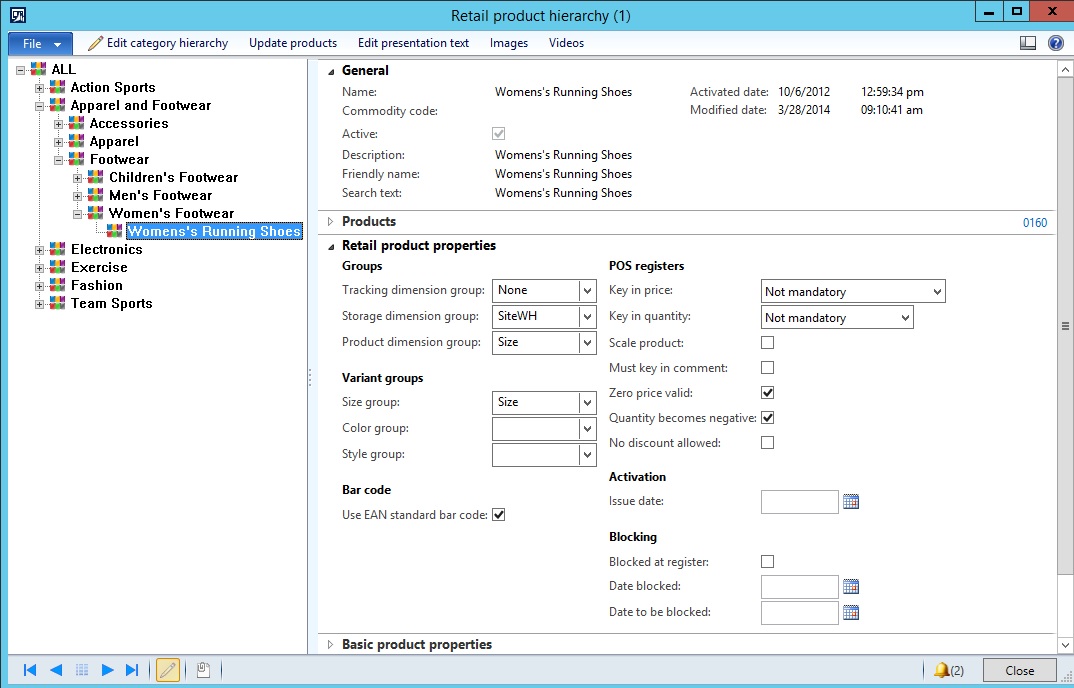
6. Add this to the Retail product hierarchy for auto applying to product masters in a category
Retail >> Setup >> Category hierarchies >> Retail product hierarchy
a. Select the category from the tree and in the details pane, expand the Retail product properties fast tab
b. In the Variant groups, add the necessary groups from the dropdown.
In our scenario we added Size group: Size
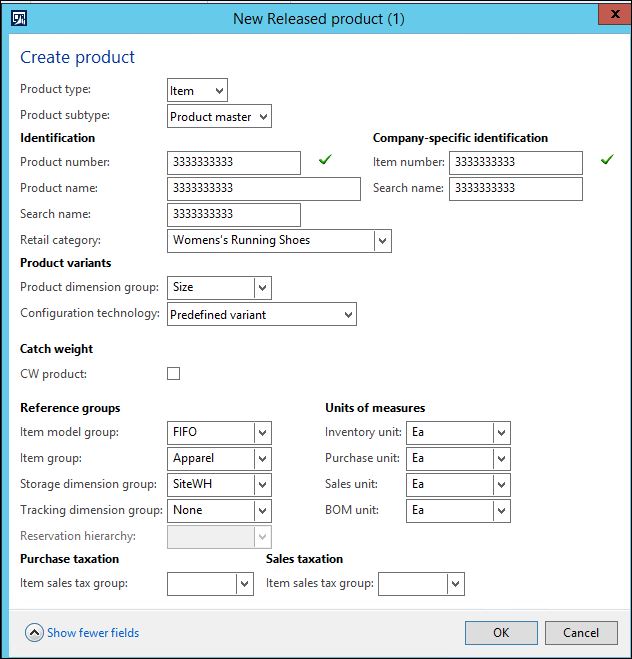
7. Create a new item:
Retail >> Common >> Products >> Released products by category or
Product information management >> Common >> Products >> Released products
a. Product type: Item
b. Product subtype: Product master
c. Product/Item Number is 10 digits long because of the Barcode Mask Setup and the Number Sequence configuration.
d. Retail category: This must be populated for the item to be available in Retail, select the category you choose in Step 6 to assign the size group.
e. Reference group: Select any value
8. Assign the available sizes to the item.
a. Find the product we just created, select it ,and click Edit.
b. Expand the Retail fast tab and note that the Size group is added automatically from the Retail product hierarchy. Select “Size” in the Bar code setup field.

c. On the Product menu select Product dimensions. You should see a list of available size dimensions.
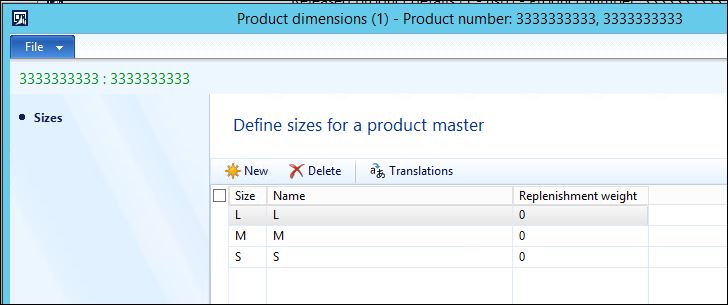
d. Close the Product dimensions form.
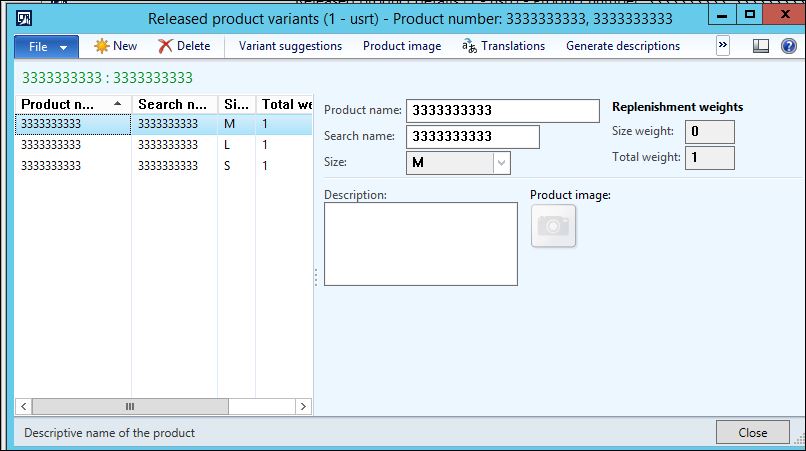
e. On the Menu bar, select Released product variants
f. Select the Variant suggestions button
g. Click Select All and then click Create
You now see the sizes in the Released product variants form
Close the Release product variants form, but leave the Released product details form open for Step 10.
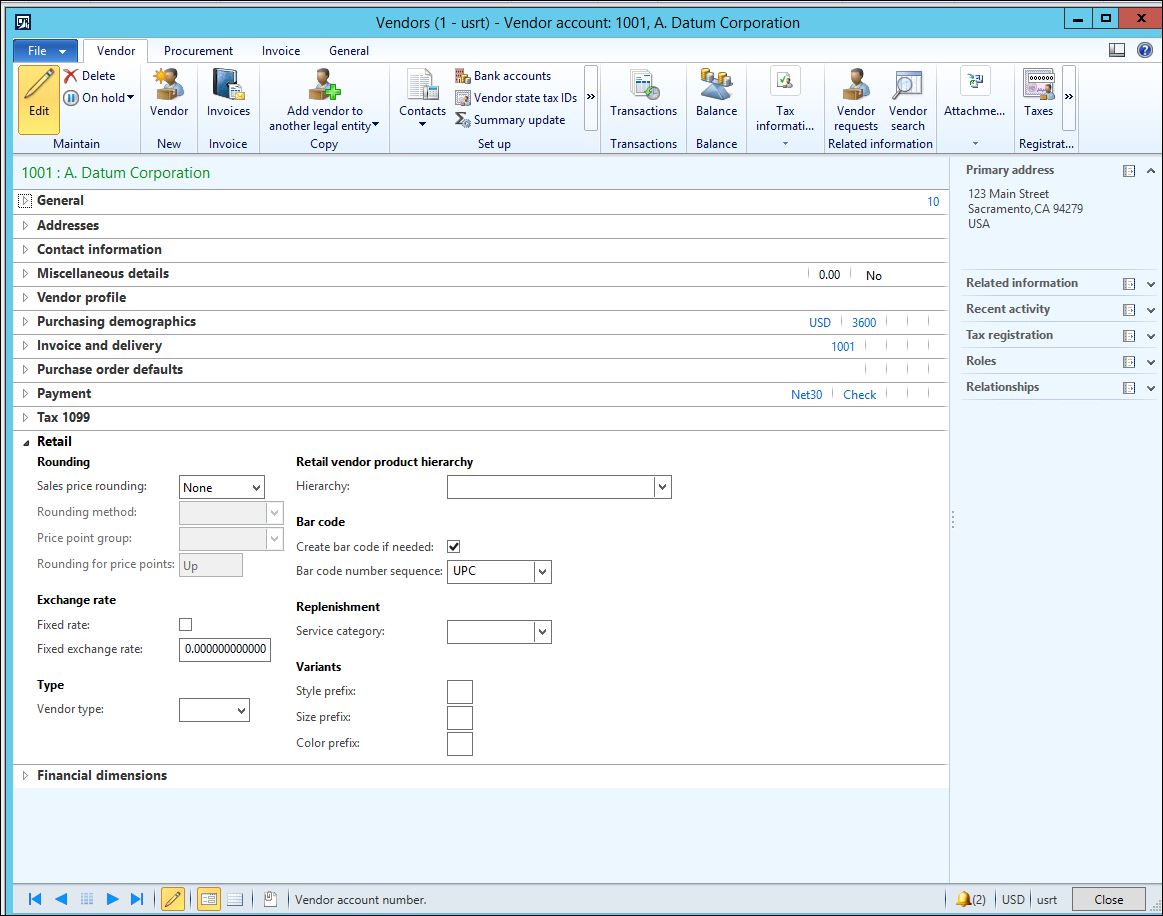
9. In order for the Number Sequence to work, it must be assigned to a vendor.
Accounts Payable >> Common >> Vendors >> All vendors
a. Select account 1001 and click Edit.
b. Expand the Retail fast tab
c. Select UPC (from Step 4) in the Bar code number sequence field.
d. Close the form.
10. Create the Bar code
a. Go to back to the item:
Retail >> Common >> Products >> Released products by category
b. On the Manage inventory menu under Warehouse, click Bar codes
An Info Log window may appear with errors/warnings, this can be ignored due to the next step.
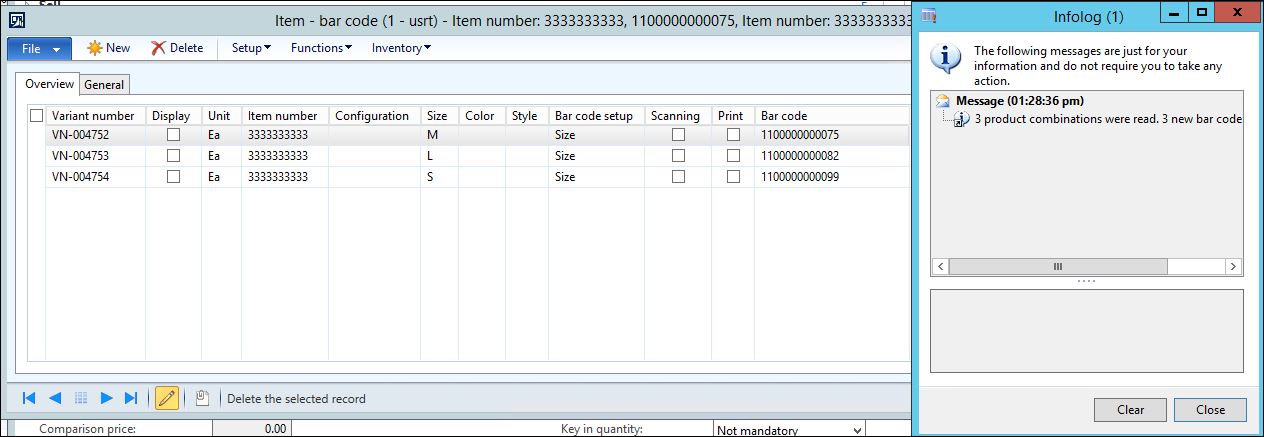
c. Select the new record that was auto-created when the form opened and click Delete. Another Info log with error messages will appear, close this. We will create new lines for bar codes.
d. Click Functions >> Create bar code from number sequences

e. Select the Vendor (1001) you assigned the bar code number sequence.
f. Select “OK” to create bar codes message
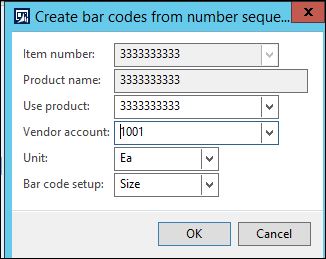
3 bar codes are created, one for each variant using the sequence number for the UPC (1100000000075,1100000000082,1100000000099)
11 is the constant, the alphanumeric next number (0000000007, 0000000008, 0000000009), and the check digit (5,2,9).
NOTE: This will create bar codes for any variants under the product that do not have a bar code associated. You can also assign more than 1 bar code to a product, but if one exists a new one will not auto create based on the number sequence..