How to use Master Planning to create Planned Kanbans with Lean Manufacturing in AX 2012
We have customers inquire around how to use Master planning with Lean Manufacturing in AX 2012, specifically around creation of Production flows\Kanban rules in a way that Master scheduling will create Planned Kanbans for Firming like any other Planned Order. I’ve created a scenario below that involves the following:
- Creating a new Finished good item called FGTEST.
- Creating a new Component item called COMPTEST.
- Creating a BOM relationship between FGTEST > COMPTEST.
- Assigning a Requirements based Coverage Group to the FGTEST\COMPTEST Items.
- Creating a Lean Production flow with Activities for Production.
- Creating a Schedule-based Kanban rule tied to the FGTEST item.
- Creating a Sales order (demand) for the FGTEST item.
- Running MRP to create Planned Kanbans for the FGTEST item.
- Firming the Planned Kanbans
The steps involved to articulate this scenario below are quite detailed in nature as I wanted to demonstrate a detailed example of how one would accomplish this in AX 2012. Enjoy!
Login to USMF.
Create a new released product called FGTEST by taking the following steps:
- Go to Product information management | Common | Released products to open the Released products list page.
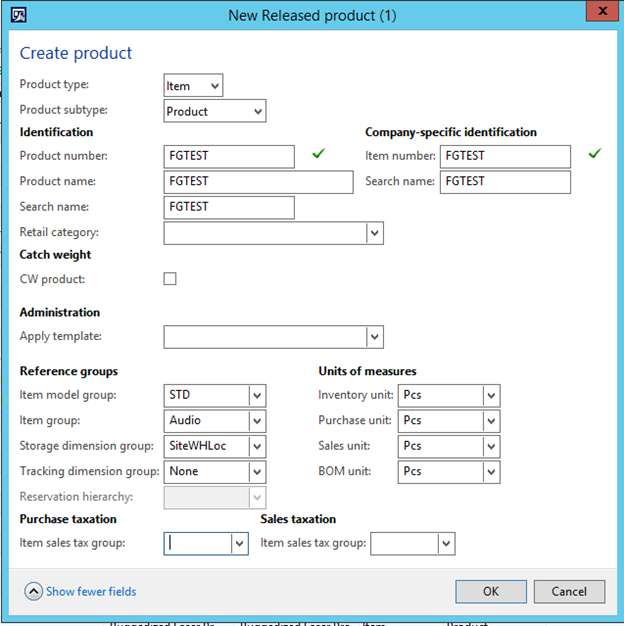
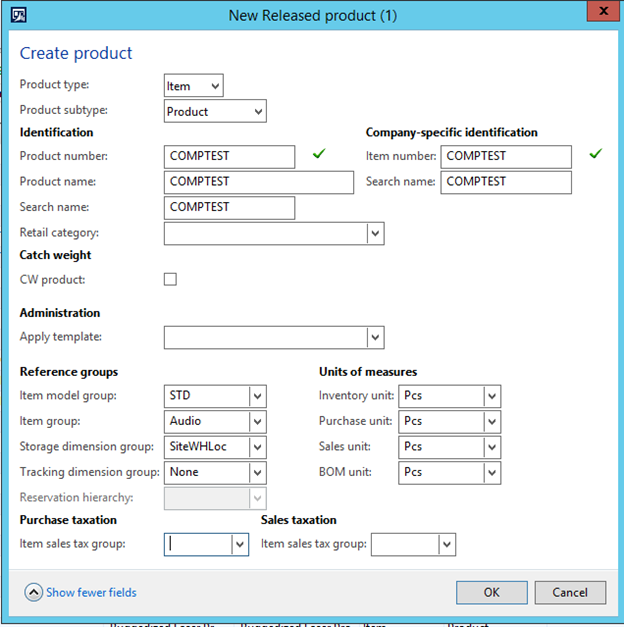
- From the Released products list page, click New | Product to open the Create product pop-up form.
Product type = Item
Product subtype = Product
Product number = FGTEST
Product name = FGTEST
Search name = FGTEST
Item number = FGTEST
Search name = FGTEST
Item model group = STD
Item group = Audio
Storage dimension group = SiteWHLoc
Tracking dimension group = None
Inventory unit = Pcs
Purchase unit = Pcs
Sales unit = Pcs
BOM unit = Pcs
- Click OK out of the Create product pop-up form.
- Back in the Released products list page, click on the FGTEST item that you just created, click the Manage costs tab at the top of the Action pane, and then click Setup | Item price to open the Item price form.
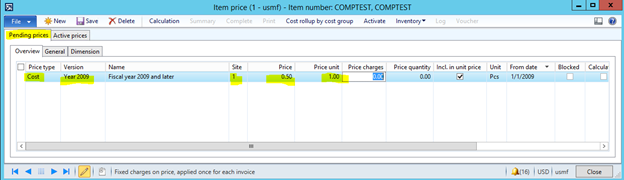
- In the Item price form, click the Pending prices tab, and add the following line: (NOTE: In fields not specifically mentioned here, leave as they are)
Price type = Cost
Version = Year 2009
Site = 1
Price = 1.00
Price unit = 1.00
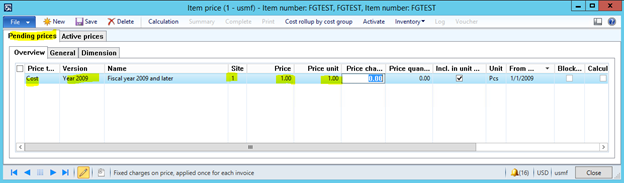
- Save the line, and then click the Activate button.
- Close the Item price form.
- Back in the Released products list page, click on the FGTEST item, click the Manage inventory tab at the top, and then click Order settings | Default order settings to open the Default order settings form.
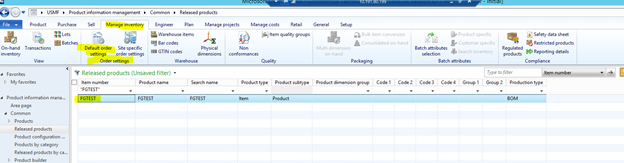
- In the Default order settings form, select ‘Kanban’ in the Default order type field.
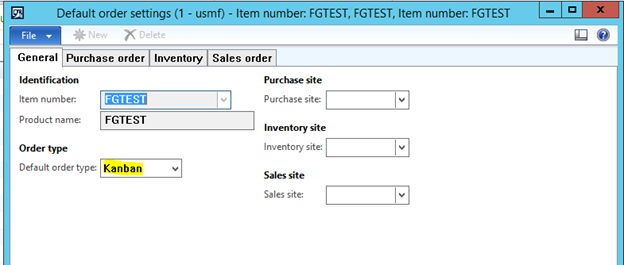
- Close the Default order settings form.
Create a new released product called COMPTEST by taking the following steps:
- Go to Product information management | Common | Released products to open the Released products list page.
- From the Released products list page, click New | Product to open the Create product pop-up form.
- In the Create product pop-up form, enter the following: (NOTE: In fields not specifically mentioned here, leave as they are)
Product type = Item
Product subtype = Product
Product number = COMPTEST
Product name = COMPTEST
Search name = COMPTEST
Item number = COMPTEST
Search name = COMPTEST
Item model group = STD
Item group = Audio
Storage dimension group = SiteWHLoc
Tracking dimension group = None
Inventory unit = Pcs
Purchase unit = Pcs
Sales unit = Pcs
BOM unit = Pcs
- Click OK out of the Create product pop-up form.
- Back in the Released products list page, click on the COMPTEST item that you just created, click the Manage costs tab at the top of the Action pane, and then click Setup | Item price to open the Item price form.
- In the Item price form, click the Pending prices tab, and add the following line: (NOTE: In fields not specifically mentioned here, leave as they are)
Price type = Cost
Version = Year 2009
Site = 1
Price = 0.50
Price unit = 1.00
- Save the line, and then click the Activate button.
- Close the Item price form.
Create a BOM between FGTEST/COMPTEST items by taking the following steps:
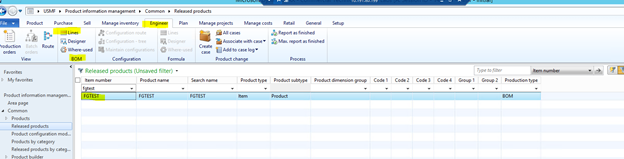
- Go to Product information management | Common | Released products to open the Released products list page.
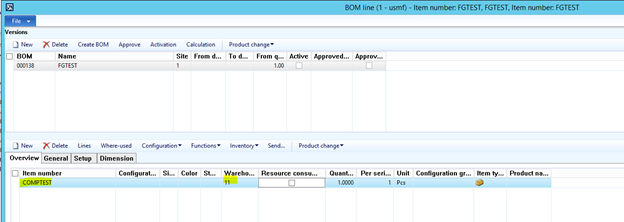
- From the Released products list page, click on the FGTEST item, click the Engineer tab at the top of the Action pane, and then click BOM | Lines to open the BOM Line form.
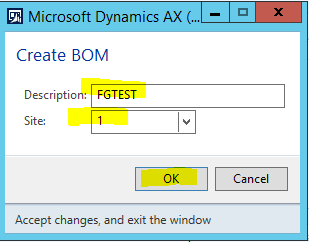
- In the BOM line form, click the Create BOM button to open the Create BOM pop-up form.
- In the Create BOM pop-up form, enter ‘FGTEST’ in the Description field, select ‘1’ in the Site field, and then click OK.
- In the BOM line form, add the following line: (NOTE: In fields not specifically mentioned here, leave as they are)
Item number = COMPTEST
Warehouse = 11
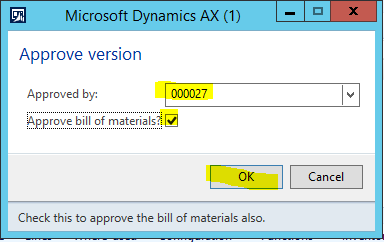
- At the top of the BOM line form, click the Approve button to open the Approve version pop-up form.
- In the Approve version pop-up form, select ‘000027’ in the Approved by field, mark the ‘Approve bill of materials’ checkbox, and then click OK.
- At the top of the BOM line form, click the Activate button.
- Close the BOM line form.
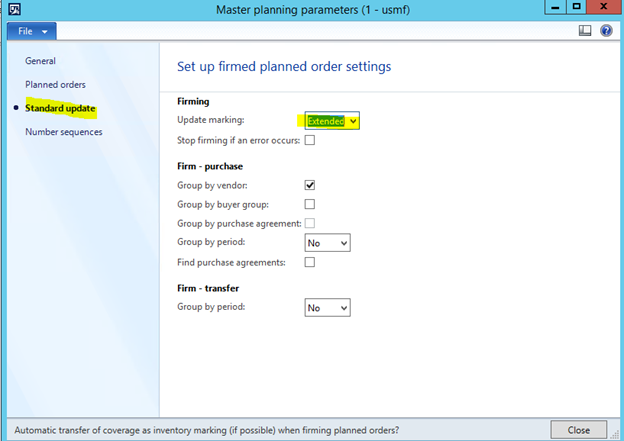
Configure ‘Extended’ as the MRP Marking parameter by taking the following steps:
- Go to Master planning | Setup | Master planning parameters to open the Master planning parameters form.
- In the Master planning parameters form, click the Standard update tab, and select ‘Extended’ in the Update marking field.
- Close the Master planning parameters form.
Assign the ‘Req’ Master planning coverage group to the FGTEST and COMPTEST items by taking the following steps:
- Go to Product information management | Common | Released products to open the Released products list page.
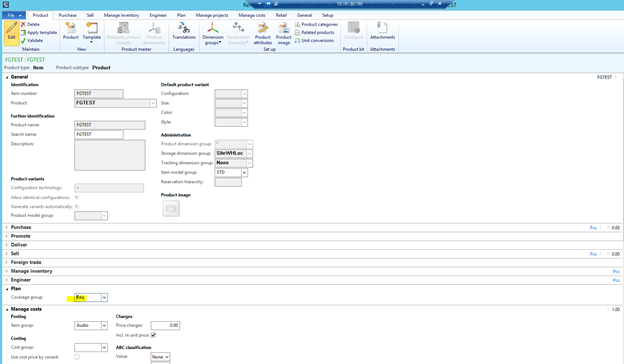
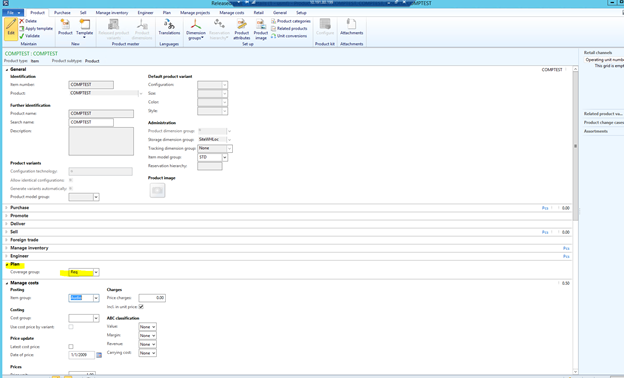
- From the Released products list page, click on the FGTEST item, and then click Maintain | Edit to open the Released product details form.
- In the Released product details form, expand the Plan fast tab, and select ‘Req’ in the Coverage group field.
- Close the Released product details form.
- Back in the Released products list page, click on the COMPTEST item, and then click Maintain | Edit to open the Released product details form.
- In the Released product details form, expand the Plan fast tab, and select ‘Req’ in the Coverage group field.
- Close the Released product details form.
Create a Production flow called FGTEST by taking the following steps:
- Go to Production control | Setup | Lean manufacturing | Production flows to open the Production flows form.
- In the Production flows form, click New, and enter the following:
Name = FGTEST
Description = FGTEST
Legal entity = USMF
Value stream = LeanProduction
Production group = 10
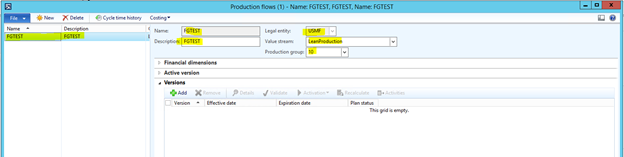
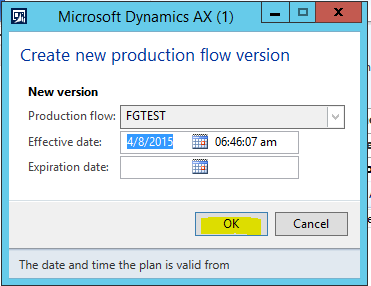
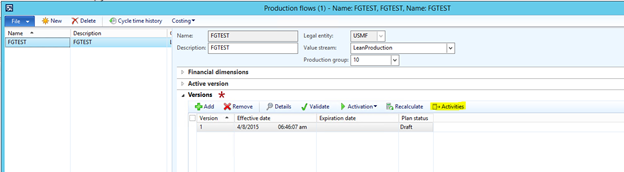
- Expand the Versions fast tab, and click the Add button.
- In the Create new production flow version pop-up form, click OK.
- Back in the Production flows form, click the Activities button to open the Production flow activities form.
- In the Production flow activities form, click New version activity | Create new plan activity to open the Create new plan activity wizard.
- In the Create new plan activity wizard, click Next.
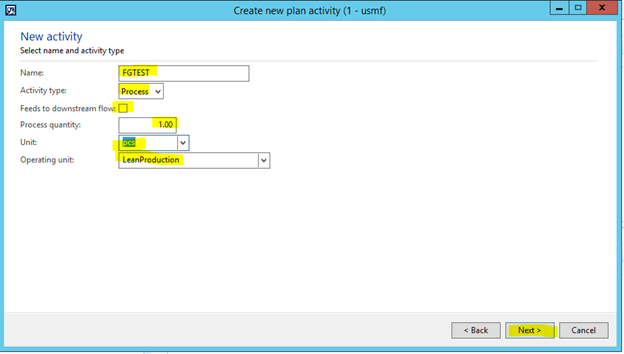
- In the New activity area of the Wizard, enter the following, and then click Next:
Name = FGTEST
Activity type = Process
Feeds to downstream flow = unmark this checkbox
Process quantity = 1.00
Unit = pcs
Operating unit = LeanProduction
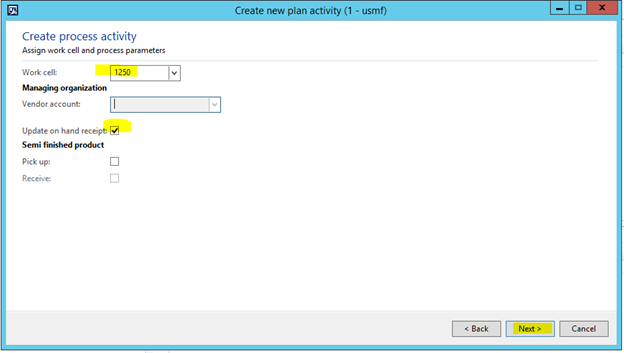
- In the Create process activity area of the Wizard, enter the following, and then click Next:
Work cell = 1250
Vendor account = leave blank
Update on hand receipt = mark this checkbox
Pick up = unmark this checkbox
Receive = unmark this checkbox
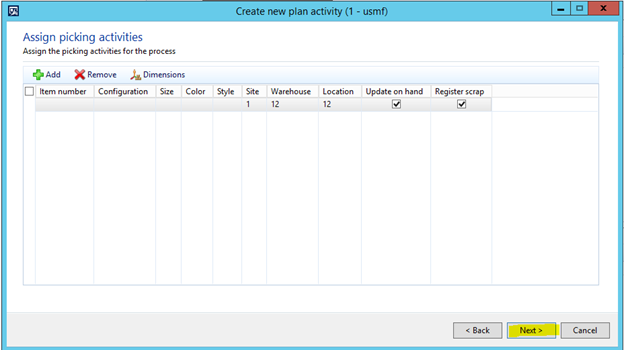
- In the Assign picking activities area of the Wizard, click Next.
- In the Assign activity time area of the Wizard, enter ‘1.00’ in the Time field of the Runtime line, and then click Next.
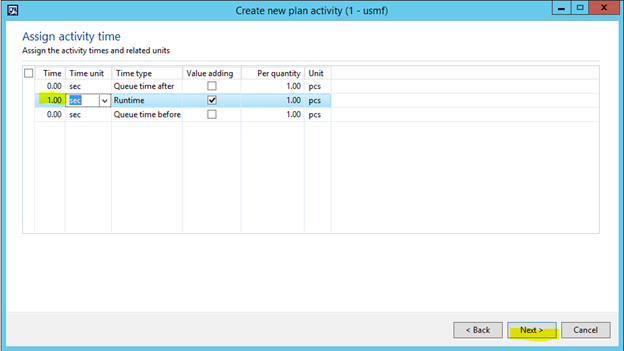
- In the Wizard completed area of the Wizard, click Finish.
- Close the Production flow activities form.
- Back in the Production flows form, click Activation | Activate to open the Activate production flow pop-up form.
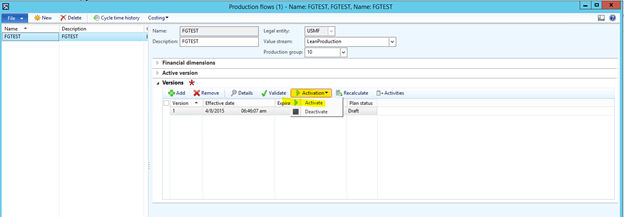
- In the Activate production flow pop-up form, click the OK button.
- Close the InfoLog, and Production flows forms.
Create a new Kanban rule tied to the FGTEST item by taking the following steps:
- Go to Production control | Setup | Lean manufacturing | Kanban rules to open the Kanban rules form.
- In the Kanban rules form, click New | Kanban rule, and enter the following:
Type = Manufacturing
Replenishment strategy = Scheduled
Kanban rule = accept the default
First plan activity = FGTEST
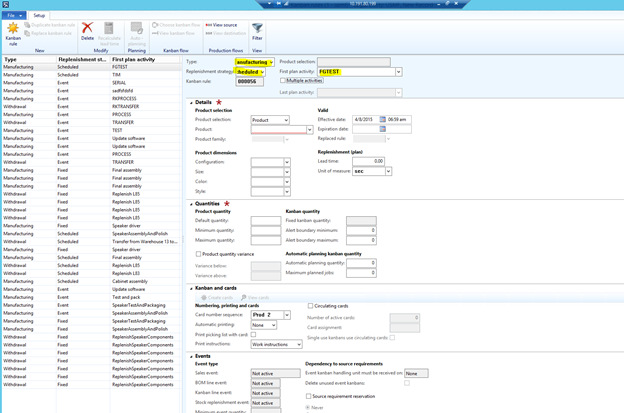
- Expand the Details fast tab, and select ‘FGTEST’ in the Product field.
- Expand the Quantities fast tab, and enter the following:
Default quantity = 1.00
Minimum quantity = 1.00
Maximum quantity = 1.00
Alert boundary minimum = 0.00
Alert boundary maximum = 0.00
Automatic planning quantity = 1
Maximum planned jobs = 0
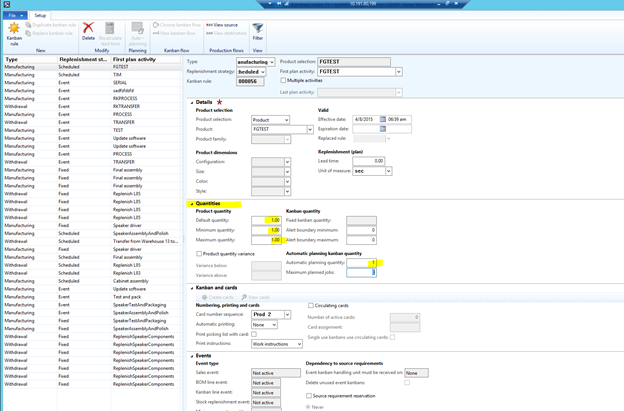
- Save the Kanban rule, and then close the Kanban rule form.
Create a new sales order for FGTEST by taking the following steps:
- Go to Accounts receivable | Common | Sales orders | All sales orders to open the All sales orders list page.
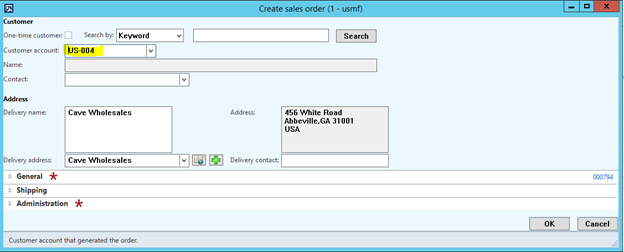
- From the All sales orders list page, click New | Sales order to open the Create sales order pop-up form.
- In the Create sales order pop-up form, select ‘US-004’ in the Customer account drop-down field.
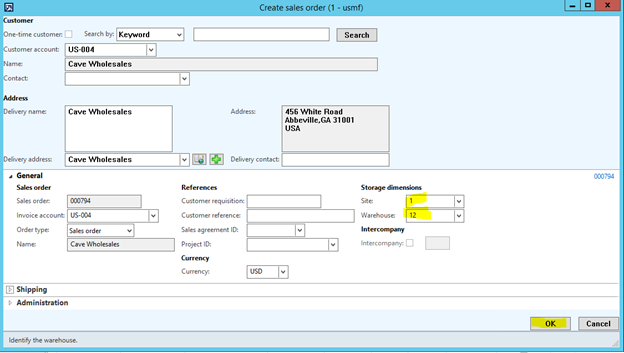
- Expand the General fast tab, select ‘1’ in the Site field, select ’12’ in the Warehouse field, and then click OK.
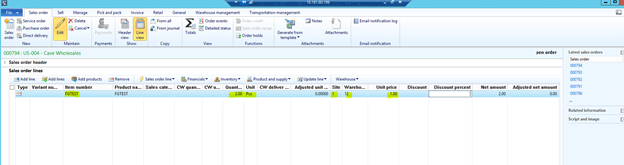
- In the Sales order form, add the following line: (NOTE: In fields not specifically mentioned here, leave as they are)
Item number = FGTEST
Quantity = 2.00
Unit = Pcs
Site = 1
Warehouse = 12
Unit price = 1.00
- Save and close the Sales order form.
Run MRP for the Dynamic plan to create Planned Kanbans for the FGTEST item by taking the following steps:
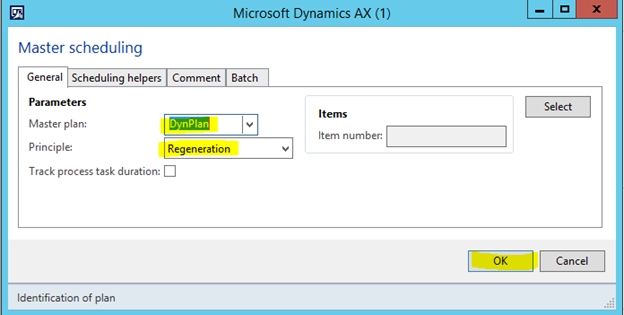
- Go to Master planning | Periodic scheduling | Master scheduling to open the Master scheduling form.
- In the Master scheduling form, select ‘DynPlan’ in the Master plan field, select ‘Regeneration’ in the Principle field, and then click OK.
- Close the InfoLog.
Verify that Pegging exists between the Sales order that you just entered and the Planned Kanban and then firm the Planned Kanban by taking the following steps:
- Go to Master planning | Common | Planned orders to open the Planned orders list page.
- From the Planned orders list page, select ‘DynPlan’ from the Plan drop-down field.
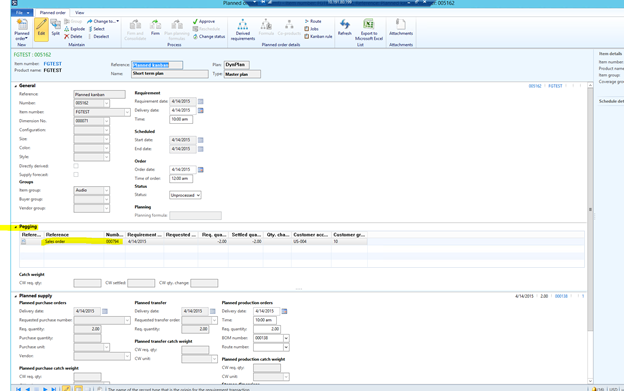
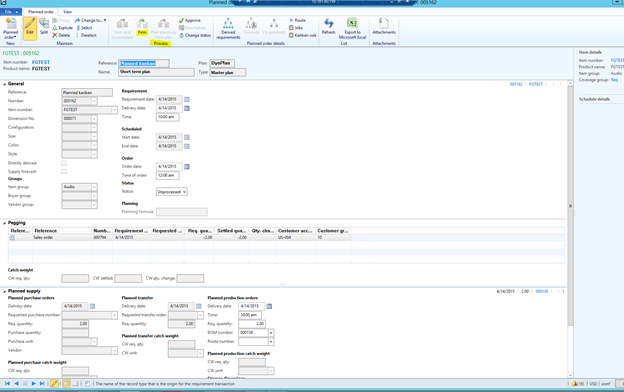
- Double-click on the Planned Order for the FGTEST item number.
- In the Planned orders form, expand the Pegging fast tab. Here you will see the Pegging back to the original Sales order which triggered MRP to create the Planned Kanban.
- At the top of the Planned orders form, click Process | Firm to open the Firming form.
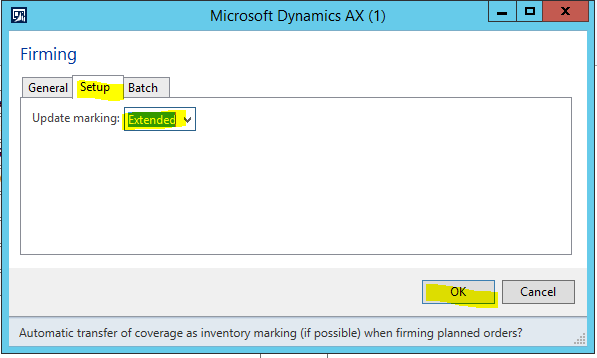
- In the Firming form, select ‘Extended’ from the Setup tab, and then click OK.
- You will get an InfoLog that suggests that 2 Kanbans were planned.
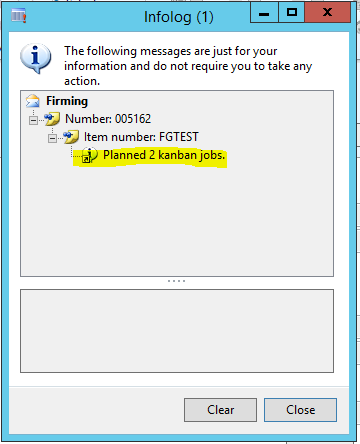
- Close the InfoLog.
Hopefully this example provides a framework for how to consider use of Master Scheduling for the creation of Kanbans in a Lean Manufacturing environment.