How to configure SLAs
Hey, congrats on updating to Microsoft Dynamics CRM Online 8.1. Of the many new and exciting features, you now have the capability to use service level agreements (SLAs) for entities apart from Case. The additional entities with the SLA capabilities are:
- All activity entities (email, appointment, etc.) except recurring appointment
- Account
- Contact
- Order
- Invoice
- Quote
- Opportunity
- Lead
- And yes, custom entities and custom activities as well 🙂
I am assuming you are already adept with configuring SLAs for Cases.
Fair assumption? Good!
Unlike cases, however, you will need to do some extra steps for configuring SLAs on the above entities. This is because you will not get the out of the box SLA KPIs for the above entities. You will have to create your own SLA KPIs, timers, and quick view forms.
Here are the steps that you need to follow for configuring SLAs on the above entities. Though you can get this information from the official documentation, there are a few places you might want to watch out for while configuring SLAs. Let’s take Account as an example and learn how to configure SLAs for it.
First, you would need to enable Accounts for SLAs. (It is not enabled out of box)
- Navigate to Settings > Customizations > Customize the System > Entities > Account
- In the Communication & Collaboration section, you will see a checkbox ‘Enable for SLA’. Check, Save and Publish.
- Note that this is already checked for Cases out of box.
A few words of caution! SLA needs a committed relationship. Once you have selected that checkbox and saved, (by the power vested in you by Dynamics CRM and the position of a configurator) SLA cannot be disabled for the entity.

The second step is to create SLA KPIs for this entity.
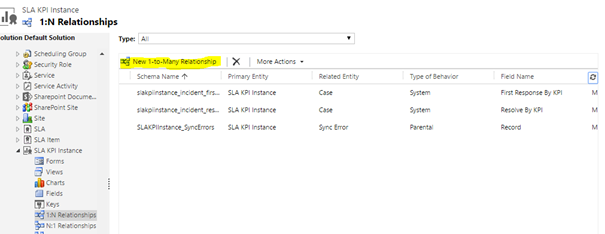
- In the same Customization window, expand the SLA KPI Instance entity.
- Click 1: N Relationships.
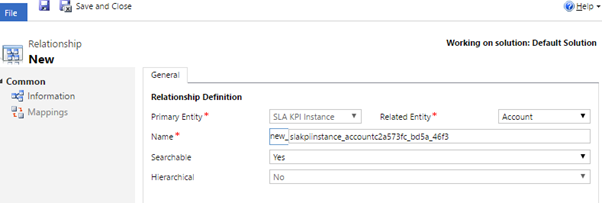
- Click the New 1-to-Many Relationship button. The new relationship form opens.
- Select Account <entity> in Related Entity dropdown.Here is a catch! As soon as you select Account in the Related Entity dropdown, the Name field gets auto populated to “new_ slakpiinstance_account”.You can use it as it is, but you will face issues if you want to export the SLAs created in this org to an org that also has SLAs enabled for Account. This is because while importing the SLAs, the system will attempt to create this relationship in the target org. Since there will be a relationship already existing in the target org, the import will fail. So it is strongly recommended to add a different name or change the name to a GUID (with underscores).
- Fill the Display Name to your taste.
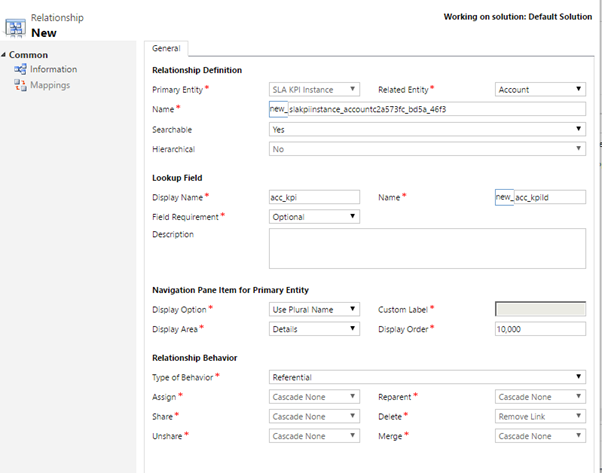
- Save and close.
For Cases, you’ve got 2 KPIs out of the box (First Response in and Resolve by). You will need to create similar additional KPIs if your business demands.
One of the best things about SLAs is the use of timers to indicate the time left for the SLA to be noncompliant. You can use timers for these entities too. You have it out of the box for Case but you will have to configure it for the new entities you enable for SLA.
Let’s see how to configure the timer.
- Go to SLA KPI Instance > Forms.
- Create a new Quick View Form.
- On the Insert tab, click Timer to add a timer on this form with the values of Data Source section illustrated below.
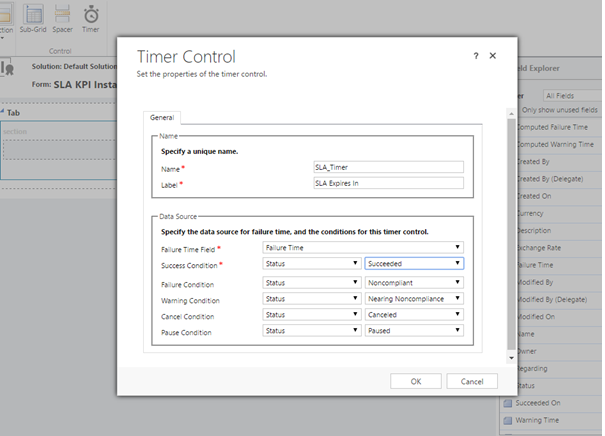
A couple of things to remember.
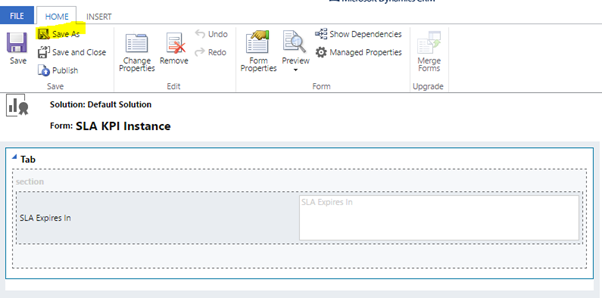
- The quick view form is automatically named to “New Form”. It is strongly advised to rename it to something identifiable such as (Account SLA QV). Else, you will get confused which one to use if multiple entities are configured with SLA. [Names not so important? Go on reading]
- For each KPI, you will have to create a quick view form with timer. So if you have multiple entities to configure, this can get boring. Here is a quick tip for making your life easier. You will have to apply minimal effort if the SLA name and label is same across all your entities, else you will just have to edit these. Oh, I didn’t tell you the trick. The trick is to create one quick view form manually and then use Save As option to create copies. This way the Data Source section will not have to reconfigured (at least). Also the name of the form will be distinct and easily identifiable as you will be giving appropriate names while you use “Save As”.
The final configuration step
Now you need to put the controls on the entity form so that you can see the timer at the runtime. A few other relevant fields will be placed.
You could apply SLAs to Cases by either default SLA, entitlement or manually using SLA lookup. In all above entities, you cannot use the out of box entitlements. You will have to have a default SLA or use SLA lookup.
We will place the SLA lookup, SLA KPI Instance quick view form and SLA KPI Instance sub grid on the Account form.
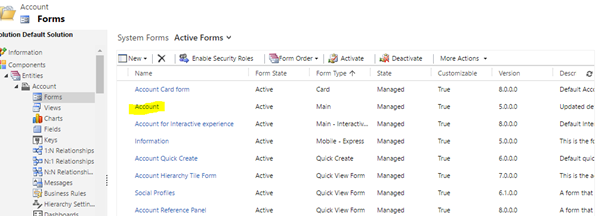
- Click Accounts > Forms > Account on the same customization window.
- Drag SLA field from the Field Explorer to place the SLA lookup field.

- Insert corresponding SLA KPI Instance Quick View form using the created SLA KPI Instance relationship above and correct quick view form containing the timer. If we do not rename the quick view forms while creating, we will have multiple forms in the Quick View Form lookup with the same name ‘New Form’ making it difficult to recognize the correct form.
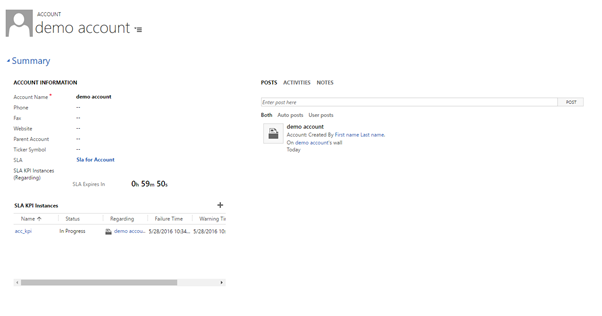
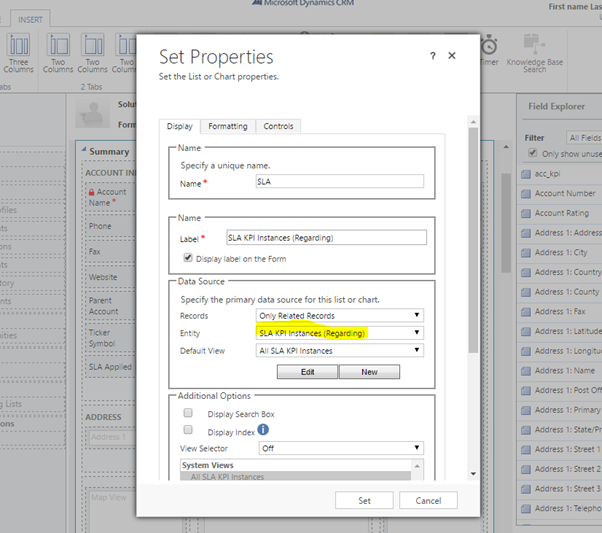
- You may also want to insert a sub grid to view all active SLA KPI Instances when SLA is applied to this record.
- Save and close.
- Publish all customizations (Or go and publish individual customizations).
Phew! Configuration complete.
Now let’s create SLAs.
- Go to Settings > Service Management > Service Level Agreements
- Type a name for the SLA and select the entity for which you’re creating the SLA from entity dropdown. Note that only those entities that are enabled for SLAs will be listed here.
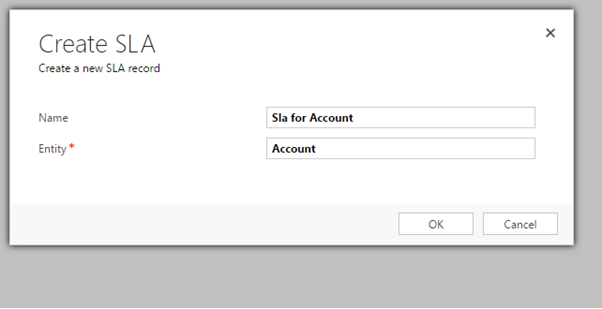
- Click OK.
- Choose correct date time field in the Applicable from field.
- Click Save.
- Add SLA Items. Save the form.
- Click Activate.
- If you want to make this SLA default, you can click Set as Default on the command bar. You can have one default SLA per SLA-enabled entity.
- Next you can configure the SLA Pause states for each SLA-enabled entity.
- Click Service Configuration Settings (Settings > Service Management > Service Configuration Settings)
- Select your entity and the corresponding status reasons (belonging to active state) which will pause SLA time calculations.
Voila! Enjoy SLAs!