Convert email to a case with a few clicks in Dynamics 365 App for Outlook
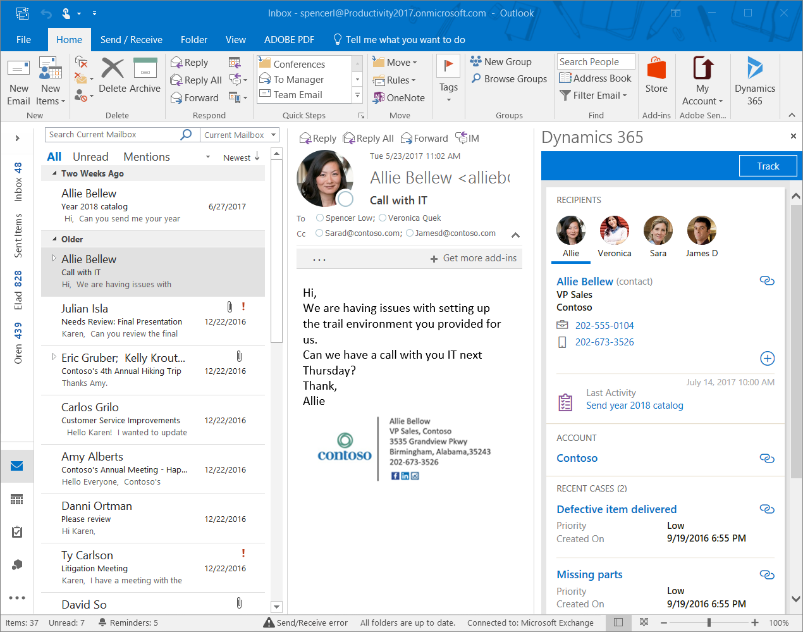
Microsoft Dynamics 365 App for Outlook leverages the power of Dynamics 365 while you’re using Outlook on the desktop, web, or phone. Using the app, you can link emails and appointments to existing Dynamics 365 records or create new records and link them to an email with one click.
In this blog post, I’ll describe how users can easily create a new case from an email, and link the email to this case.
What “convert email to a case” really means
For most users, the goal is straightforward: A new email contains information regarding a new issue that needs to be tracked in Dynamics 365. The user wants to create a new case in Dynamics 365 as quickly as possible, without leaving Outlook. If we translate the business need to Dynamics 365 App for Outlook actions, the user needs to track the email, create a new case, perhaps edit some fields, and save. “Converting an email to a case” is therefore a specific scenario of “track and create new” in Dynamics 365 App for Outlook.
How to create a case from an email
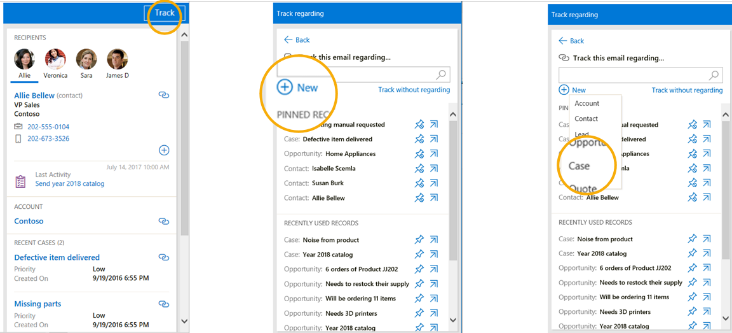
When you decide that an email needs to be linked to a new case in Dynamics 365, you can do so using the following steps:
- Click Track.
- Click New.
- Select Case from the dropdown list.
- Edit or add the fields in the quick create form.
- Click Save.
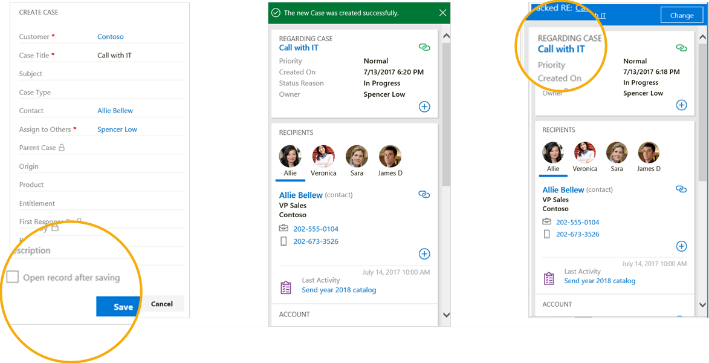
To make the process even faster, if the email sender already exists in Dynamics 365, some of the fields are pre-populated for you. The app fills in the Customer field with the recipient’s account name and the Case Title field with the email subject, and assigns you as the owner of the case. From here, all you have to do is to click Save and the case is immediately created in Dynamics 365 with the email linked to it.
Adding more details to the case
Before saving, you can choose to open the case in Dynamics 365 in a new browser window after saving it. The quick create form contains a limited number of fields, so this gives you the option to add more information to the case. Also, as in any other regarding record, you can click on the case title in the regarding card to open the case in Dynamics 365 at any time.
When I create a new case from an email, I typically do one of the following:
- Open the case in Dynamics 365 and add more details, or
- Quickly track the email as a new case and move to the next email. This is useful if I just want to track the email while I quickly scan my inbox. Later in the day, I can go over the list of new cases in Dynamics 365 and add more information.
Adding the Case entity to the list of entities users can create in the Outlook app
The rest of this blog post explains how to add the Case entity to the list of entities users can create in Dynamics 365 App for Outlook.
Note: Although the scenario describes the Case entity, these guidelines apply to any other built-in or custom entity. You can use these procedures to add (or remove) any entity from a list.
“Case” does not show up as an option while creating a new record
Sometimes “Case” does not appear in the dropdown list as an option. Usually the reason is that the user doesn’t have privileges to create or edit new cases in Dynamics 365. To solve this, simply grant the user privileges to create and edit cases, or assign them a role that has these privileges.
What if “Case” still doesn’t appear?
If you still can’t see “Case” in the list, the issue might be one of the following:
- Case entity is not searchable for quick create
- Case entity is not enabled for set regarding
- Case entity is not enabled for quick create, does not appear in mobile, or appears as read only
Here’s how to solve these issues:
Case entity is not searchable
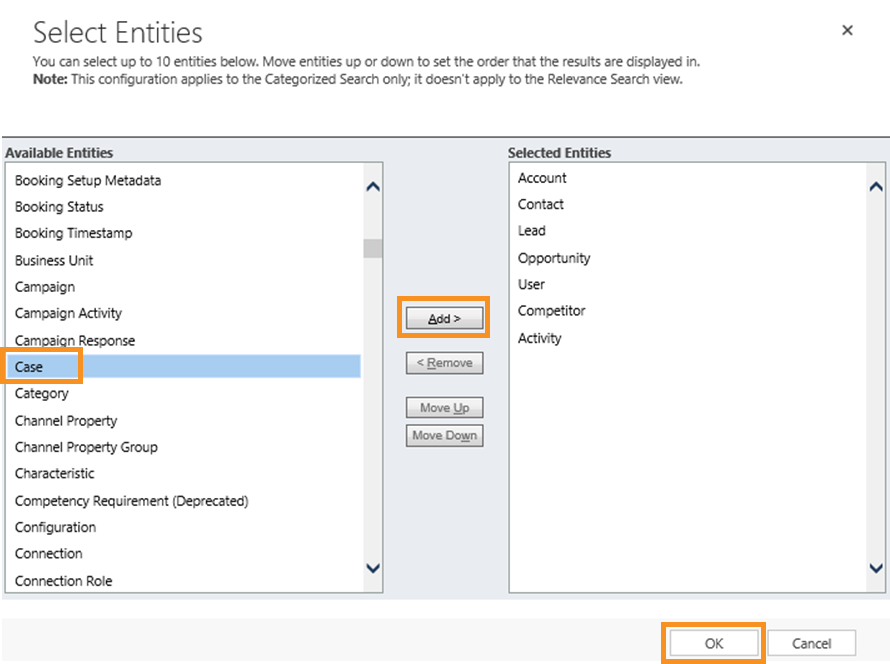
To see the case in the list, you need to make sure it’s included in categorized search. To do this:
- Navigate to Settings > Administration, and then click System Settings.
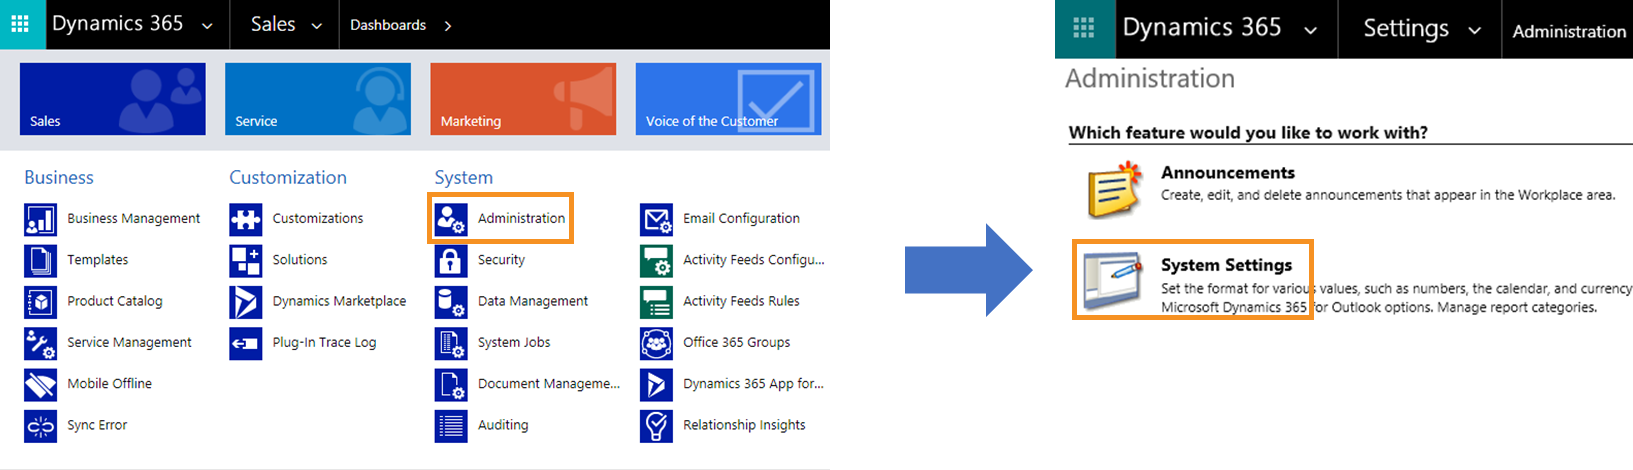
- On the General tab, scroll down to Set up Search, and then click Select.
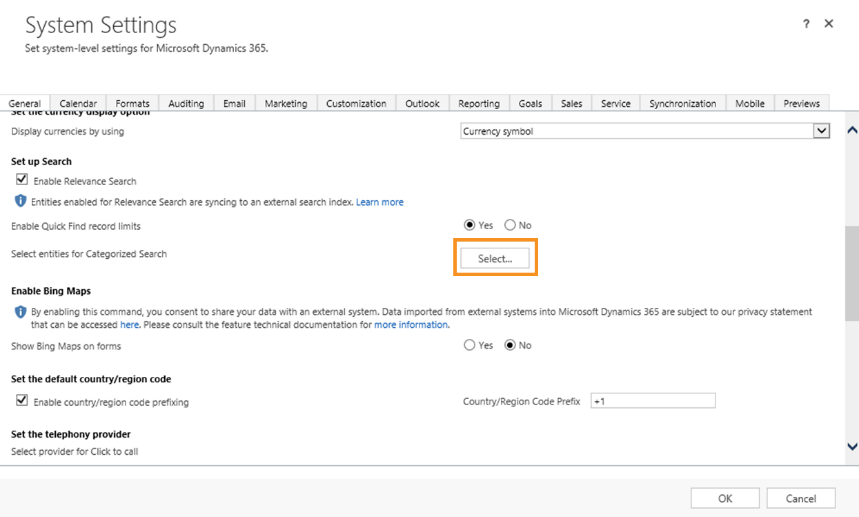
- Click Case, click Add, and then click OK
Next, you need to make sure this entity is enabled to have activities appended to it (meaning you can set regarding to this entity).
Case entity is not enabled for set regarding
The Case entity needs to be enabled for activities to be appended to it, so you can set regarding to a case (meaning link activities to a case).
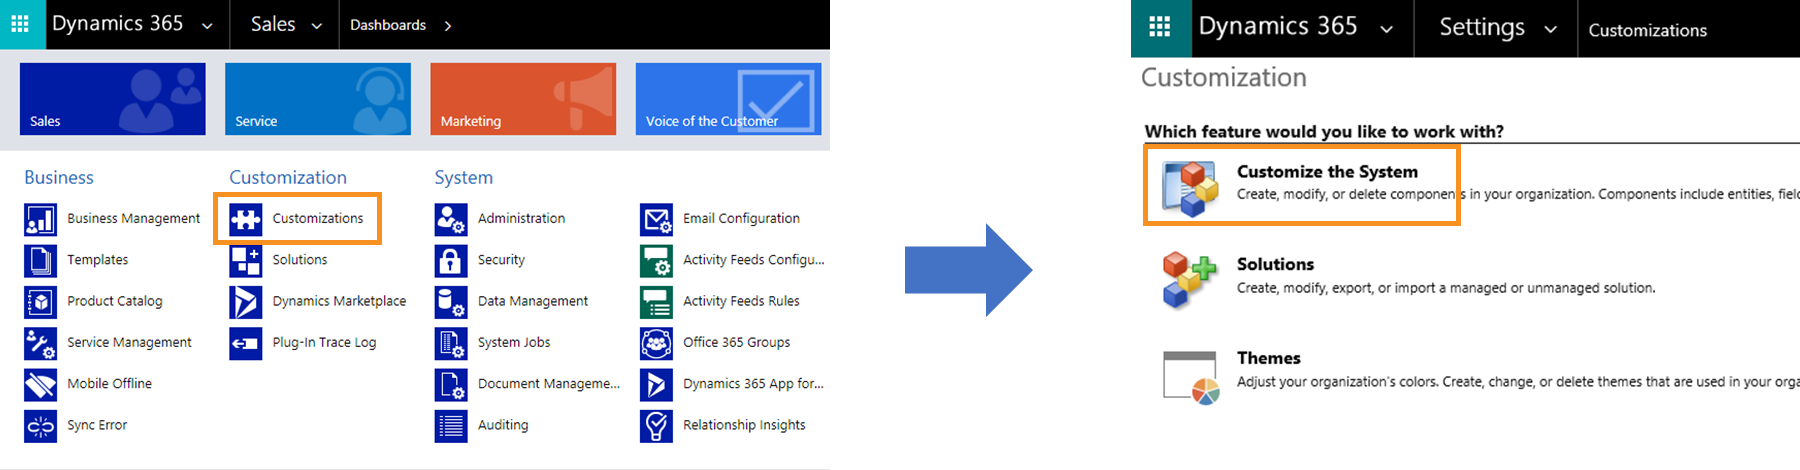
- Navigate to Settings > Customizations > Customize the system.
- Expand the entities tree and click Case. Scroll down and make sure that the Activities option is selected.
Note: By default, the Case entity is enabled for activities. Since you can only change this value with the SDK, if this option is not selected, it was disabled in the past. To select it again, you need to use the SDK. For custom entities, you can enable or disable the record for activities by selecting this option in the UI.
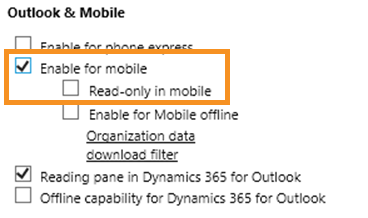
Case entity is not enabled for quick create or mobile
Finally, you need to make sure the Case entity appears in mobile or is allowed for quick create.
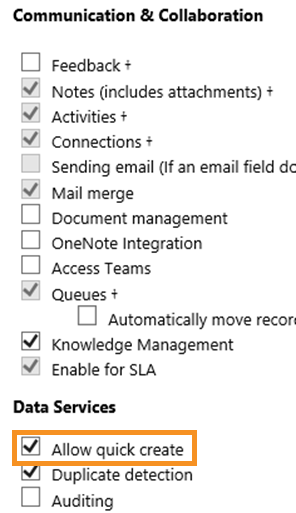
- In the same dialog as the previous step, make sure the Allow quick create option is selected.
- Scroll down to the Outlook & Mobile section, and then select the Enable for mobile Make sure that the Read-only in mobile option is not selected (since that means a user cannot create or edit a case in the app).
Wrapping up
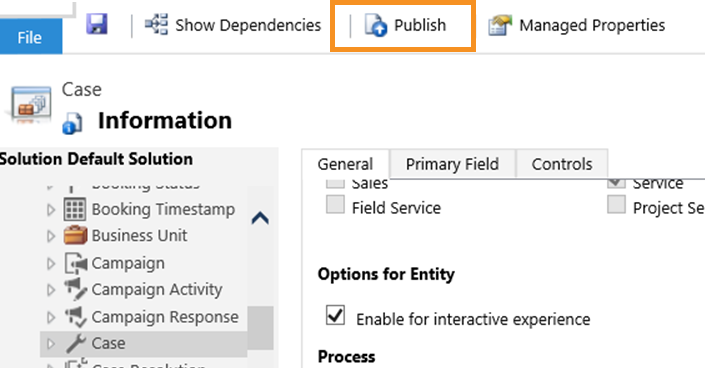
To apply any of these three changes, click Publish at the top of the Solution Explorer. It might take a few minutes for the changes to take effect. If you want to see those changes immediately, clear Internet Explorer 11 cache (regardless if Internet Explorer 11 is your default browser) and restart Outlook.
Summary
The “convert email to a case” option is an easy way to capture issues while you or your users stay in the context of Outlook. In this blog post, I covered some basic and advanced steps you can take to enable this in Dynamics 365 App for Outlook. Also, by using case as an example, you can enable any other record to appear in the app as an option so you can create a new record in Dynamics 365 and link the email to it.
For more information on using the Outlook app, see the Dynamics 365 App for Outlook User’s Guide.
Senior Program Manager
Microsoft Dynamics 365 team