

Deploying externally generated Python/R Models as Web Services using Azure Machine Learning Studio

Azure Machine Learning Studio is Microsoft’s graphical tool for Data Science, which allows for deploying externally generated machine learning models as web services. This product was designed to make Data Science more accessible for a wider group of potential users who may not necessarily be coming from a Data Science background, by providing easy to use modules and a drag and drop experience for various Machine Learning related tasks.
For those looking for an integrated, end-to-end advanced analytics solution, Azure Machine Learning Workbench might be the better option. Data scientists can use it to prepare data, develop experiments, and deploy models at cloud scale. Go here for a full end-to-end tutorial on how to prepare (part 1), build (part 2), and deploy/operationalise your models as web services using Docker (part 3) with Azure Machine Learning Workbench.
This article will focus on deploying models using Studio, the graphical interface. The purpose of this article is to take you through how to deploy an externally trained and serialised sklearn Python machine learning model, or a pre-saved model generated in R, as a web service using the Studio features.
First, we generate a simple model in Python using the pickle module, training the model using a .csv file that contains a sample from iris data set:
import pickle
import sys
import os
import pandas
import numpy as np
from sklearn.metrics import confusion_matrix
from sklearn.linear_model import LogisticRegression
from sklearn.model_selection import train_test_split
from sklearn.metrics import precision_recall_curve

# create the outputs folder
os.makedirs('./outputs', exist_ok=True)

# load Iris dataset from a DataPrep package as a pandas DataFrame
iris = pandas.read_csv('iris.csv')
print ('Iris dataset shape: {}'.format(iris.shape))

# load features and labels
X, Y = iris[['Sepal Length', 'Sepal Width', 'Petal Length', 'Petal Width']].values, iris['Species'].values

# split data 65%-35% into training set and test set
X_train, X_test, Y_train, Y_test = train_test_split(X, Y, test_size=0.35, random_state=0)

# change regularization rate and you will likely get a different accuracy
reg = 0.01

# load regularization rate from argument if present
if len(sys.argv) > 1:
   reg = float(sys.argv[1])

print("Regularization rate is {}".format(reg))

# train a logistic regression model on the training set
clf1 = LogisticRegression(C=1/reg).fit(X_train, Y_train)
print (clf1)

# evaluate the test set
accuracy = clf1.score(X_test, Y_test)
print ("Accuracy is {}".format(accuracy))

# serialize the model on disk in the special 'outputs' folder
print ("Export the model to model.pkl")
f = open('./outputs/model.pkl', 'wb')
pickle.dump(clf1, f)
f.close()
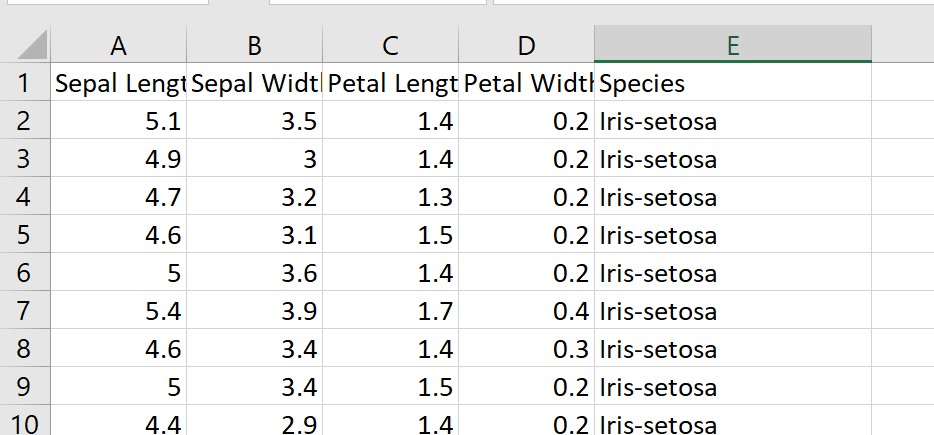
In the above example, the .csv file just contains a sample of the iris data set. The “species” column is the classification that our Logistic Regression model is going to predict, based on the four features of Sepal and Petal length and width:
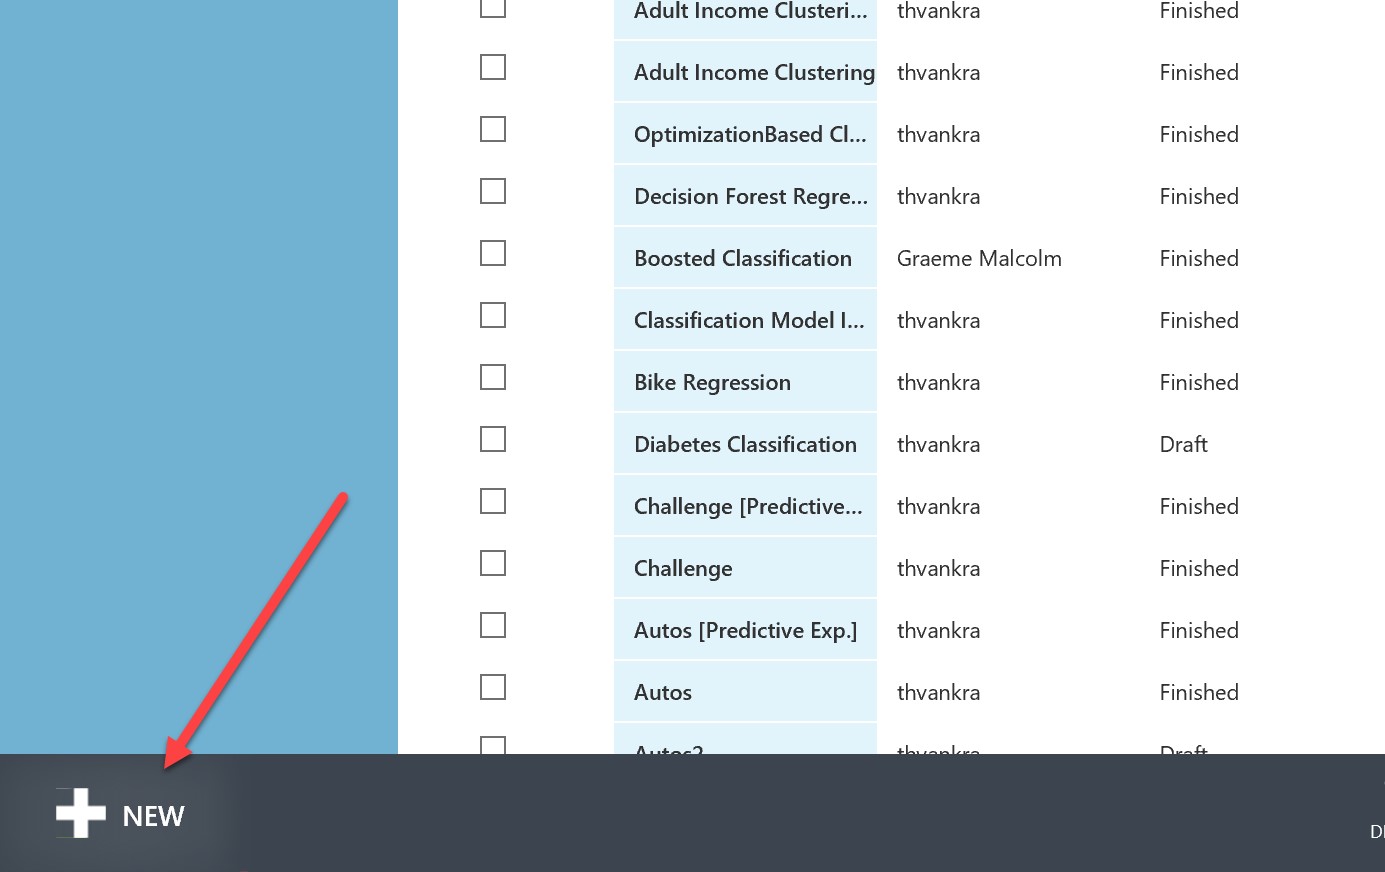
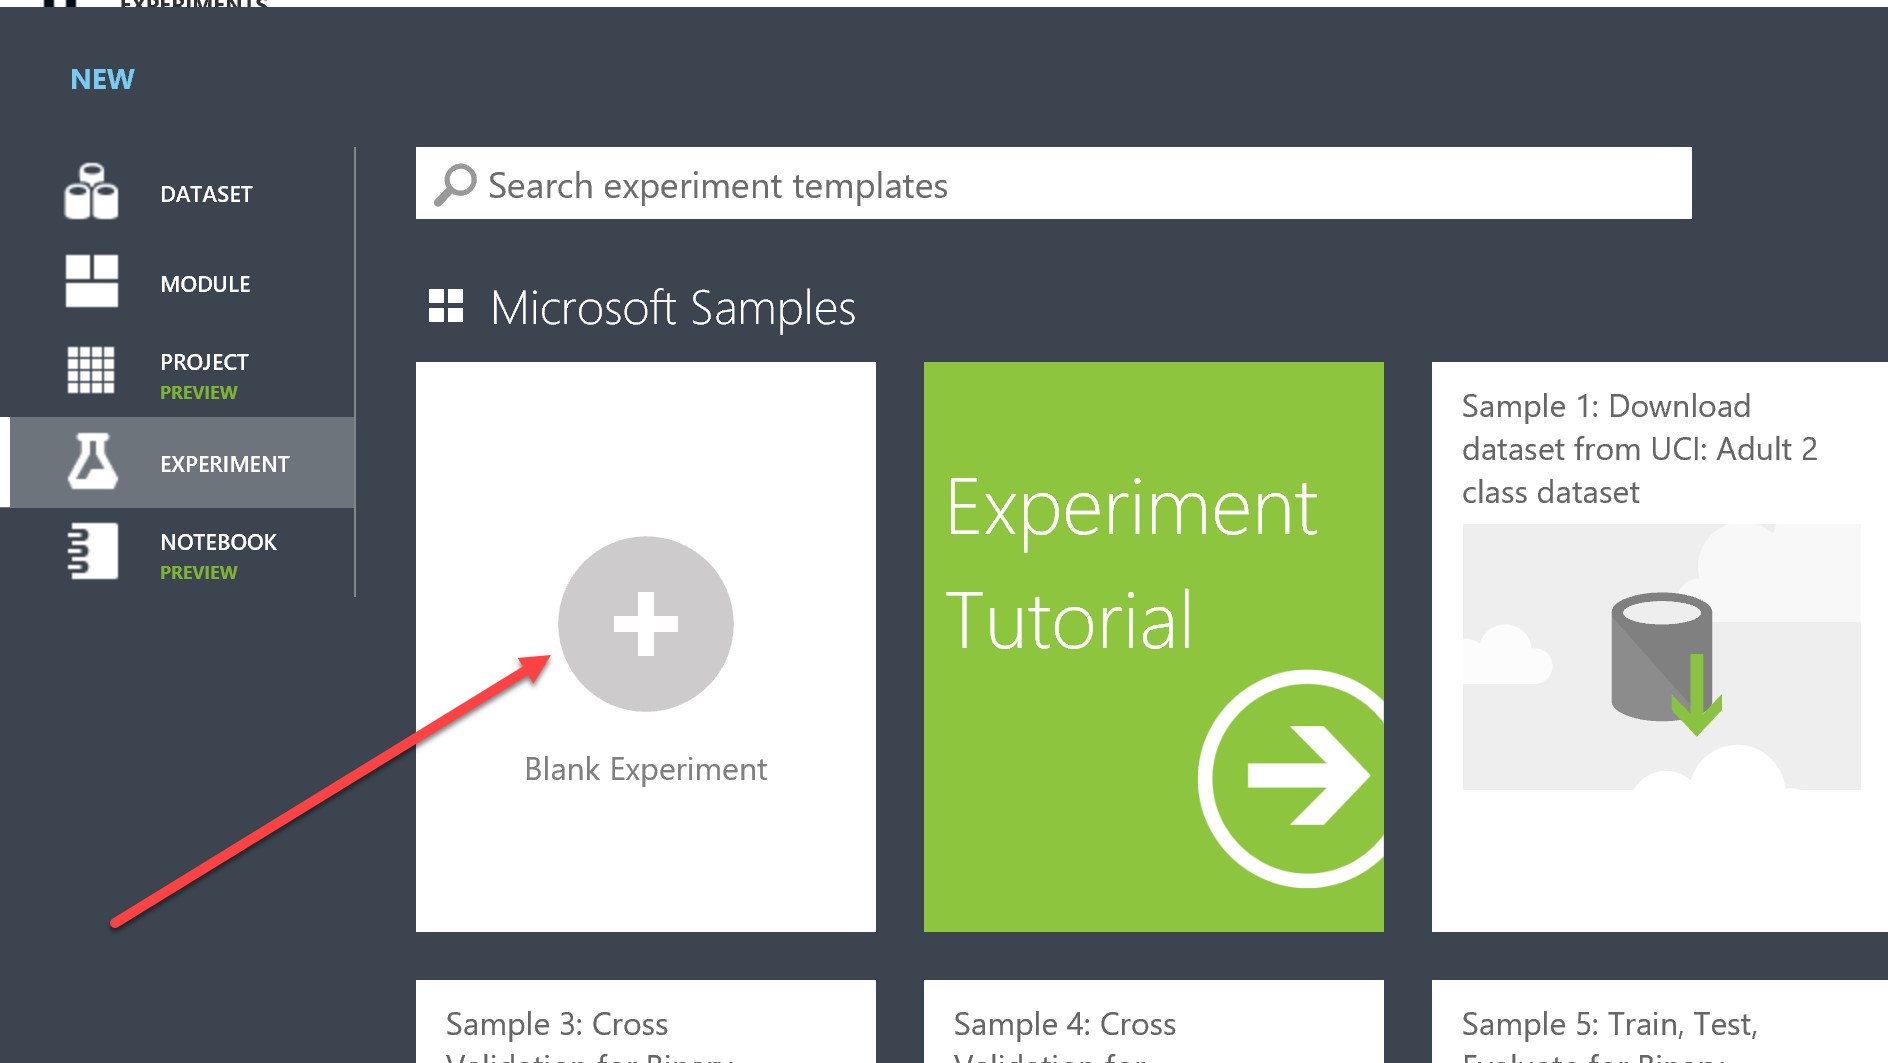
The above code will save the serialized model into the outputs folder. We take the model.pkl file, zip it, and upload it into Azure Machine Learning Studio (sign up here if you have not already done so). Click the “New” icon in the bottom left:
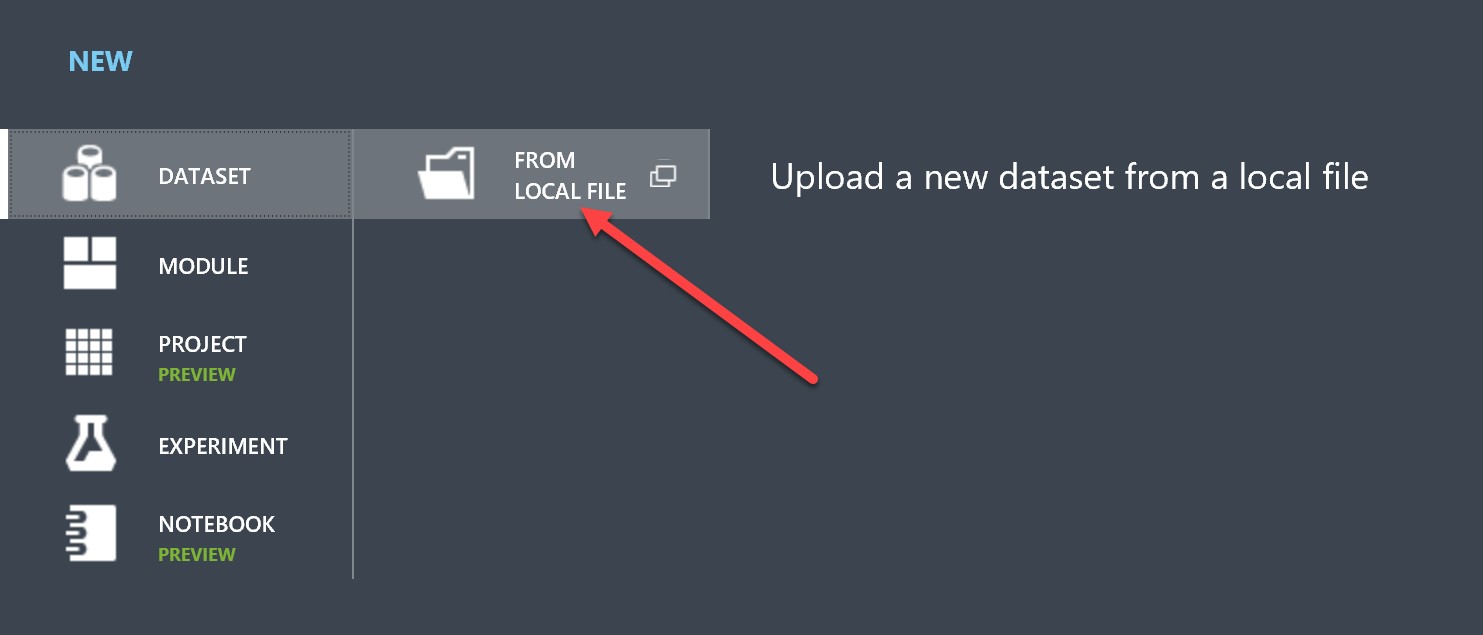
In the pane that comes up, click on dataset, and then “From Local File”:
Select the zip file where you stored your serialized sklearn model and click the tick:

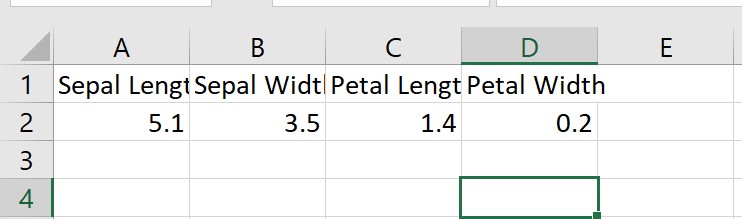
We are also going to create an iris_input.csv file that will be used to model the request input to the web service (note that this will not have the “species” column, as this is a score label):
Use the same process as above to upload your iris_input.csv. Next, hit “new” and this time click “Blank Experiment”:
You will be presented with the experiment canvas:

In the “search experiment items” box, search for each of the below, and drag each into the canvas:
- Your serialized “model.zip” that you uploaded earlier
- Your “iris_input.csv”
- A module named “Execute Python Script”
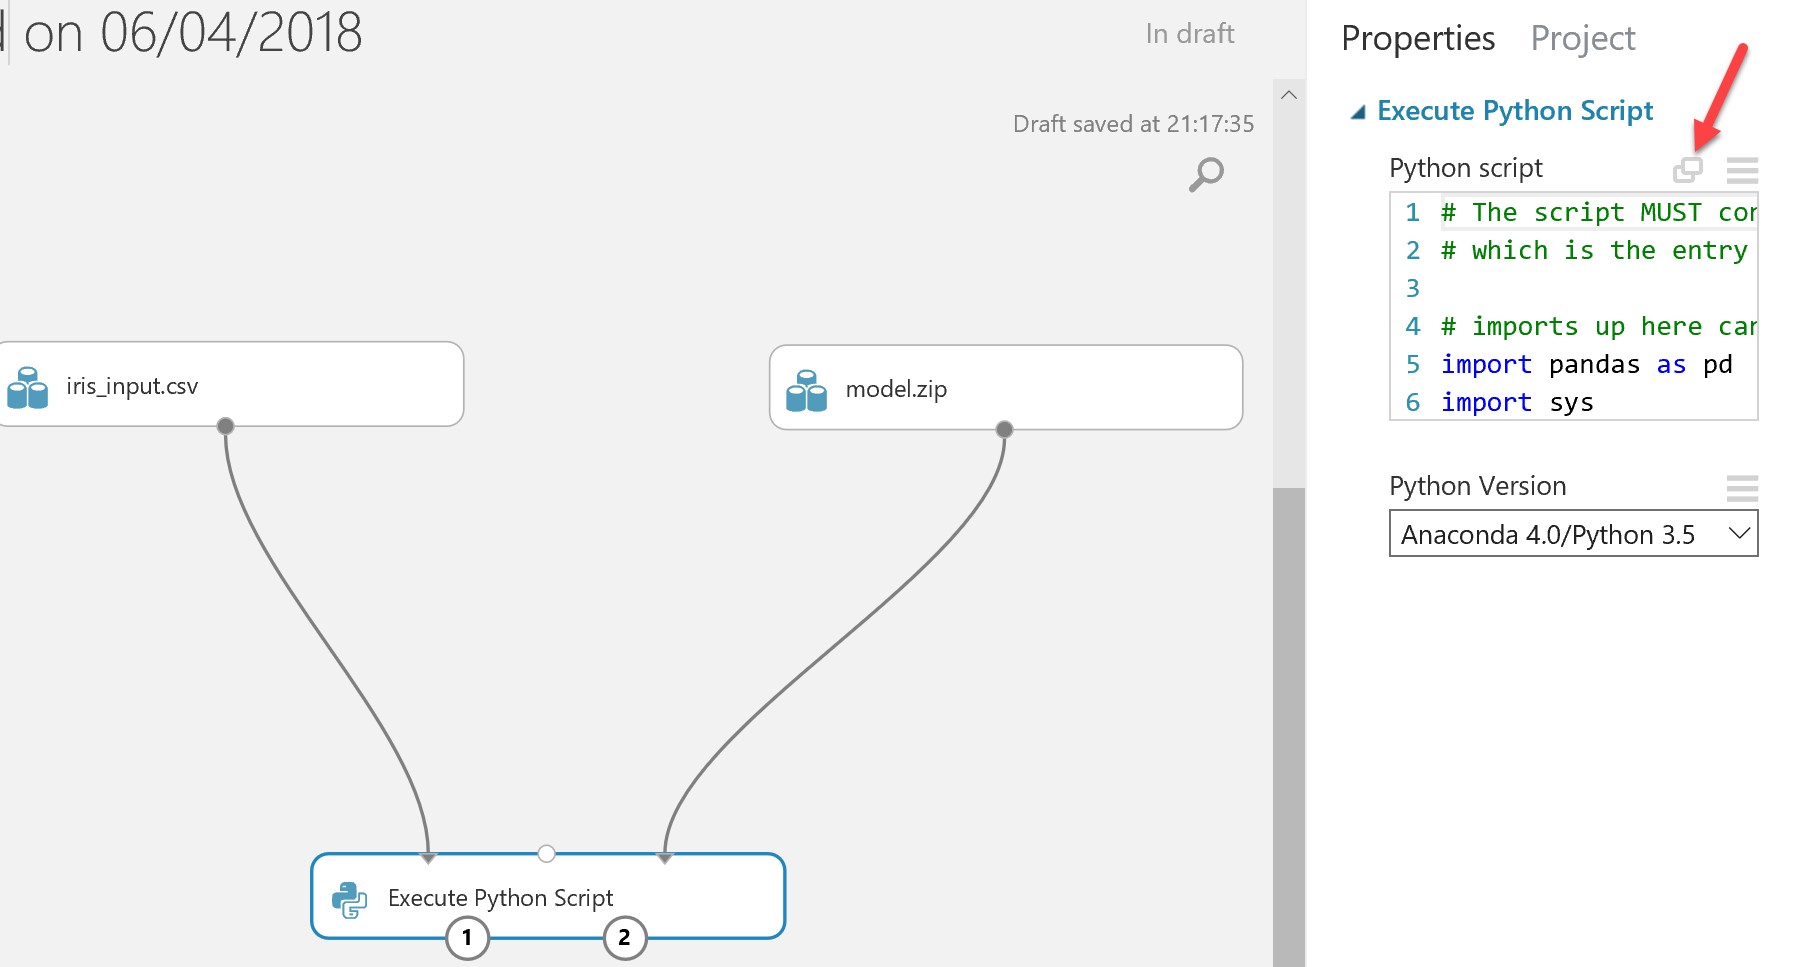
When they are on the canvas, connect iris_input.csv and model.zip to the “Execute Python Script” module as illustrated below:

Highlight the execute Python Script Module, and an Execute Python Script pane will appear, click the highlighted icon below to expand it so you can edit the code (note: you will need to ensure that the Python version selected contains a version of the pickle module that matches the one used to originally create the serialized model) :
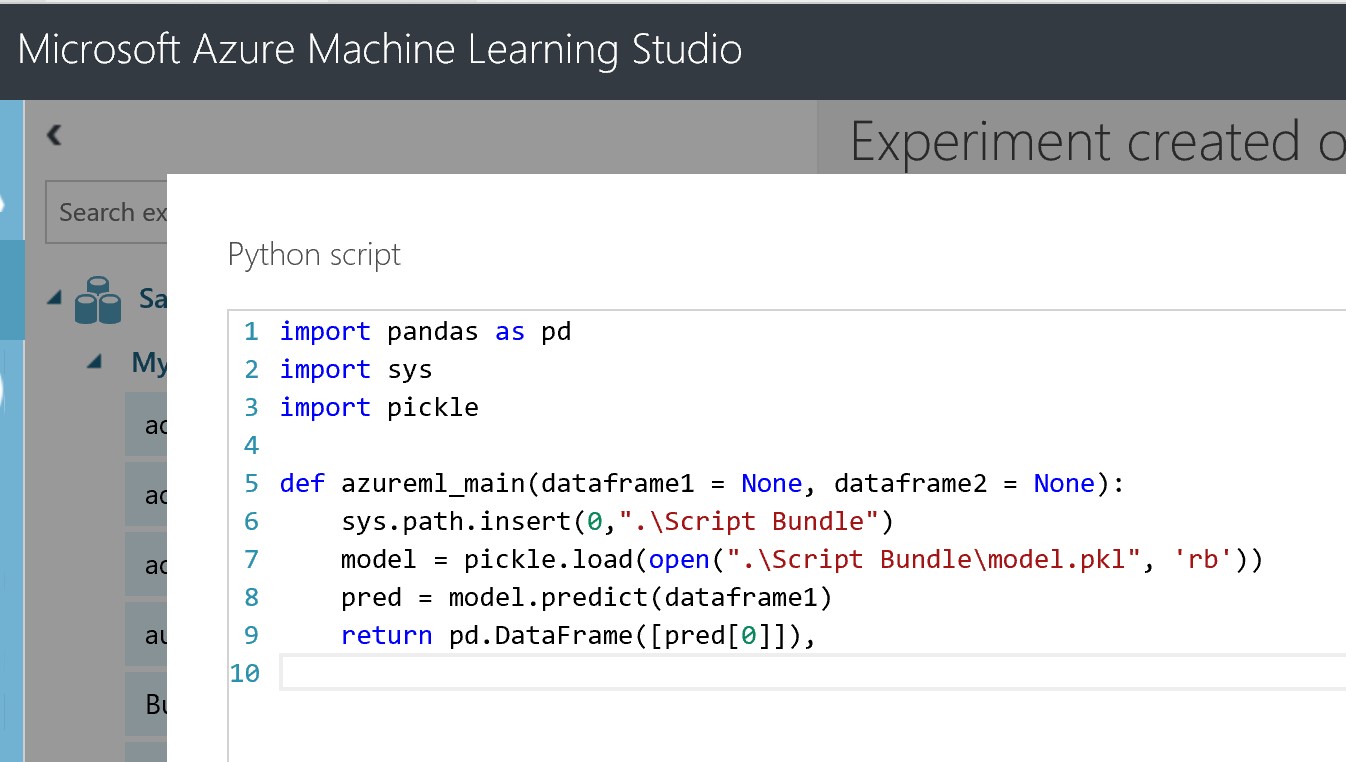
Replace the auto-generated code with the simple script below:
import pandas as pd
import sys
import pickle

def azureml_main(dataframe1 = None, dataframe2 = None):
    sys.path.insert(0,".\Script Bundle")
    model = pickle.load(open(".\Script Bundle\model.pkl", 'rb'))
    pred = model.predict(dataframe1)
    return pd.DataFrame([pred[0]]),
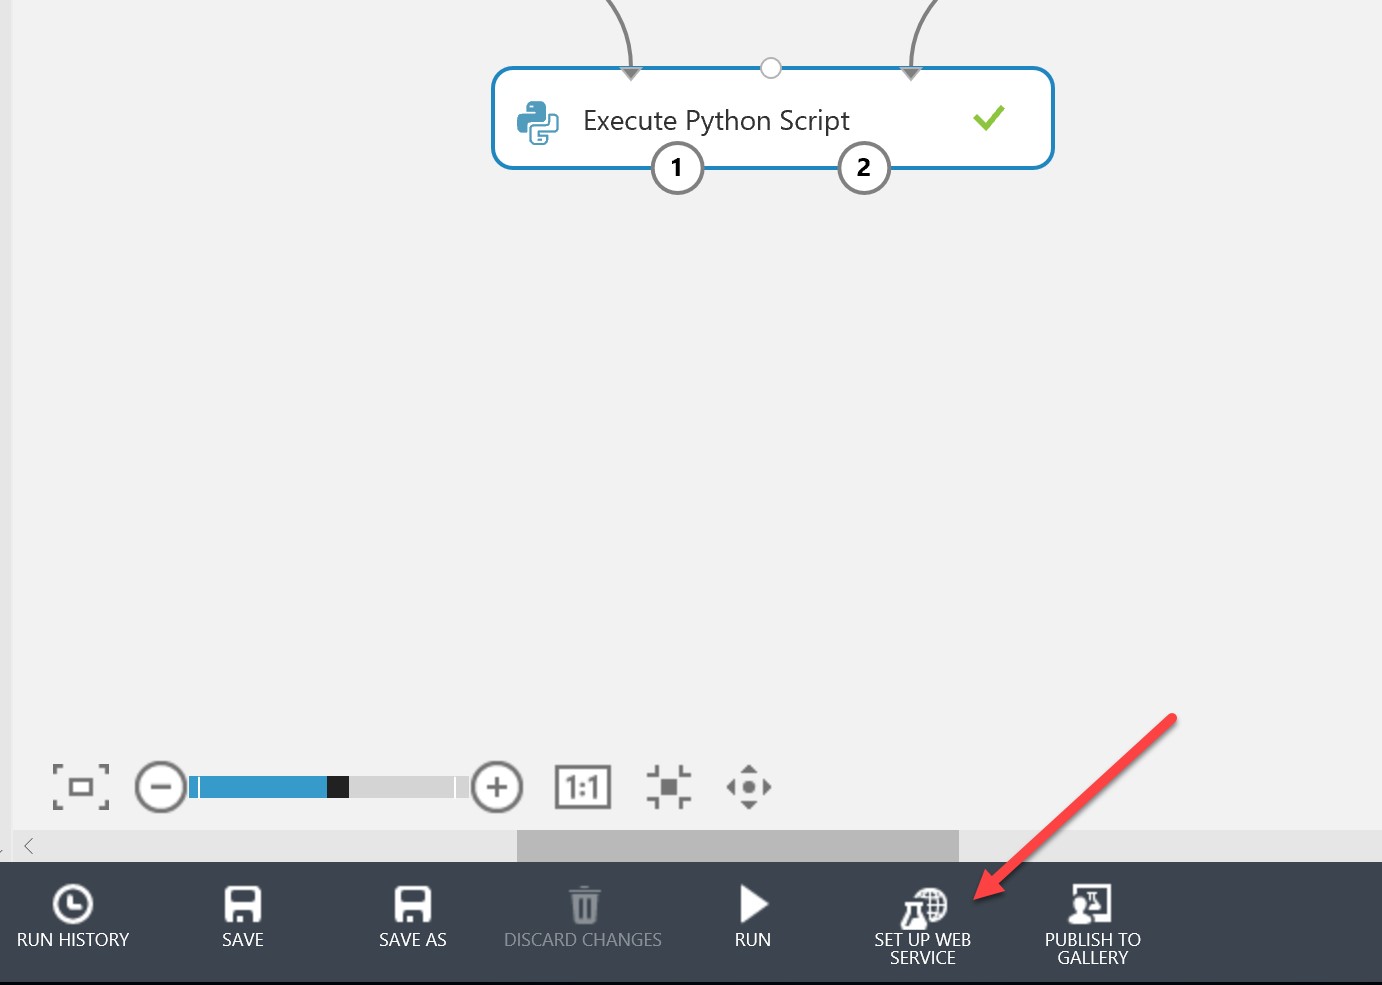
Click the tick, ensure you save the experiment using the icon in the bottom left, and then hit “Run” to run the experiment. This will de-serialise the model into the Azure Machine Learning Studio Environment.
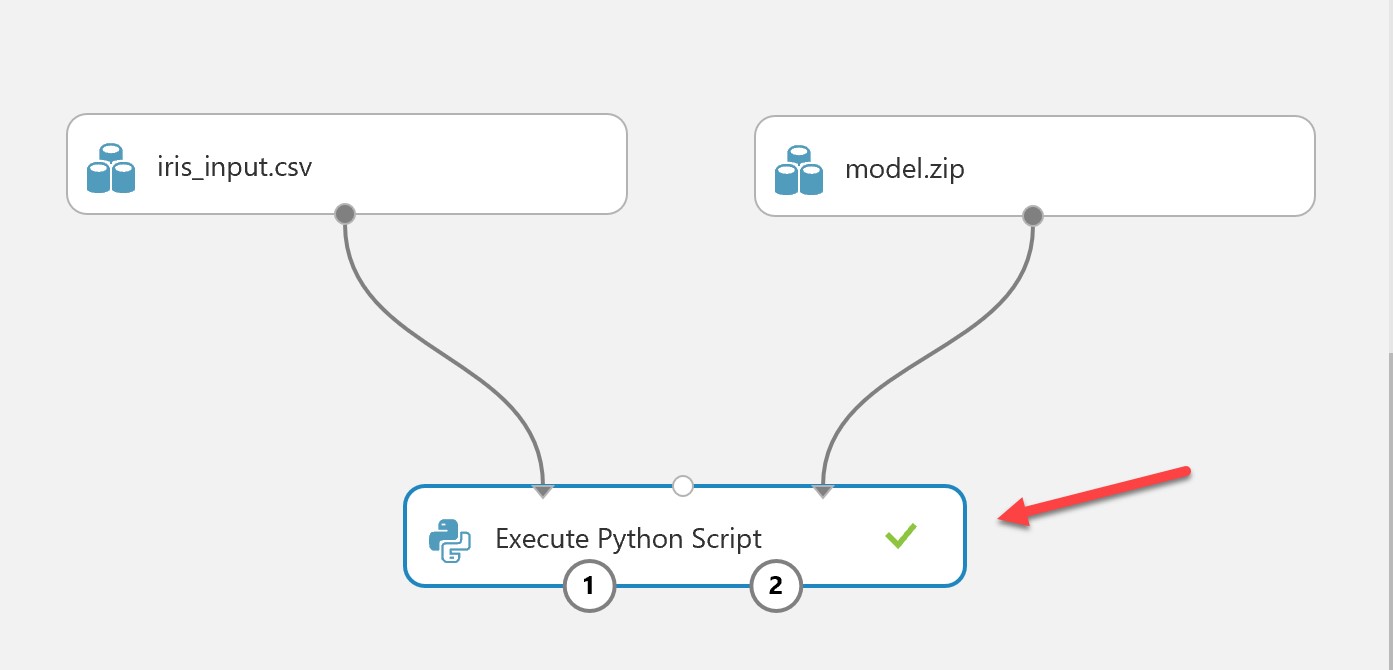
When finished, the Execute Python Script module should have a green tick, You can now hit “Set up web service”:
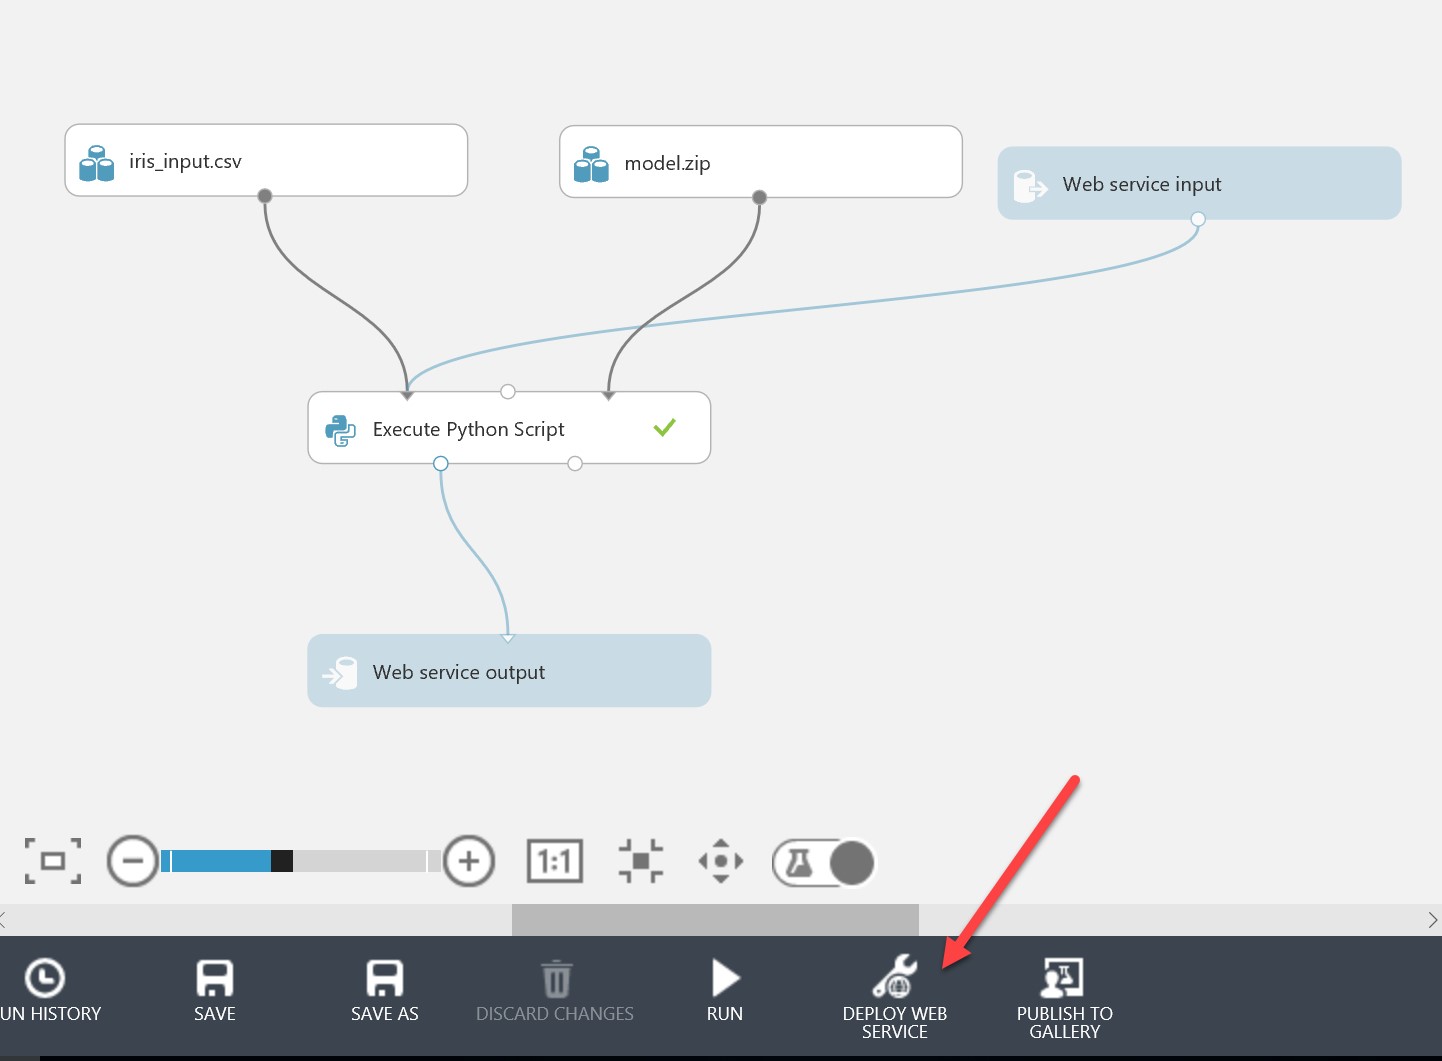
This will generate web service input and output modules. By default the output module will connect from the 2nd output port of the Python script. You will need to change this so that it connects from the 1st port, which is the result data set. Make sure your pane looks like the below:

Save the experiment. Before deploying the web service, you will need to run the experiment again (this is so Machine Learning Studio can determine the correct inputs and outputs from running the end-to-end model). When this is run and you have a green tick, you can hit “Deploy Web Service”:
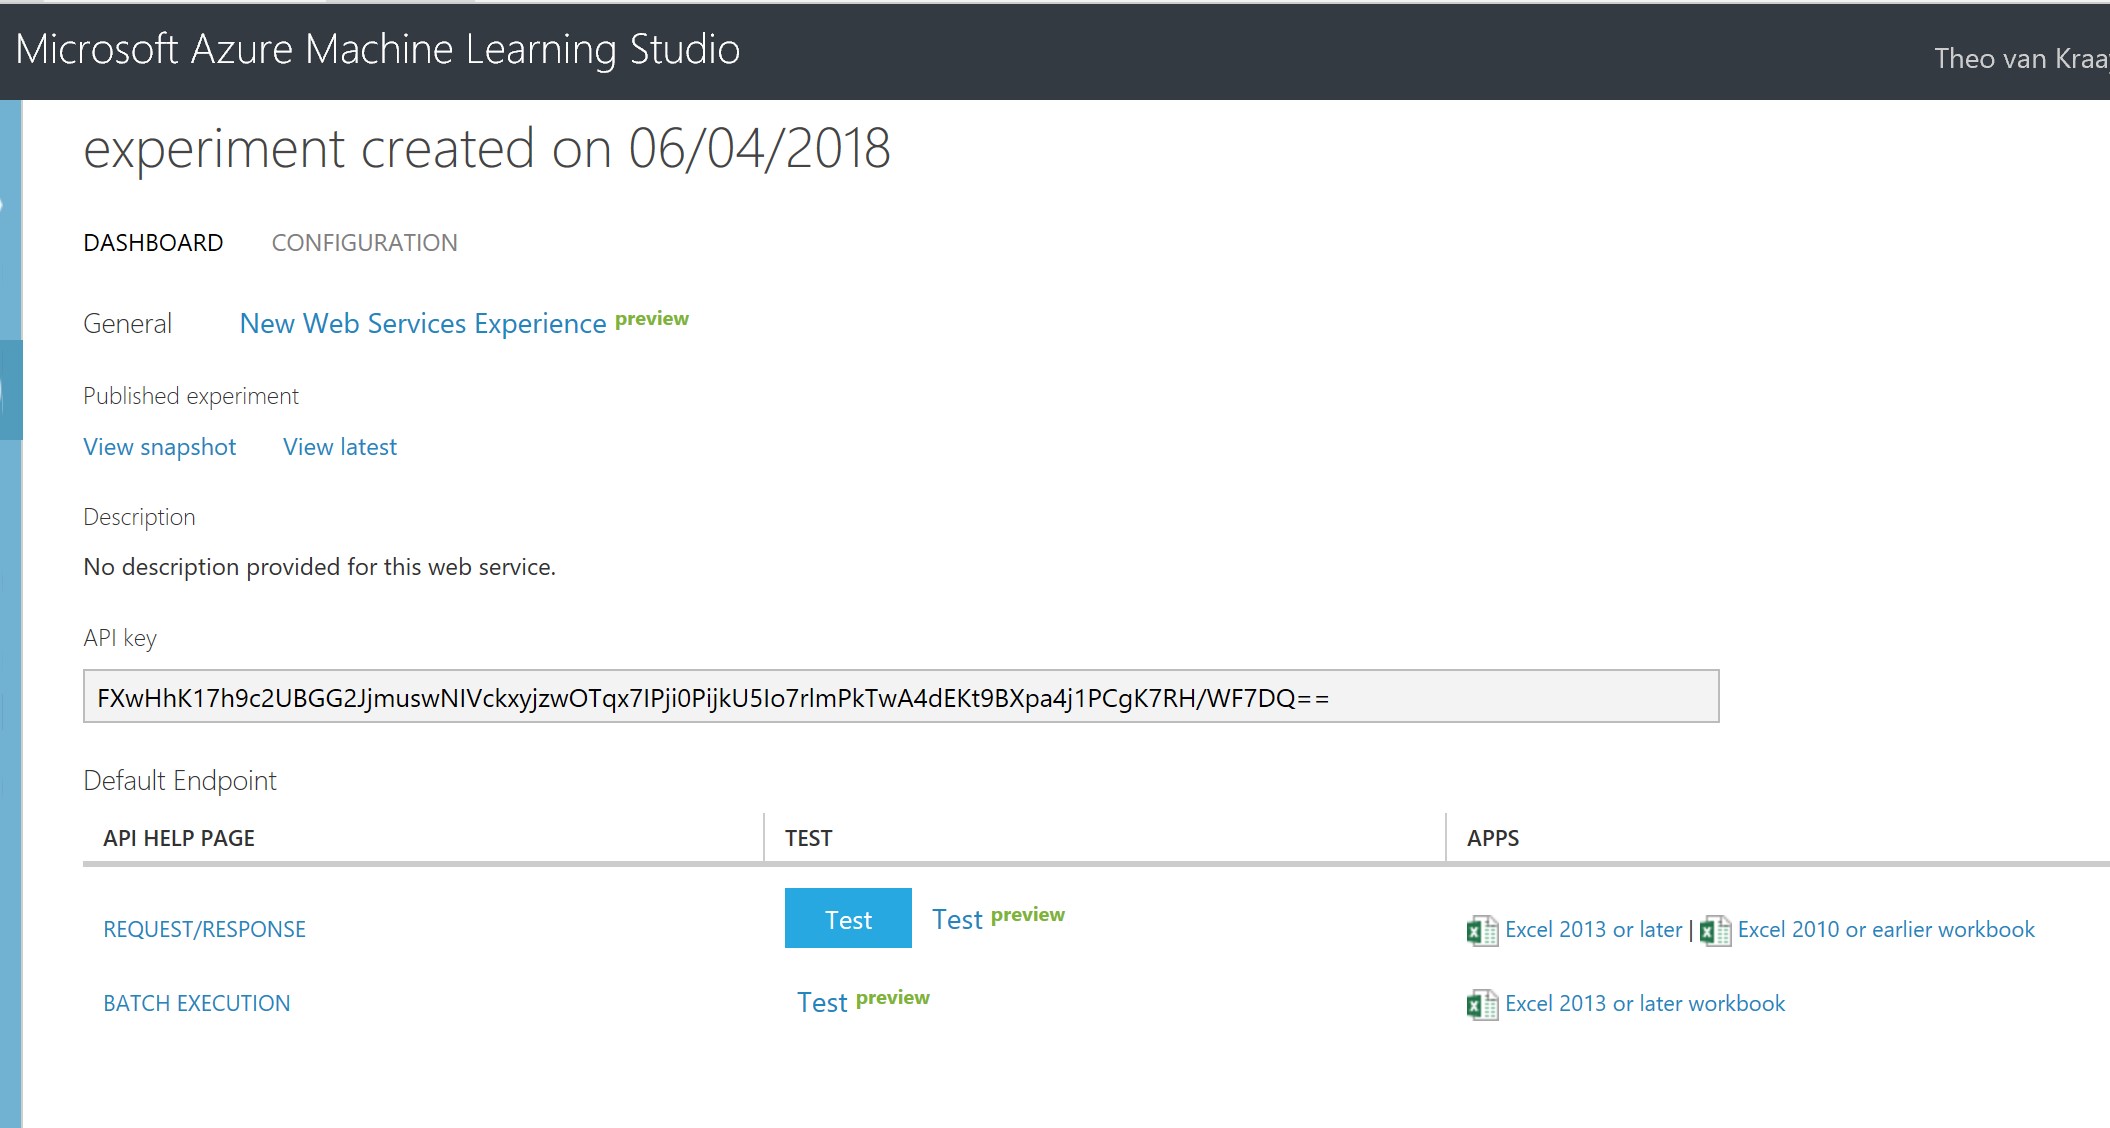
This will take you to a screen with information about the newly provisioned web service, including the API key which you should store for later:
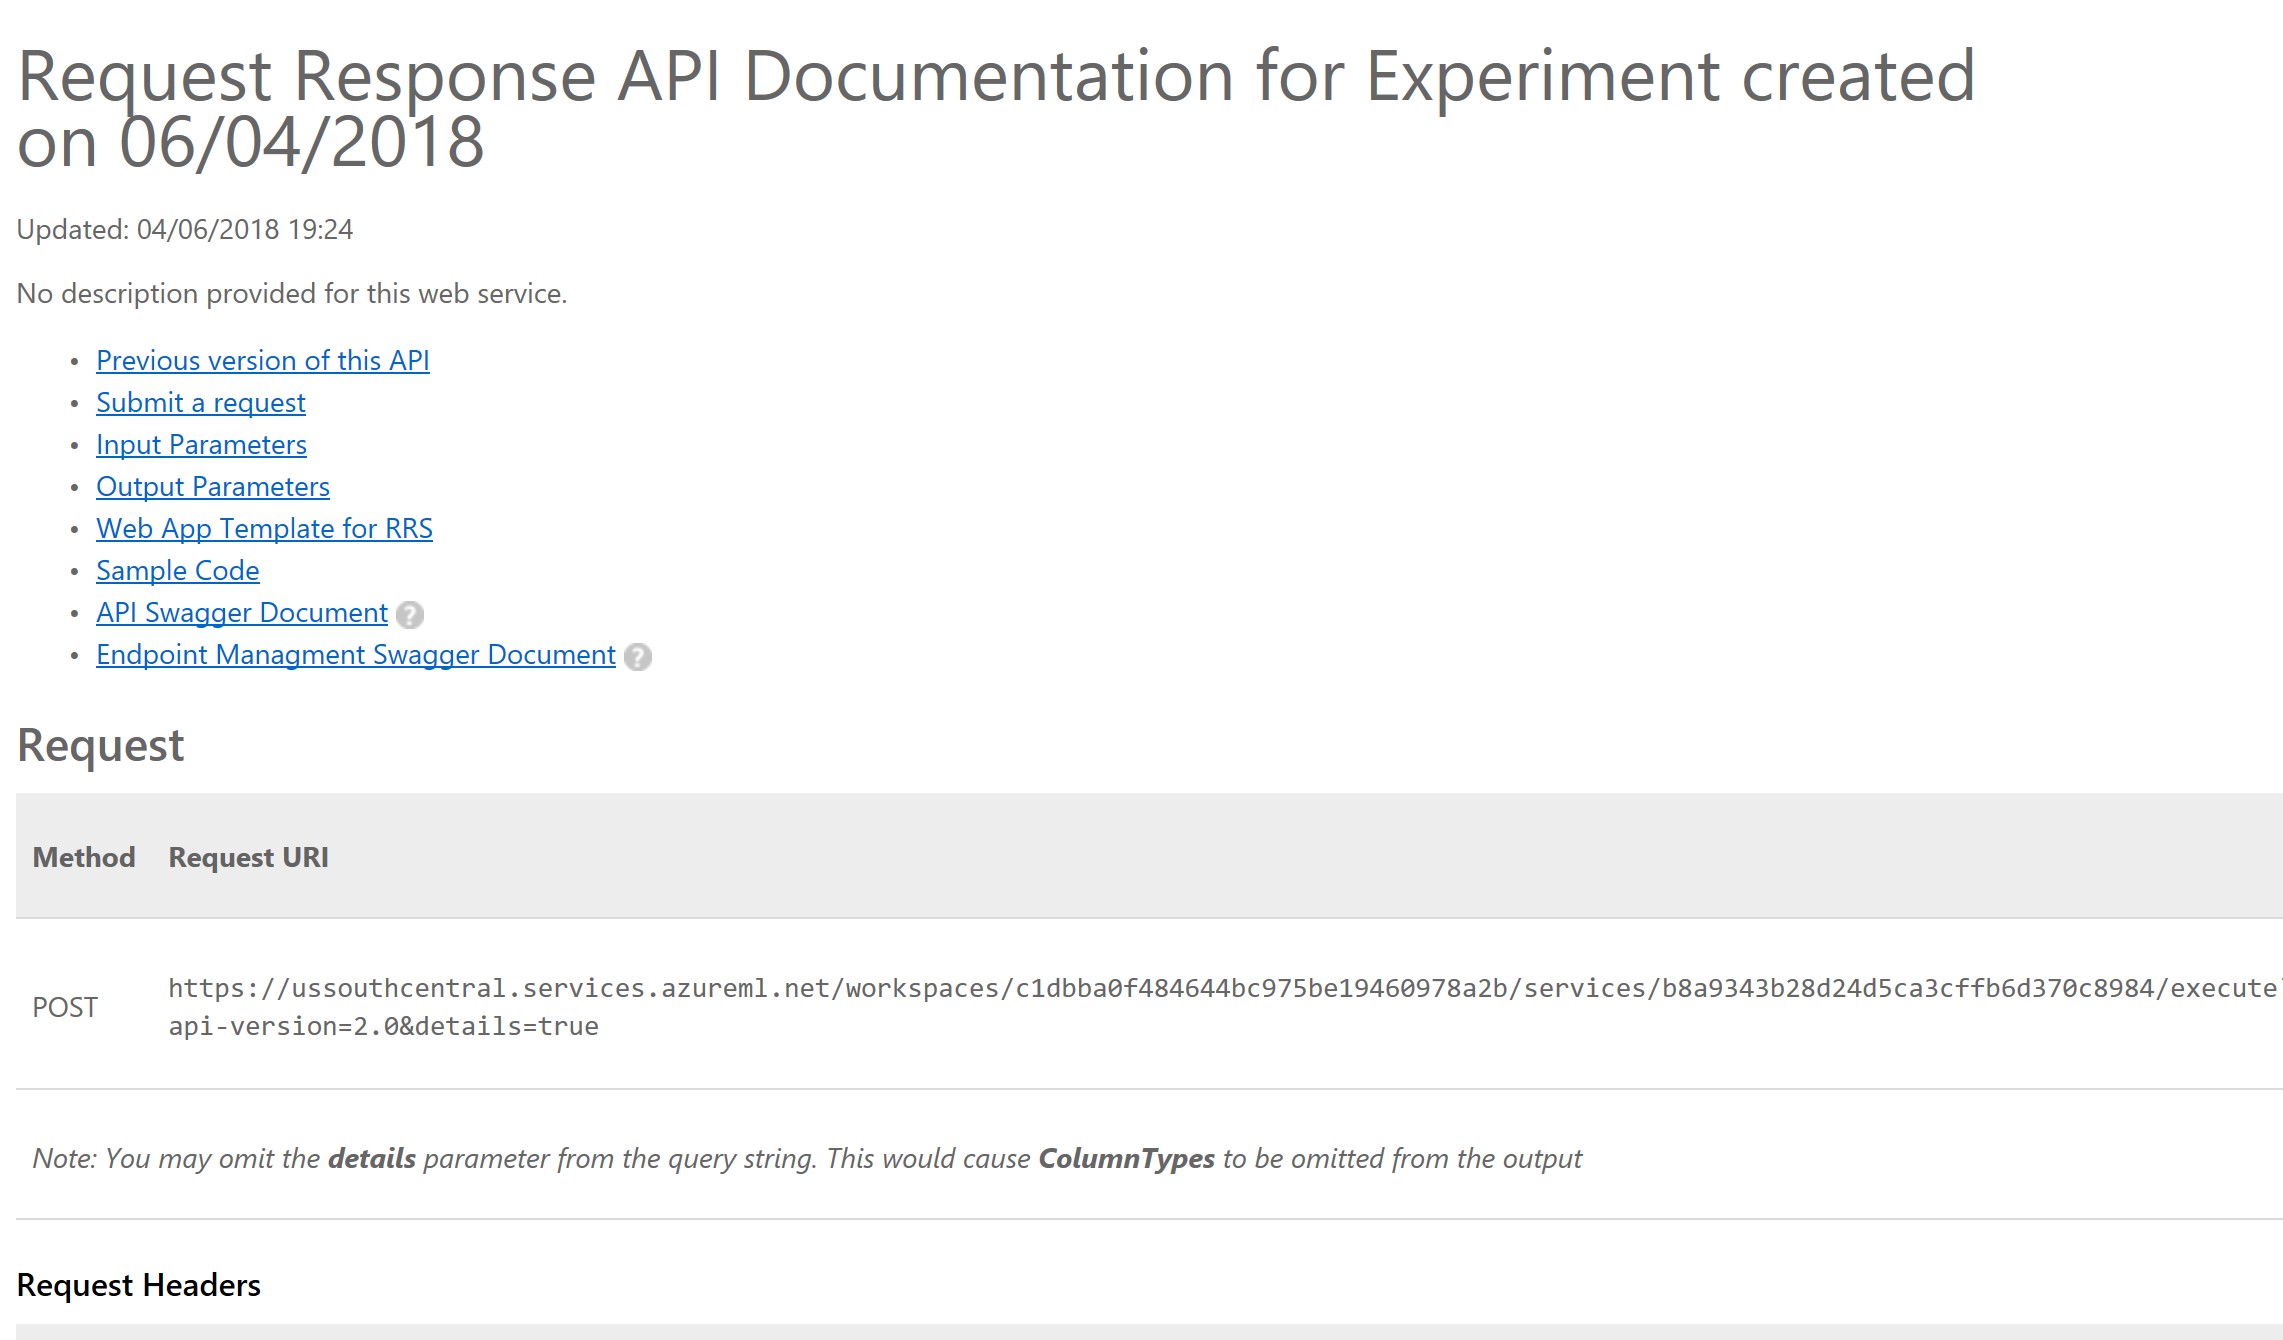
If you click on Request/Response, this will open a new window with a comprehensive set of information about calling the web service, including Swagger documentation, and sample client API code:
We can follow exactly the same process for externally generated and saved models in R. For example, we can use a Support Vector Machine to train a model using the same iris.csv file mentioned earlier, in R:
library(kernlab)
rbf <- rbfdot(sigma=0.1)
irisSVM <- ksvm(Species~.,data=iris,type="C-bsvc",kernel=rbf,C=10,prob.model=TRUE)
save(irisSVM, file = "c:/irisSVMmodel.rda")
We can zip and import the irisSVMModel.rda file created above. The R script to load the saved model in Azure Machine Learning Studio, using “Execute R Script” instead of “Execute Python Script”, would be as below:
library(kernlab)
dataset1 <- maml.mapInputPort(1) # class: data.frame
load("./src/irisSVMmodel.rda");
prediction <- predict(irisSVM, dataset1, type="probabilities")
dataframe <- prediction
index <- which.max(dataframe)
df <- colnames(dataframe)
result <- data.frame(df[index])
# Select data.frame to be sent to the output Dataset port
maml.mapOutputPort("result");
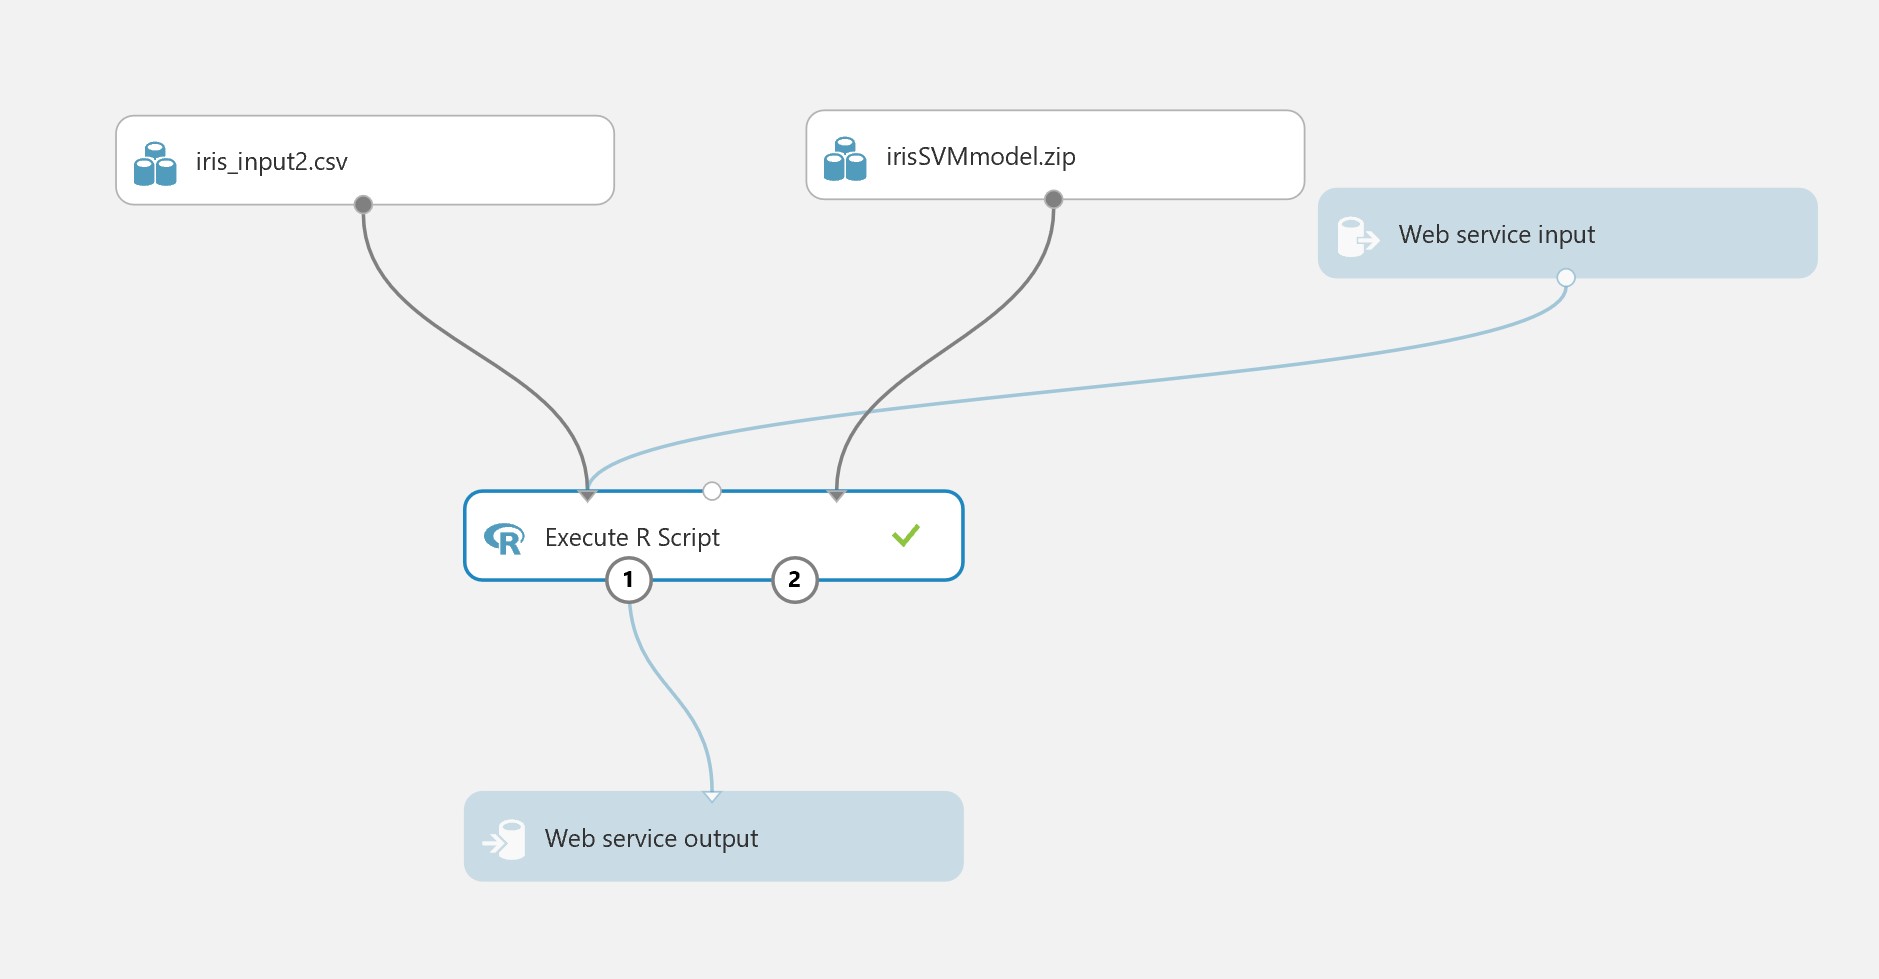
We can publish in the same way:

Performance considerations
Although performance may be adequate for small models and limited throughout, since the Azure Machine Learning Environment is a managed service (where you are not in control of the physical resources) and the model is being de-serialized at runtime for each execution, you may need to consider the performance characteristics.
It would be advisable to test/evaluate the following, and ensure you are content with the results:
- Is there a “spin up” latency after some inactivity? What are the characteristics of that?
- What is the average latency for 100 sequential requests
- What is the average latency for 10 parallel requests done 10 times in a sequence?
- Does changing the scale of the web service affect these statistics?
CICD
Additionally, whilst the graphical user interface is a convenient tool for deploying web services adhoc, you may also need to consider the Continuous Integration/Continuous Delivery (CICD) paradigm within your organisation. The methods discussed above assume that the Data Scientist has control over the deployment process and/or this process is not automated, but in the context of CICD, such approaches may be inadequate. Automation of web service deployment is possible through the Azure Machine Learning Studio automation SDKs/APIs. For more details, see here for R, and here for Python. As mentioned above, you may also prefer to use AML Workbench for this.
For more information on the various Machine Learning Environments and capabilities in Microsoft Azure, go here.