The current Windows Virtual Desktop HTML5 client is currently accessed using a Microsoft URL which is reasonably long and also is the exact same for every customer:
https://rdweb.wvd.microsoft.com/webclient/index.html
This isn’t ideal if you work for an enterprise and want your users to be using a corporate URL in order to access what are corporate applications and data from the Windows Virtual Desktop service.
What would be better is to use a URL that looks something like myapps.contoso.com.
There are two very simple methods to achieve this, the first is using an Azure Function App, the second is to use Azure Front Door – more details on AFD are at the end of this article.
An Azure Function App will require a tiny bit of code but can be free to use, whilst Azure Front door does not require any coding at all for this capability, but will always have a cost.
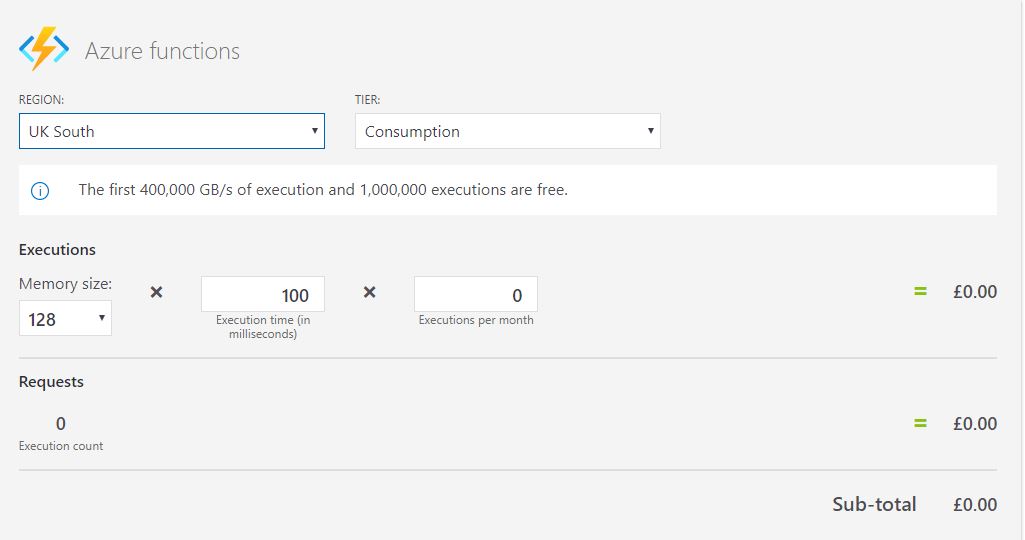
This article describes how to do this using a Function App, and will guide you through how to set this up. One of the great things about Function Apps is that the first 1,000,000 executions are free which is very handy.
First thing you will need is an Azure Subscription and have access to your corporate DNS in order to create a CNAME record.
A Function App is a serverless application that allows you to run small pieces of code without the need for any infrastructure.
Create your Function App
In the Azure portal click on Create a Resource.
Search for Function App.
Give your app a name and select .NET Core as your runtime stack.
On the hosting tab, create or select an existing Storage Account. For the Plan type, as this is such a tiny Function App select “Consumption”. See this
article for details on pricing.
I switch off Application Insights as this app only does one thing. But you might want to enable this for alerting in case the link changes or someone changes the DNS entry.
Create your Function App.
In your Resource Group you will have an App Service, an App Service Plan and a Storage Account. Click on the App Service.
Now you will need to add some code to your new Function App.
Click on the New Function button.
Select the Azure portal to be your development environment, and click on Continue.
Click on More Templates, and Finish and view templates.
From the resulting templates select HTTP Trigger, give it a name and click on Create.
Now you will need to enter your code. Delete what is there and enter your own code.
This is the code that I use:
usingstatic System.Environment;
using System.Net;
using System.Net.Http;
using System.Net.Http.Headers;
publicstaticasync Task<HttpResponseMessage> Run (HttpRequestMessage req, TraceWriter log) {
string OriginUrl = req.Headers.GetValues (“DISGUISED-HOST”).FirstOrDefault ();
log.Info (“RequestURI org: ” + OriginUrl);
//create response
var response = req.CreateResponse (HttpStatusCode.MovedPermanently);
if (OriginUrl.Contains (“myapps.contoso.com”)) {
response.Headers.Location = new Uri (“https://rdweb.wvd.microsoft.com/webclient”);
} else {
log.Info (“error RequestURI org: ” + OriginUrl);
return req.CreateResponse (HttpStatusCode.InternalServerError);
}
return response;
}
All you will need to do is replace myapps.contoso.com with your corporate URL that you want your users to consume.
Click on Save.
Click on </> Get function URL, and then click on Copy.
The next thing you will need is a Proxy.
On the left-hand side click on Proxies and click on the + to create a new one.
In the New Proxy window enter a name, for the Route template enter a “/”. Accept All methods in the Allowed HTTP Methods drop down, and then in the Backend URL paste in the URL copied from above.
Click on Create.
Final thing for the function app is to add your corporate domain as a custom domain.
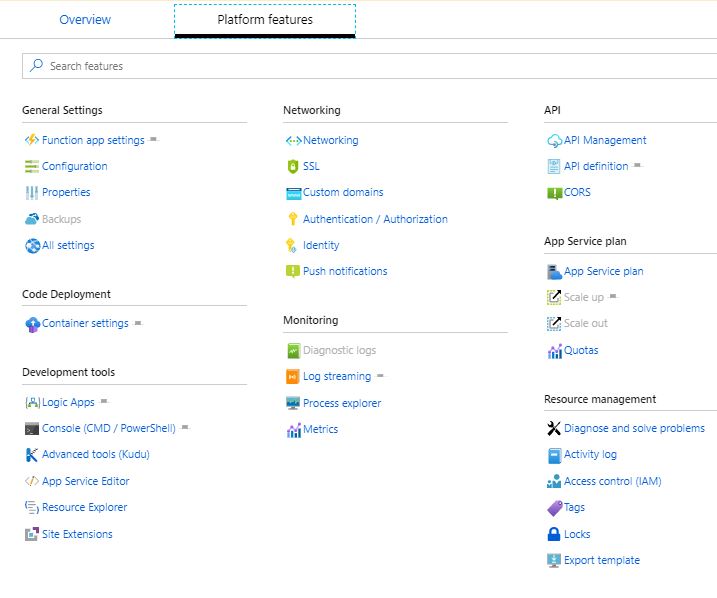
On the left select your Function App name, and then on the right click on Platform Features
Click on Custom Domains.
In the Custom domain blade click on Add Domain.
Enter your domain name and click on Validate.
The next blade will provide you the CNAME record that you will need to create in your DNS service.
Copy the Value text in the Domain Ownership section, then go to your DNS service and create a new CNAME record that maps “myapps” for your domain to the Value. (This may take some time to propogate).
Once that has been created successfully, come back and click on the Validate button once again.
The Domain ownership icon will change to a Green Tick.
Then click on Add Custom domain button
This will add your custom domain into this Function App.
At this juncture you may be thinking, if I am creating a DNS record to forward to the function app why don’t I just forward to the RD Web client URL directly and cut out the function app.
Well a CNAME record just forwards one domain to another (including sub domains), i.e. domain1.com to domain2.com, but importantly stops at the Top Level Domain (tld) as in .com
Now the RD Web Client Web application resides at
https://rdweb.wvd.microsoft.com/webclient/index.html – after the .tld.
We could create a CNAME record to https://rdweb.wvd.microsoft.com. However, at the root of this domain resides the WVD Consent Web App, which we don’t want. Hence we need something with a little more control to get to the application at /webclient
Now all you need to do is test it. It should look like this:
Azure Front Door
However, AFD does not have a free option, hence whilst not massively expensive there will be a cost associated to what is a simple redirect service. This is because AFD is a much richer service and has a whole lot more functionality such as SSL Off Loading, WAF with DDoS, Autscale etc, in order to provide enterprise grade Web Application hosting.
Now if you already have AFD then adding a simple Redirect Rule is very simple, or you may want some of the extra capabilities that come with AFD for web application hosting that are not present in Funcation Apps. If so then Azure Front Door might be a better option for you, and will take the same amount of time to configure without the need for any coding.