
Get started with Azure DevOps Projects
DevOps makes your products and processes more reliable by introducing a practice that unifies people, process, and technology across development and IT. By taking advantage of DevOps, you can automate and accelerate software delivery in a reliable way.
It’s widely known that Azure DevOps is great for .NET solutions and deploying applications from the Microsoft stack easily to Azure and other platforms by using CI/CD pipelines. But that’s not all. Azure DevOps is also designed to create this same experience for any language and any platform. This broad capability makes it the ultimate solution for deploying any type of project into Azure. By embedding DevOps in every software development project, you can reuse successful deployment and testing patterns across your organization.
In this article, I’m going to show you how you can create a full DevOps project from scratch in a just a few clicks. We are going to end up with a sample code project, a build and release pipeline, and an infrastructure in Azure—all automatically created and deployed using Azure DevOps Projects. This will create the core of a successful DevOps project and can be reused for every type of project. In my daily work we use Azure DevOps Projects as the core of every software development project. For developers this is the tool to create applications in source control and use the boards for planning. Information technology operations (ops) provide secure building blocks that are thoroughly tested, and security hardened. The developers (devs) use these building blocks to deploy their applications to the different environments.
Create the Azure DevOps project
The first step is to create a DevOps project in the Azure portal. Therefore, take the following steps:
- Navigate to the Azure portal by opening https://portal.azure.com.
- To create a new Azure DevOps project, click Create a new resource in the left menu.
- In the search box, type: DevOps Project and create a new project.
- In the next screen, you have to select the language that you are going to use:
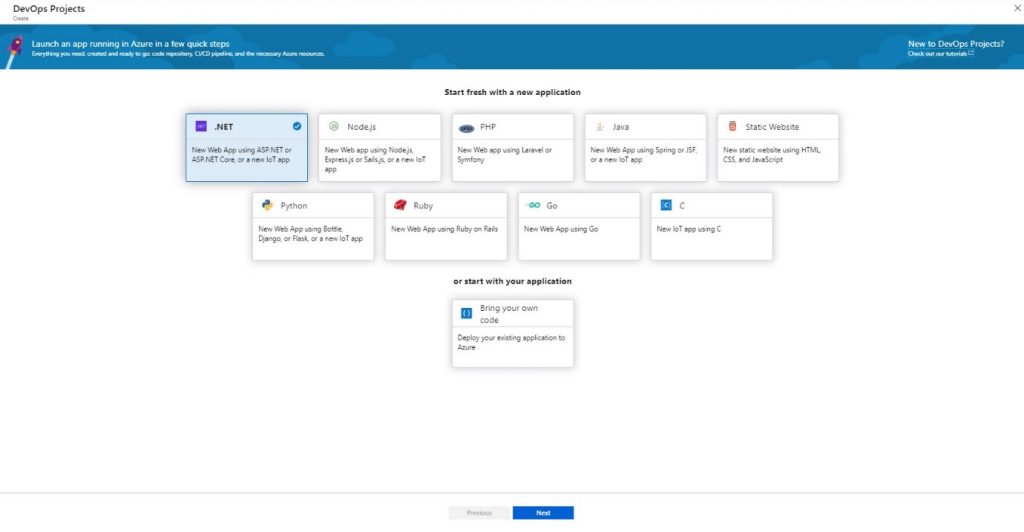
- In here, you can select all the different languages and frameworks that Azure DevOps projects support. For every language, the way of working and the artifacts that are going to be deployed automatically will remain the same. For this demo, select .NET and click
- In the next screen, you have to select an application framework. For .NET, you can choose from the frameworks below:
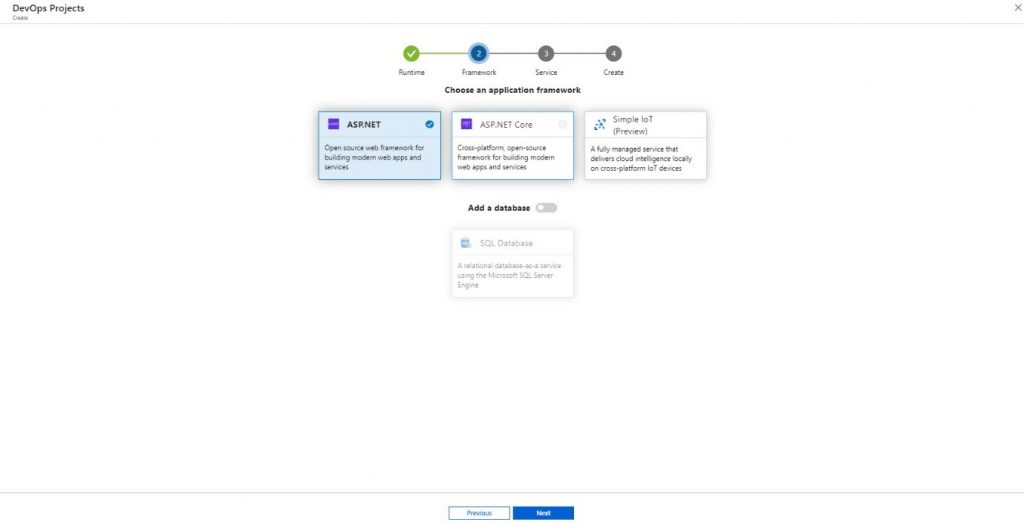
- Select NET and click Next.
- In the next screen, the Azure service needs to be selected. You can choose from the following options:
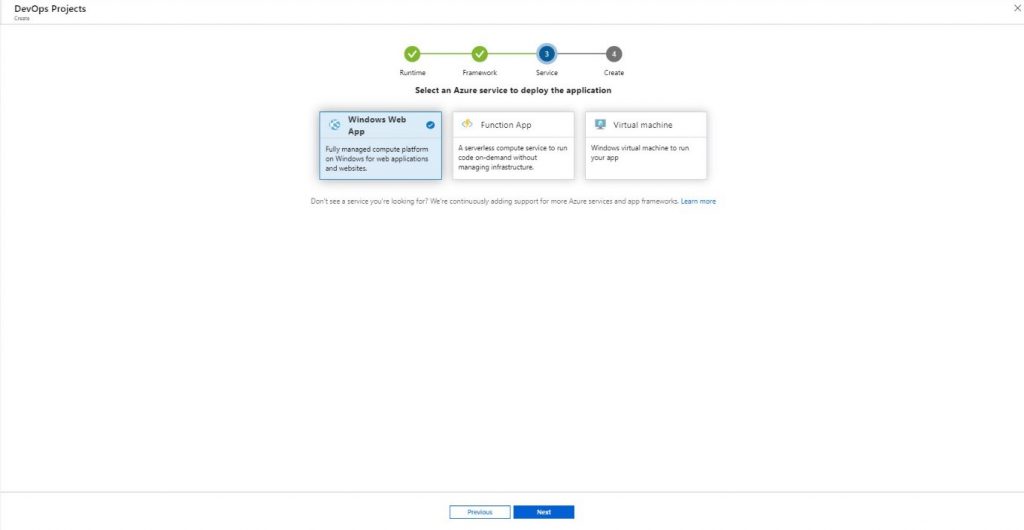
- Select Windows Web App and click
- In the last screen, you need to specify the project details. Give the project a name, select a subscription and location, and specify a name for the web app:
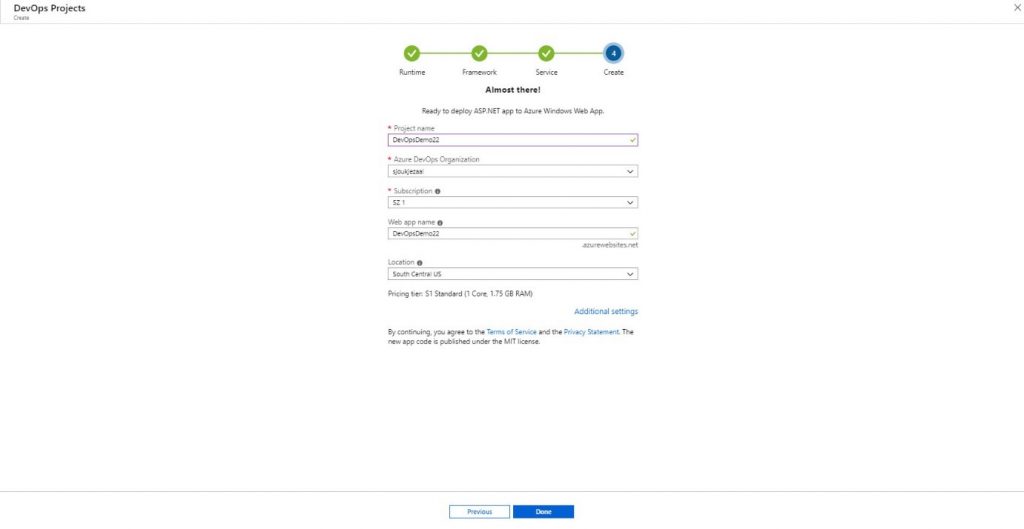
- If you don’t have a DevOps organization in place, click Additional settings and create a new DevOps organization. Provide a name for the DevOps organization.
- Click Done.
The project can now be created in Azure DevOps and the sample code is added to the source control of Azure DevOps. There is also a CI/CD release pipeline created and the sample project is automatically deployed into the web app that we created in the previous step. This will build the powerful foundation of the full DevOps project, which is specifically designed for automation and speed of testing and deployment. When all this is provisioned, we can proceed with the next step.
Make changes to application
After creation, you can make coding changes to the application using the tools and frameworks of your choice. There is a Git repository created for you, where the sample application is deployed. You can use two types of source control provided by Azure DevOps: Git and Team Foundation Version Control. You can also add more projects to it and use the built-in scrum boards and planning tools for an agile way of working, to help your teams run sprints, stand-ups, and planning.
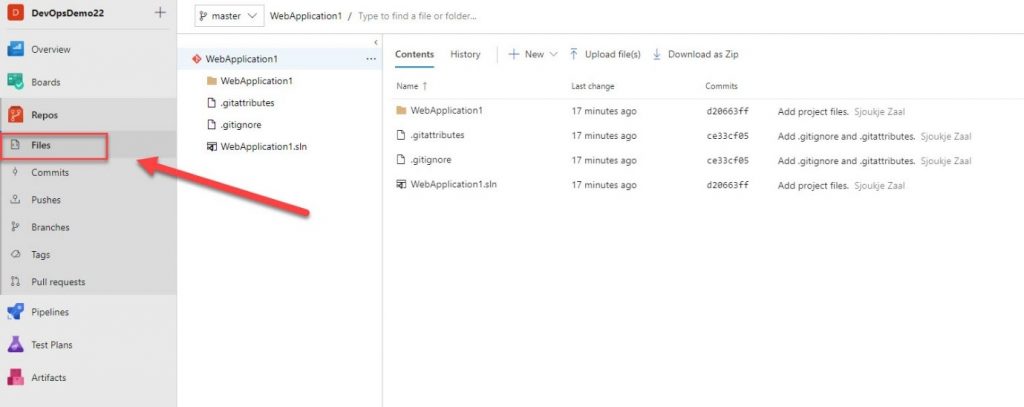
If you want to make changes to the sample code, you can navigate to the Azure DevOps Git repository (DevOps Project) by clicking Project Homepage. There, you can view the code and make changes to it. Therefore, you have to click Files in the left menu:
For this tutorial, I’m going to skip the part of making any code changes to the application and proceed with building and releasing the application.
Build and release
When the project is created, there is also a build-and-release pipeline (CI/CD) created automatically. Continuous integration (CI) is the practice used by development teams to automate the merging and testing of code. Implementing CI helps to catch bugs early in the development cycle, which makes them less expensive to fix.
The build that is created for you in the first step, will automatically compile all your code changes and you can embed unit tests in there as well for automatic testing. To make any changes, we need to take the following steps:
- Our build can also be accessed from the DevOps portal. In the left menu, select Pipelines and then select This will take you to the build that is automatically created and used to deploy the sample application.
- Here, you can edit the build definition. Select Edit in the top right screen and in the next screen you can add and remove tasks to this build to customize it. You can add all sorts of out-of-the-box tasks, like deploying Azure artifacts or executing custom scripts, and you can pick some from the Marketplace or create custom tasks using PowerShell or Node.js.
Deploying to multiple environments
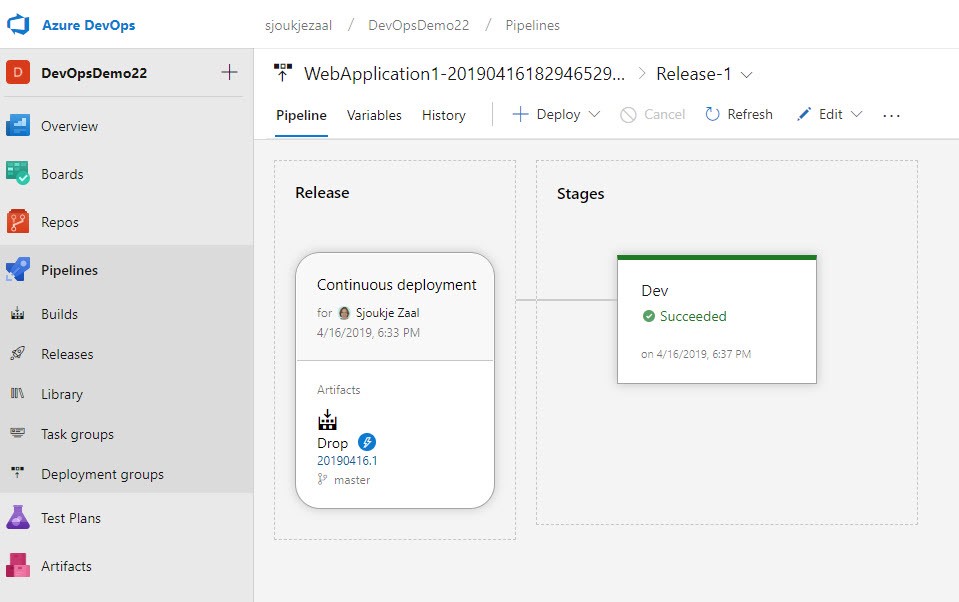
Once the build is completed, it is released using the release pipeline that is automatically created for you as well. Here, you can set the different environments where you want this build to be deployed.
- From the build screen in the DevOps Projects portal, on the left menu, under Pipelines, click Releases. This will take you to the release pipeline of the project. Select Release-1 to open the release pipeline:
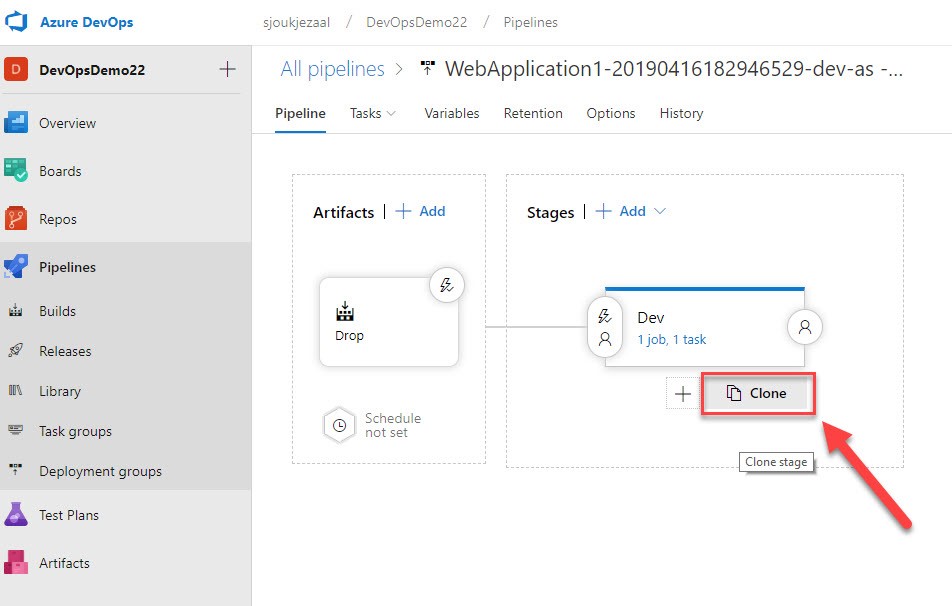
- If you want to deploy this project to multiple environments, you can clone the task from the In the top menu, click Edit > Edit pipeline.
- Select the Dev stage task and underneath click the Clone button:
- The task is cloned, and to change the name, click on the new task to open the settings.
- Change the name to Production and click the Save button in the top right corner of the screen:
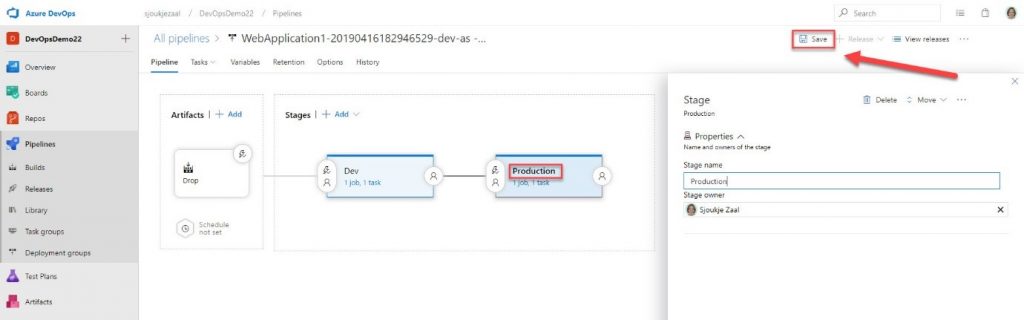
- If you want to customize what happens inside this build, select the job and task link inside the different stages.
Useful links
In this blog post, we’ve created an Azure DevOps Project from the Azure portal. We’ve let Azure create a sample application using the programming language of our choice and deployed it using CI/CD pipeline. If you want more information on how to get started, please refer to the following articles: