

How you can make your databases more efficient with Azure DevOps

One core objective of any development project is the ability to safely and securely accelerate the delivery process. And the foundation of any such project is the database it’s built on. That’s why it’s important that the database development project is integrated into the pipeline in Azure DevOps as well.
In this article, we are going to add a database project to Azure DevOps and we will set up continuous integration and continuous deployment (CI/CD). This way it can be part of the automatic build and deployment, just like all the other projects in Azure DevOps.
For this demo, we are going to create a new project in Visual Studio Team Services. We will also define and create a new database project in Visual Studio 2019 using SQL Server Data Tools. Finally, we are going to automate the build and deployment using Azure DevOps and deploy the database to a SQL Server Database in Azure.
Creating the project in Azure DevOps
The first step is to create a new project in Azure DevOps. Take the following steps:
- Open a web browser and navigate to: https://aka.ms/azdev-signin
- On the right side of the screen, click + Create Project
- Give the project a name, for instance
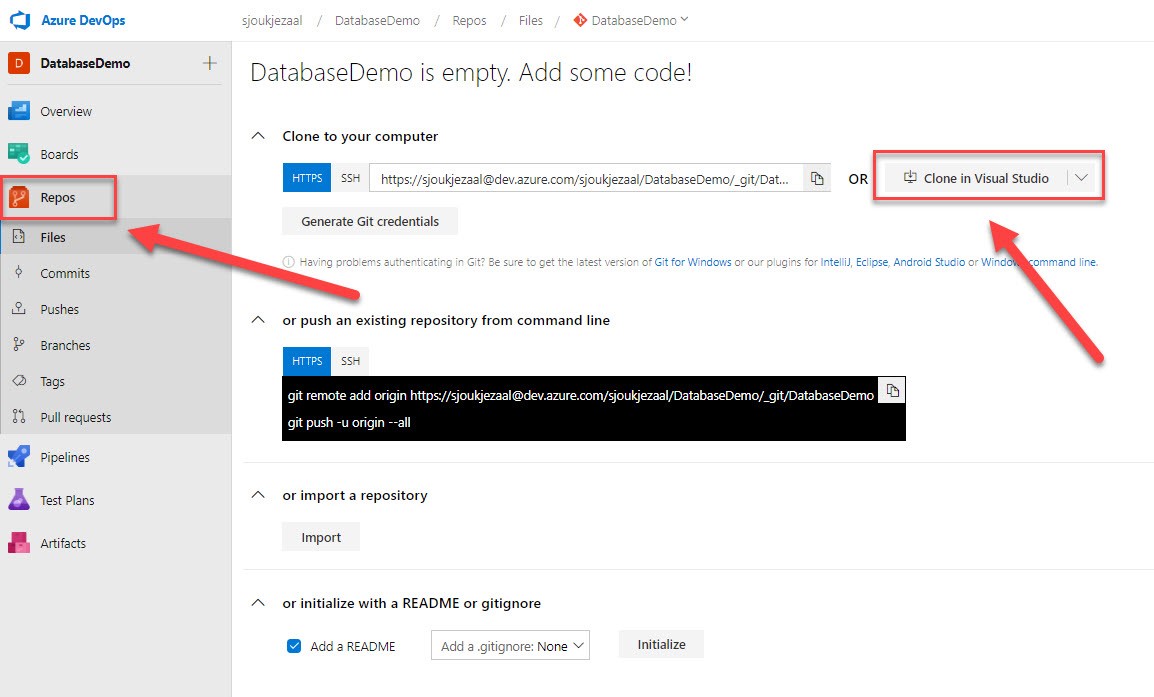
- After creating the project, select Repos in the left menu. On the Repos overview page, click on Clone in Visual Studio (if this is not selected, click on the arrow to select it) to open this project in Visual Studio:
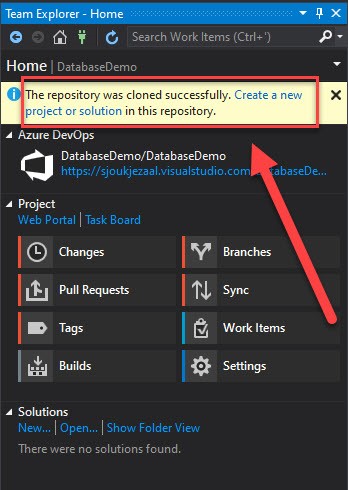
Visual Studio will now clone this project to your local file system and open it.
Creating the database project in Visual Studio
To create the database project, you need to be install SQL Server Data Tools on your system. This can be done during installation of Visual Studio or by running the installer again. Make sure that you select Data Storage and processing. For more information, you can refer to https://docs.microsoft.com/en-us/sql/ssdt/download-sql-server-data-tools-ssdt?view=sql-server-2017.
- In Visual Studio, in the Team Explorer window: select Create a new project or solution in this repository:
- In the search box, type Data and select SQL Server Database Project:
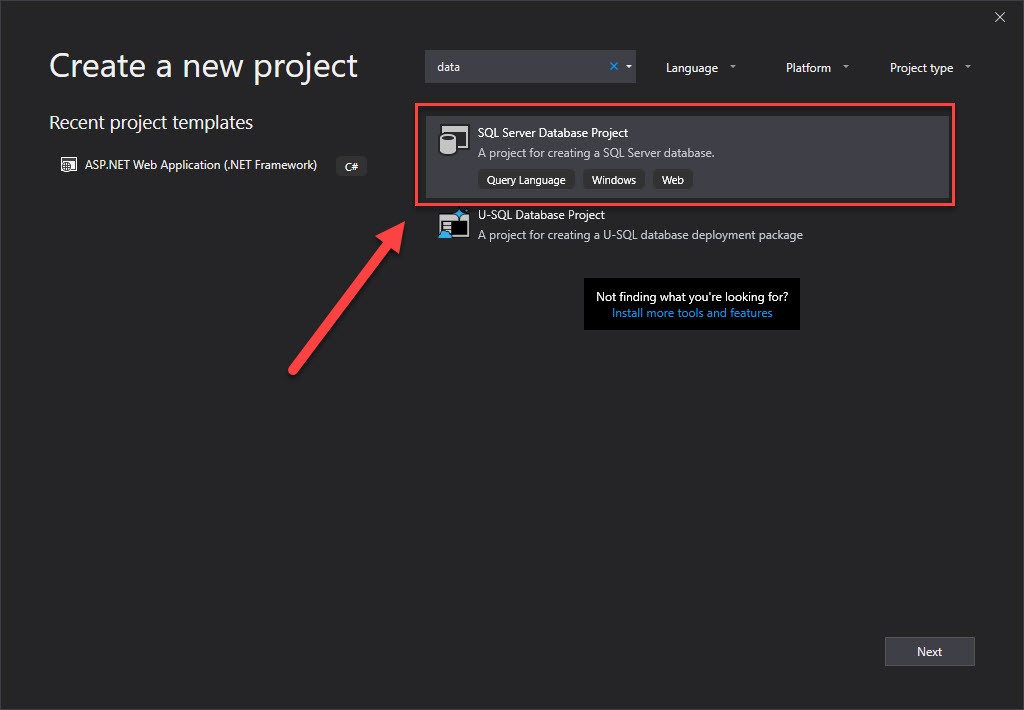
- Click Next.
- Add the Project name in the next screen of the wizard (and make sure that Create a new solution is selected:
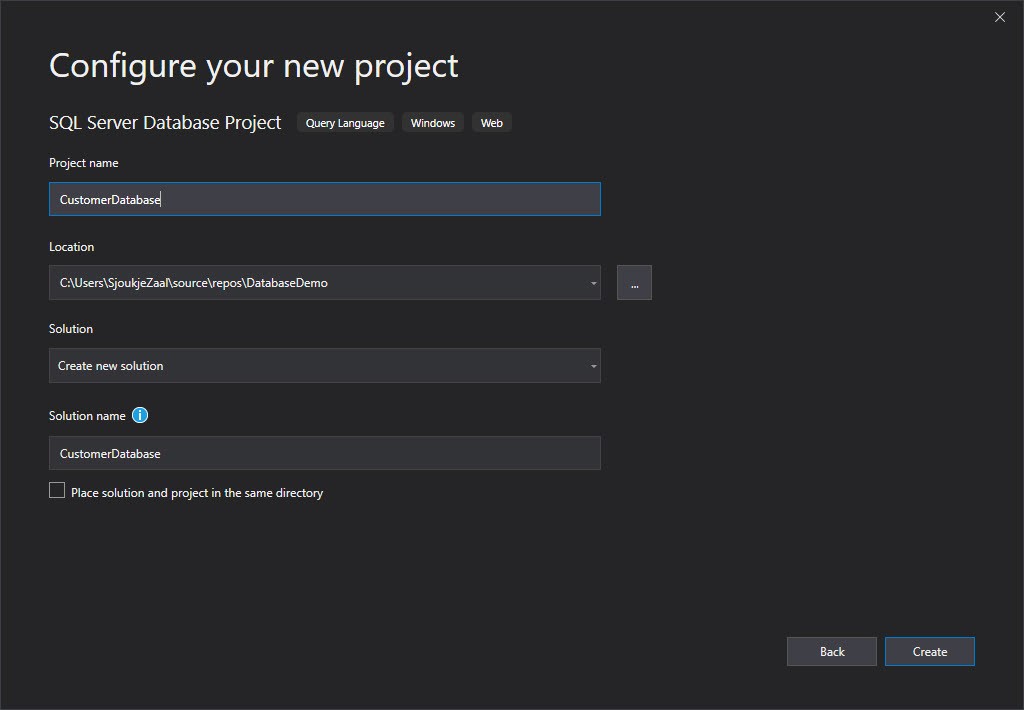
- Click Create.
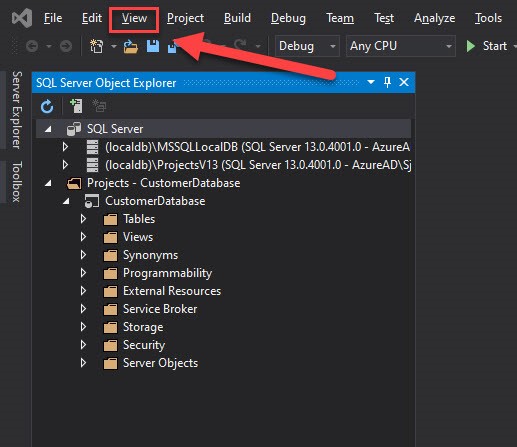
- After the project is created, select View > SQL Server Object Explorer in the top menu. Expand the projects folder there called CustomerDatabase, and you will see the database structure as displayed below:
- Right-click on Tables and select Add new table.
- Call your table Customer.
- You can now add the columns to the database designer. Add the following columns and data types:
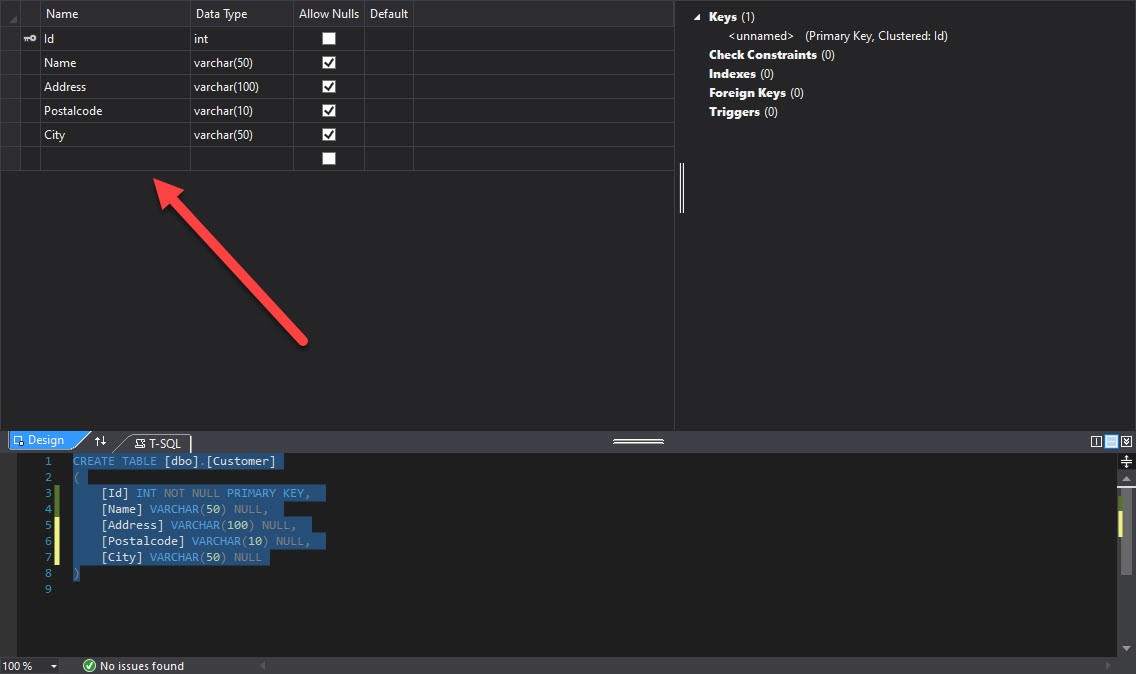
- You can add other table and views in here as well, if you wish. For this demo, leave it as it is. Save the file. If you then select Solution Explorer, you will see that there is a sql file added to the project.
- We now need to set the target platform to Microsoft Azure SQL Database V12. Right-click on the project file in the Solution Explorer and select Properties. In the Project Settings tab, make sure that Microsoft Azure SQL Database V12 is selected.
- To commit the changes to Azure DevOps, in the bottom right corner of Visual Studio, click the Changes button (the button highlighted below will open all the changes):

- You will now see all the changes Enter a commit message, and select Commit All and Push:
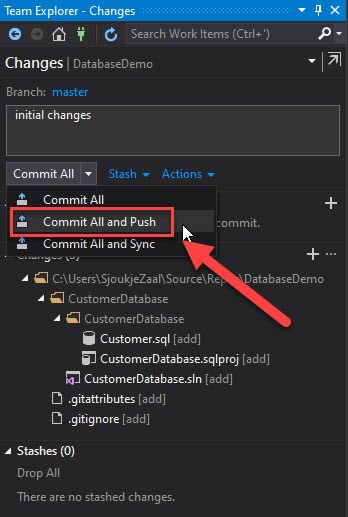
- The code has now been checked directly into the Master branch.
We have now created a new database and a table using the SQL Server Data Tools in Visual Studio.
Setting up CI/CD for your database in Azure DevOps
Before we can set up CI/CD for this database project, we need to have an Azure SQL Database server created in Azure. For more information on how to do this, you can refer to: https://docs.microsoft.com/en-us/azure/sql-database/sql-database-single-database-get-started. Call your database CustomerDatabase.
To set up CI/CD for our database, we must return to Azure DevOps.
- Open Azure DevOps again in the browser and navigate to the project.
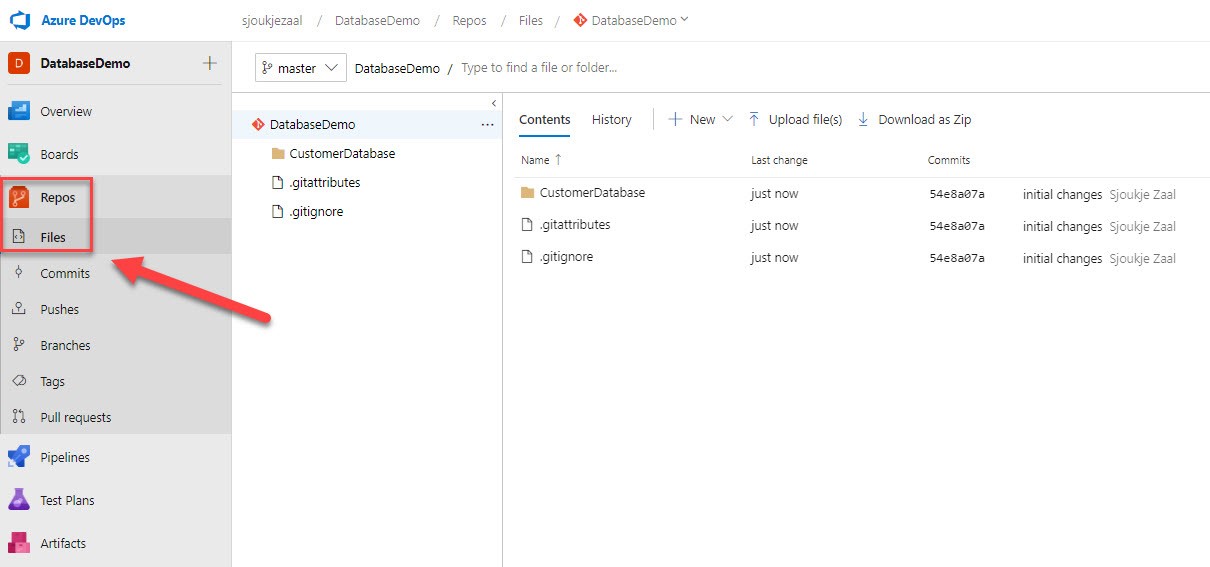
- If you click on Repos > Files in the left menu, you will see that the database project is checked in:
- First, we are going to create a new build for this project. For this, we need to define a new build definition. In the left menu, select Pipeline > Builds. Click the New pipeline
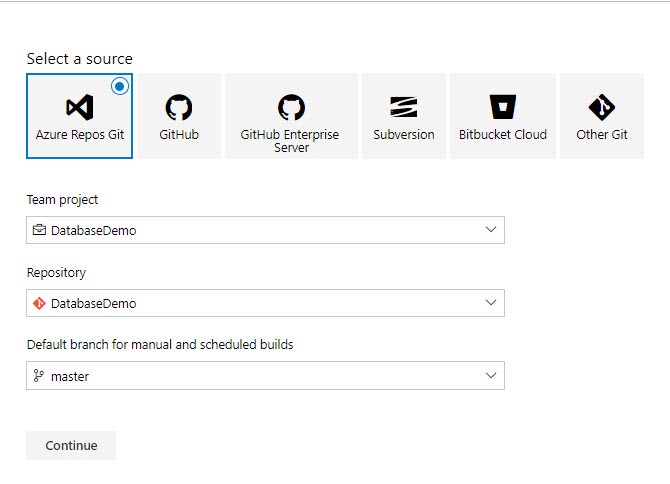
- In the next screen of the wizard, you need to select where your code is. Select Use the classic editor to create a pipeline without YAML.
- In the wizard, keep the default settings, which will look like the following:
- Click
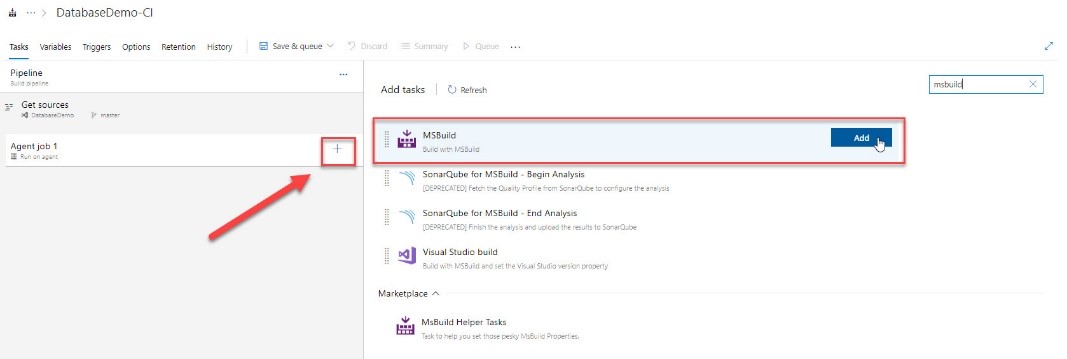
- Now we have a new job, which we can add tasks to. Click the + sign to the right of Agent job 1. Then use the search box to find MSBuild. Add this task to the agent job:
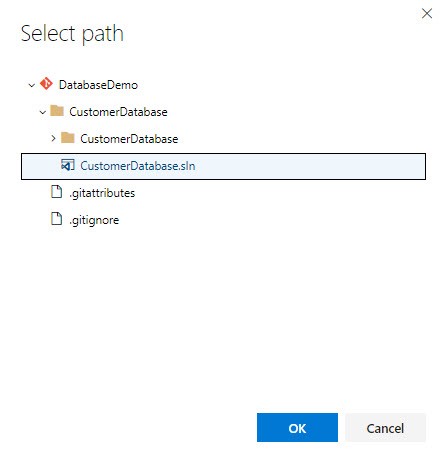
- Select the task after it is added to the agent. In this screen, we need to set the parameters for the build. Click the button next to Project and select the .sln file from the dropdown. Select OK:
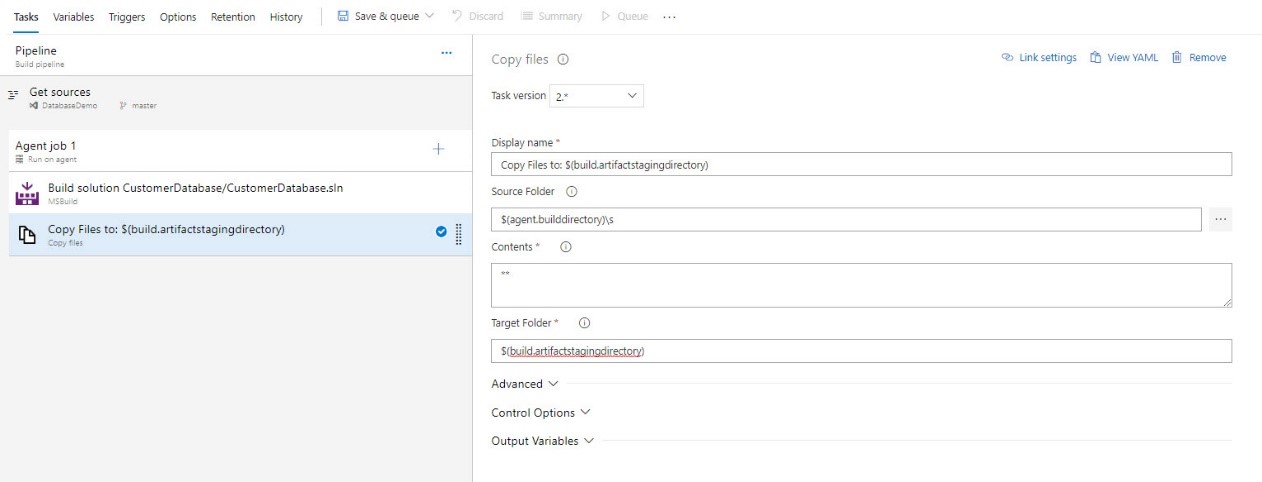
- Search for Copy files and add this task as well. Add the following configuration values:
- Source Folder: $(agent.builddirectory)\s
- Target Folder: $(build.artifactstagingdirectory)
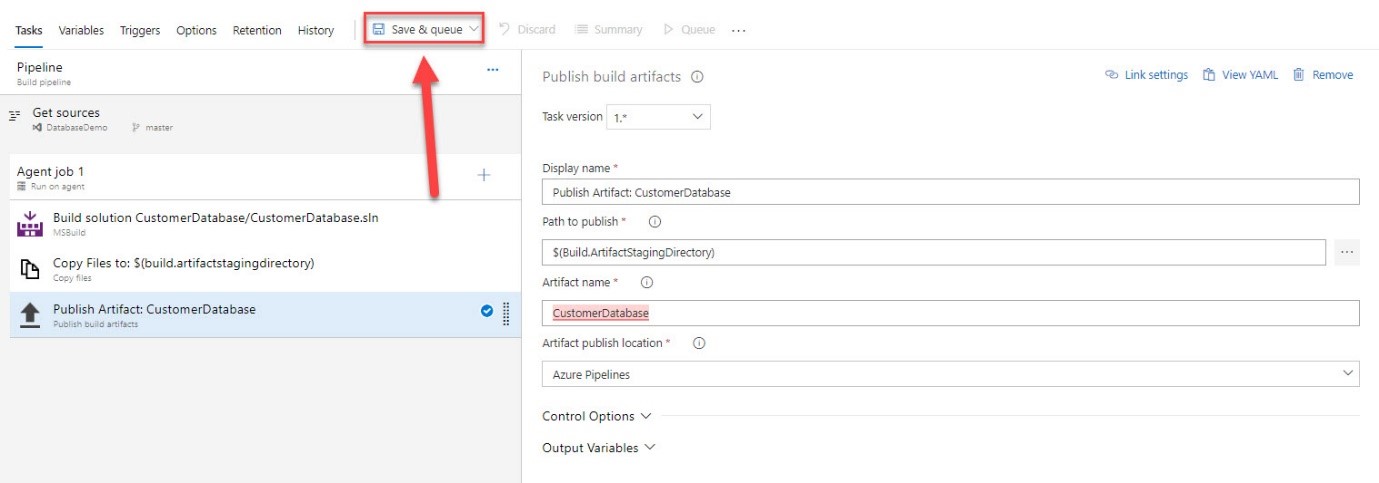
- Add a Publish Build Artifacts task to the agent and set the following value:
- Artifact name: CustomerDatabase
- Then select Save & queue:
- We now have an automatic build for this solution. You can check the process by clicking on the build number at the top of the screen.
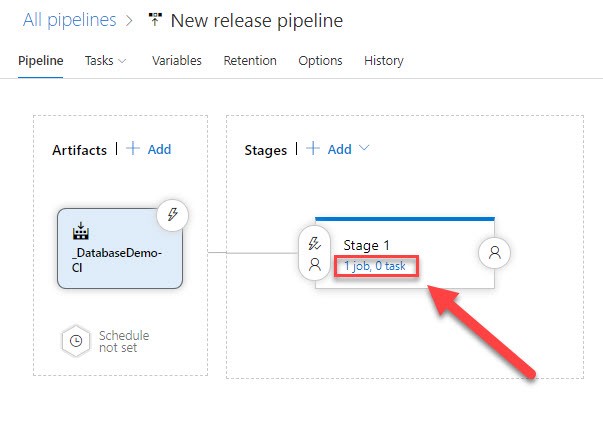
- The next step is to automate the release of this build. In the left menu, go to Pipelines > Releases. Select New pipeline.
- Again, start with an Empty job and then click on Add an artifact. Select the build that we created in the previous step and click Add:

- Now set the target environment. We are going to use the Azure SQL Server that we created earlier. Click the link underneath Stage 1:
- Click the + sign next to Agent job and search for database. Select Azure SQL Database deployment from the list:
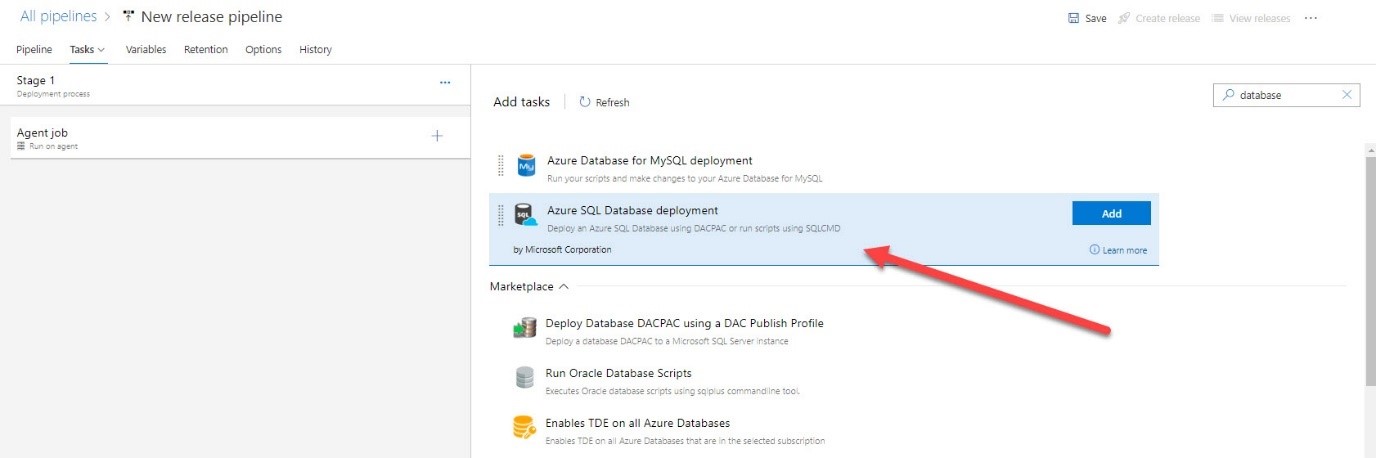
- Add the following configuration values:
- Azure Subscription: Select the subscription where the database server is deployed. If needed, click the Authorize
- Azure SQL Server: Specify the full URL for the database server (like customers6587.database.windows.net).
- Database: Specify the database name (like CustomerDatabase).
- Login: Specify the admin username.
- Password: Specify the admin password.
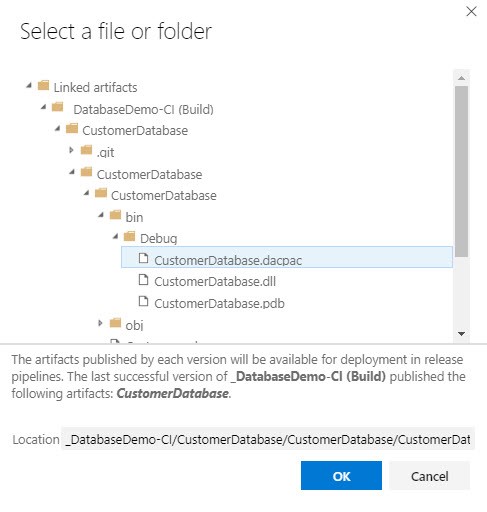
- DACPAC file: select the DACPAC file from the debug folder:
- Click Save in the top menu to save this release. Keep the default folder settings. After saving, click Create Release in the top menu (next to Save) to deploy this database to Azure.
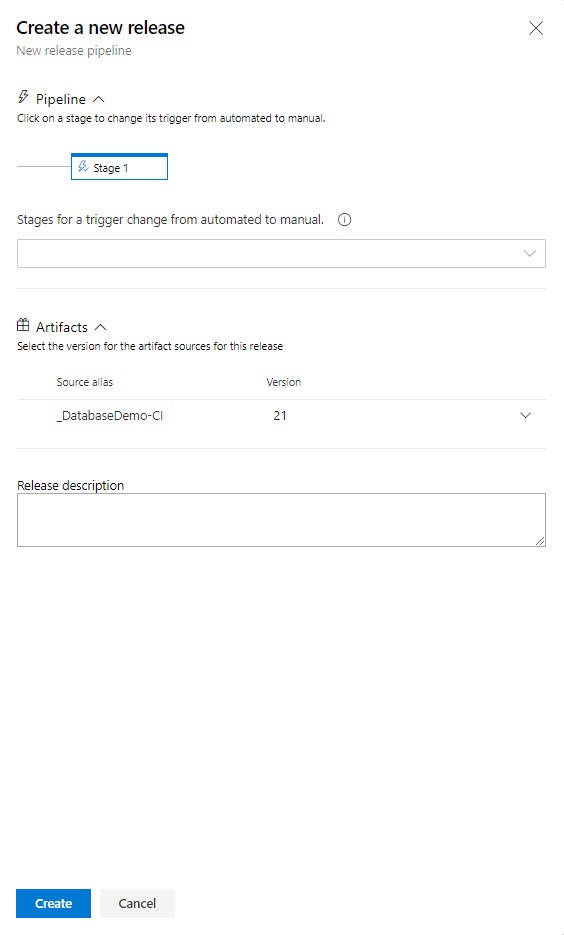
- Click Create:
- You can click the release number at the top of the screen to follow all the steps that Azure DevOps takes to deploy this database.
After the release is finished, you can check the database in the Azure portal. You can use the Query Editor to check the tables and add data to it.
Wrap up
In this article we have covered how you can add your database project in Azure DevOps. This way your database development team can safely and securely develop and deploy their database solution. Using the integration and continuous deployment (CI/CD features of Azure DevOps, the database development team can also benefit from automatic builds and automatic deployment.