

Injecting lineage and attributes into Microsoft Purview – Part 2

This is part two in a two-part series, so be sure to check out part one before you get started!
Attributes to enrich your metadata
Managed Attributes in Purview are a group of related key-value pairs that can be assigned against an asset to provide additional business context and understanding. The first step is to create the definition of these related attributes before they can be populated and assigned to an asset. Whilst one can do all of these steps using the Purview UI (public preview at the time of writing), this post will demonstrate how to use the associated APIs in order to automate the process.
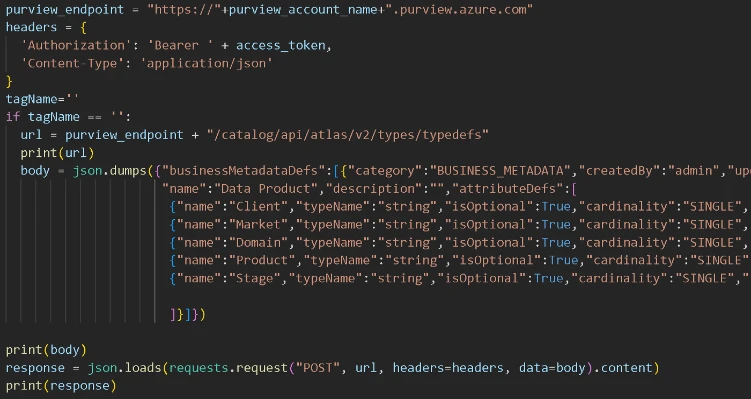
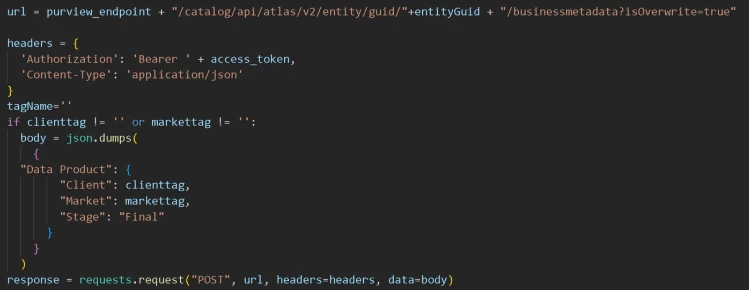
To create the definition of the group attributes we use the typedefs API, and then to populate the attributes against a particular asset we use the business metadata APIs. Business metadata can also be created using pyapacheatlas as shown in this sample, however, the next section will show you how to utilise the Atlas 2.2 APIs directly. Open the autotagger.ipynb notebook in VS Code or Synapse and follow along as we walk through the cells.
Our scenario is based on a common requirement – we need to add additional context to the assets based on some related information, such as source system or characteristics of the path (fully qualified name). For example, you might have a taxonomy system for your data lake whereby a folder name may include an acronym which defines the business unit, region or client. Let’s take an example – this is what an asset might look like in Purview after the initial scan…
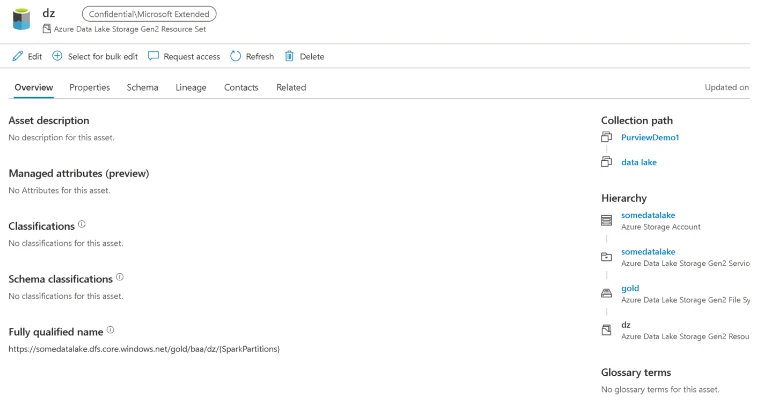
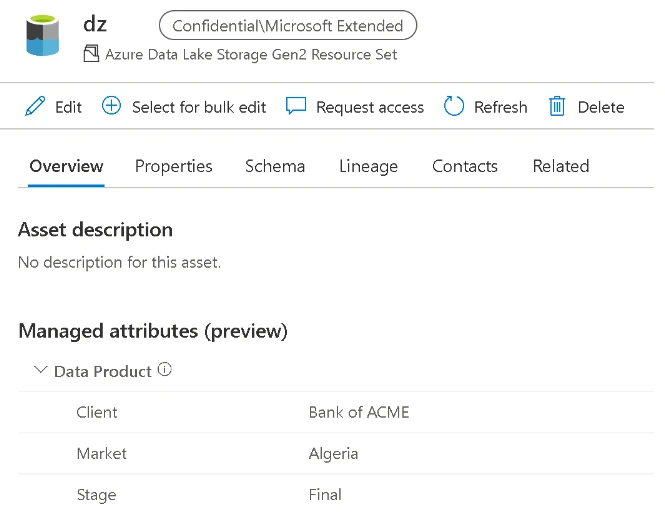
The path (fully qualified name) for this collection of spark files (resource set) has three mysterious acronyms, gold, baa and dz. The attributes we want to apply should be the full business terms, rather than the acronyms, so that data consumers are more likely to understand and find the data they’re looking for using words they’re familiar with. These acronyms will require some sort of translation or lookup of the acronym and the look up information could reside in an application, flat file or database. Data stewards could manually look these up and populate the asset’s attributes using the Purview UI if they wish, but as all the information is available programmatically, let’s automate the process…
The associated notebook provides boilerplate code (cells 1 and 2) for both file or database lookups, however, if you are using a database table you will need to ensure the pyodbc driver/library is installed and you will need to decide whether to use database or AAD authentication as the connection string will be different.
Cell 3 requires the account details and service principal credentials to authorise and interact with the Purview (Atlas) APIs. In cell 4 we define the business metadata group, in our example we named it “Data Product” with two main attributes, one for client and the other for market. Additional attributes such as data domain, product grouping or lifecycle (stage) may help define the data product, as show in our example. These related attributes can be thought of as placeholders, which will later be used when assigning key value pairs attributes to assets grouped by the business metadata definition.
As we are not able to assign/apply these attributes during the scan (although this may change in future within the Workflow feature), for now, we need to retrospectively (after a scan) identify the assets which we wish to tag in order to start populating these attributes and assigning them.
In the sample notebook we have defined a search query which returns all the resource sets below a certain path in ADLS within a specific collection.
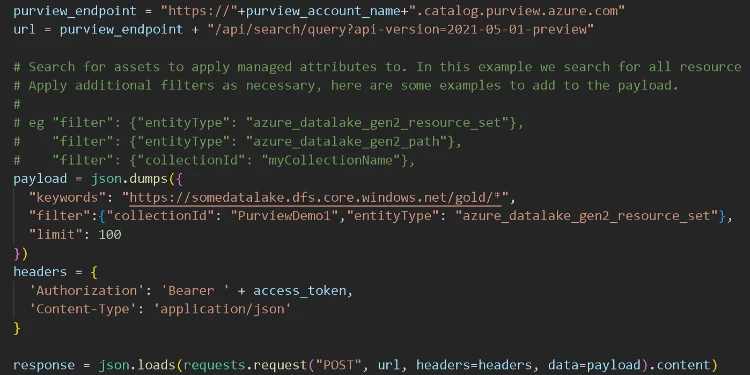
Assume we want to tag all assets ready for consumption and we know that these are stored in this “gold” container so all of these assets should be tagged with the Stage attribute set to “Final”. The logic loops through the assets found below the gold container level and inspects two levels deep in to the folder hierarchy, one for client and the next level down for market. At each level it performs the associated lookup using the dictionary objects for market and client created in the first step.
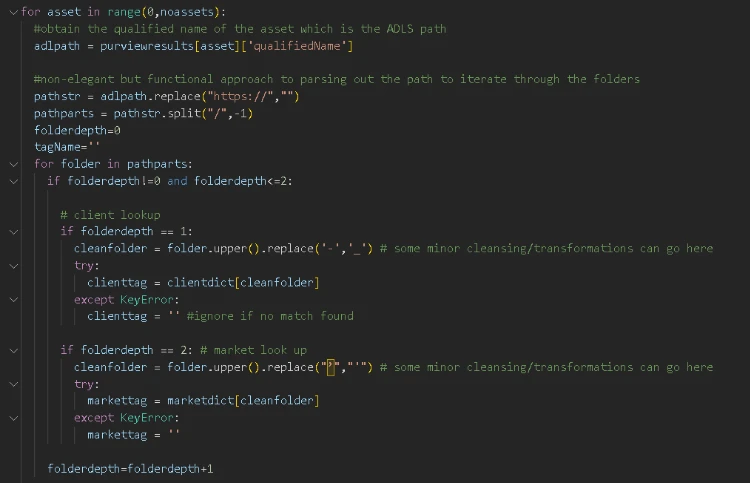
Then it populates any valid lookup results as key value pairs to the business metadata group called “Data Product” and then assigns it to the asset using it’s GUID. For example, in the screenshot above of asset “dz”, the first folder is the client name which is baa, so the client attribute is set to the result of the lookup which is Bank of ACME, and the second folder is the market which is dz so market is set to Algeria.
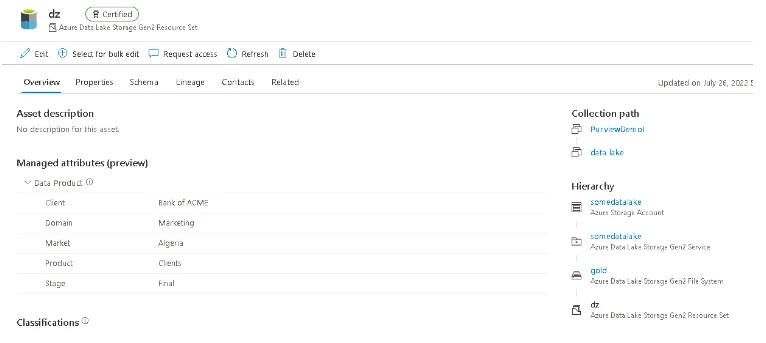
Now we see these attributes populated in the Purview UI!
Note that the business metadata API is called per asset (GUID) which could take some time if you have a large number of assets. At the time of writing there was no bulk approach equivalent API which would make the process more efficient. Also note that making numerous API calls may also mean the Elastic Data Map scales up based on increased throughput whilst the script is running.
Now that you have programmatically added attributes to the assets, your data consumers can view them in the new managed attributes section in the overview tab. These attributes could be further enriched by data stewards/owners simply by editing the asset’s metadata directly in the Purview UI and adding/populating additional attributes. Alternatively, data producers can integrate this process into their data pipeline by creating a placeholder asset as described in the previous section and setting the attributes. If the qualified path is set correctly for the placeholder asset, the subsequent scan would enrich the existing placeholder asset rather than creating a duplicate. Ensure that you have provided the appropriate permissions (such as data curator role) at a collection level to only the data owners/producers, rather than everyone to avoid accidental or inaccurate metadata from creeping in.
These attributes could be particularly useful when defining attributes about a data product, but how would this help data consumers find the right assets in the first place? In the future there may be filters in the search results page, but for now, simply by adding these keywords to the search term will boost the ranking of these tagged assets, so long as you switch to the Relevance sort order rather than sorting by name (see the drop down in the top right corner).
Here’s an example; we started by searching for a particular client called BANK OF ACME and typing in ACME which returned a heap of results…
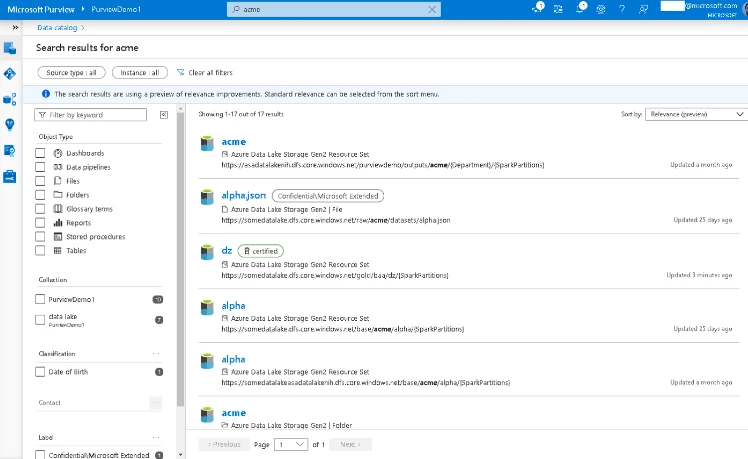
“Bank of ACME” would not be much better as we know the data producers use acronyms, and what we really wanted was the Bank of ACME clients in Algeria (again needs a country code which we, the data consumer, could not remember) in the Marketing domain. So long as the metadata has been assigned appropriately, entering all of these terms boosts the correctly tagged asset to the top of the search results. Our asset also happens to be marked as certified, normally meaning the data producer/owner has indicated that this asset meets a certain level quality, is consumption-worthy for producing analytics.
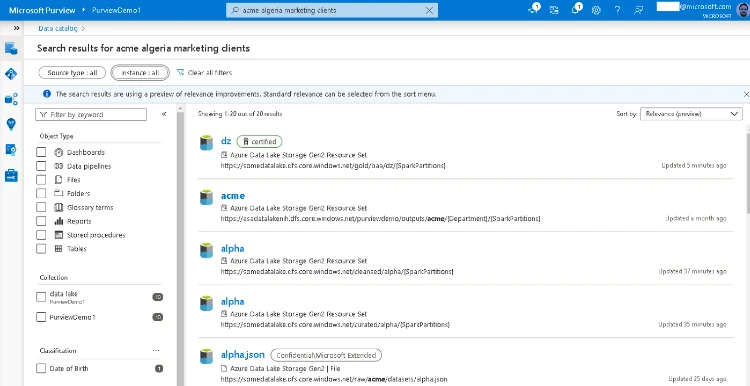
Although without the attributes against that asset, we would have had to have known all the acronyms, scanned all the qualified paths through all the results, this one being BAA and DZ — so potentially a time-consuming process! Anyone working with a certain large ERP system may know this dilemma only too well.
Attributes are everywhere…
One aspect to attributes that may not be immediately apparent, is that they can be applied to any asset type in Purview. Even the lineage entity we automated above can benefit from attributes. Here’s a scenario… assume I am a data consumer who wants to understand what the process does and what transformations occur. I am not technical so I don’t want to try to look at code or open a pipeline, I would rather use a business tool such as Azure DevOps, ServiceNow, or a Wiki to find information relating to this development work. Using attributes, we can now empower engineers and developers to associate their transformation logic/lineage process with a work item number, not only to save others time, but also to save them time from having to explain what their process does in great detail to a multitude of folks around the business!
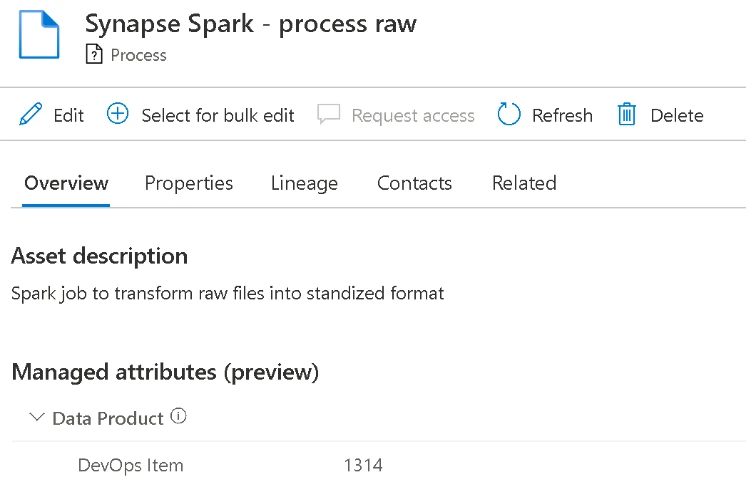
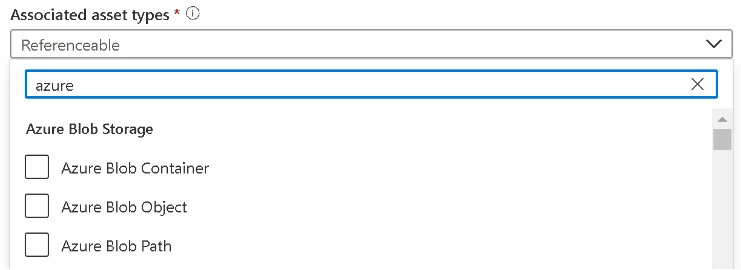
Just ensure the associated asset type (applicableEntityTypes) is included in the definition of attribute you’re trying to apply, for example in our sample code above we used-

-but in the UI the full list of types can be found. When a custom type has been used, simply set it to referenceable.
Conclusion
In this post we have discussed two techniques which inject additional metadata against data assets in order to help data consumers find and trust consumption ready datasets. Depending on your data sources and transformation engine, these metadata artefacts may become more natively integrated into the Purview service in the future. Whilst incorporating these steps programmatically or manually may seem like an additional overhead or burden for data owners/producers, it is part of becoming a data driven culture — one where everyone in the organisation needs to take ownership for ensuring their high quality data products are easily discoverable and trustworthy for the benefit of data consumers that rely on making data-driven decisions.
Learn more
- Injecting lineage and attributes into Microsoft Purview – Part 1
- Secure Access to Storage: Azure Databricks and Azure Data Lake Storage Gen2 Patterns
- Just-in-time Azure Databricks access tokens and instance pools for Azure Data Factory pipelines using workspace automation
- Configure access to Azure Data Lake Gen 2 from Azure Databricks