6 tips for global versus local changes – Universal Resource Scheduling
In global CRM implementations, there is a fine line between changes that must be global versus changes that can be managed locally without affecting the entire organization. There are unique requirements for local implementations, and autonomy is essential to enable local branches to swiftly adapt to their unique requirements without jeopardizing the global implementation.
I recently had the privilege of visiting one of our key customers that dispatch technicians all over the world. After sitting with dispatchers targeting North America and Latin America, the dispatchers explained how it would be extremely beneficial if they could just add a field here or remove a field there; they felt, however, they couldn’t make changes since it would affect the entire global operation.
The reality is that there are many changes that can be managed on a local level without affecting an entire global implementation.
Schedule boards are typically created for a given territory or set of neighboring territories. As a result, there are many changes that can be made that only impact users of that specific schedule board. For example, if you have one board that is filtered to Miami and another board filtered to Palm Beach, making changes on either of these unique boards only affects those who use that board. In Dynamics 365 Field Service, users typically focus on specific areas, so the same board is often used by only one – or a few – dispatchers. If it is only used by one dispatcher, party on. If it is shared by a few dispatchers, make sure your team agrees with these changes. If they don’t, perhaps create a personal board or another shared board for those who don’t want the changes. For more about creating and sharing schedule boards, check out our documentation.
Tip 1: Adjust booking requirements views on the schedule board
The booking requirements views on the schedule board can be adjusted on a schedule board level. Users can temporarily remove columns from within the requirements panel, but those changes are only meant to hold until the board is refreshed.
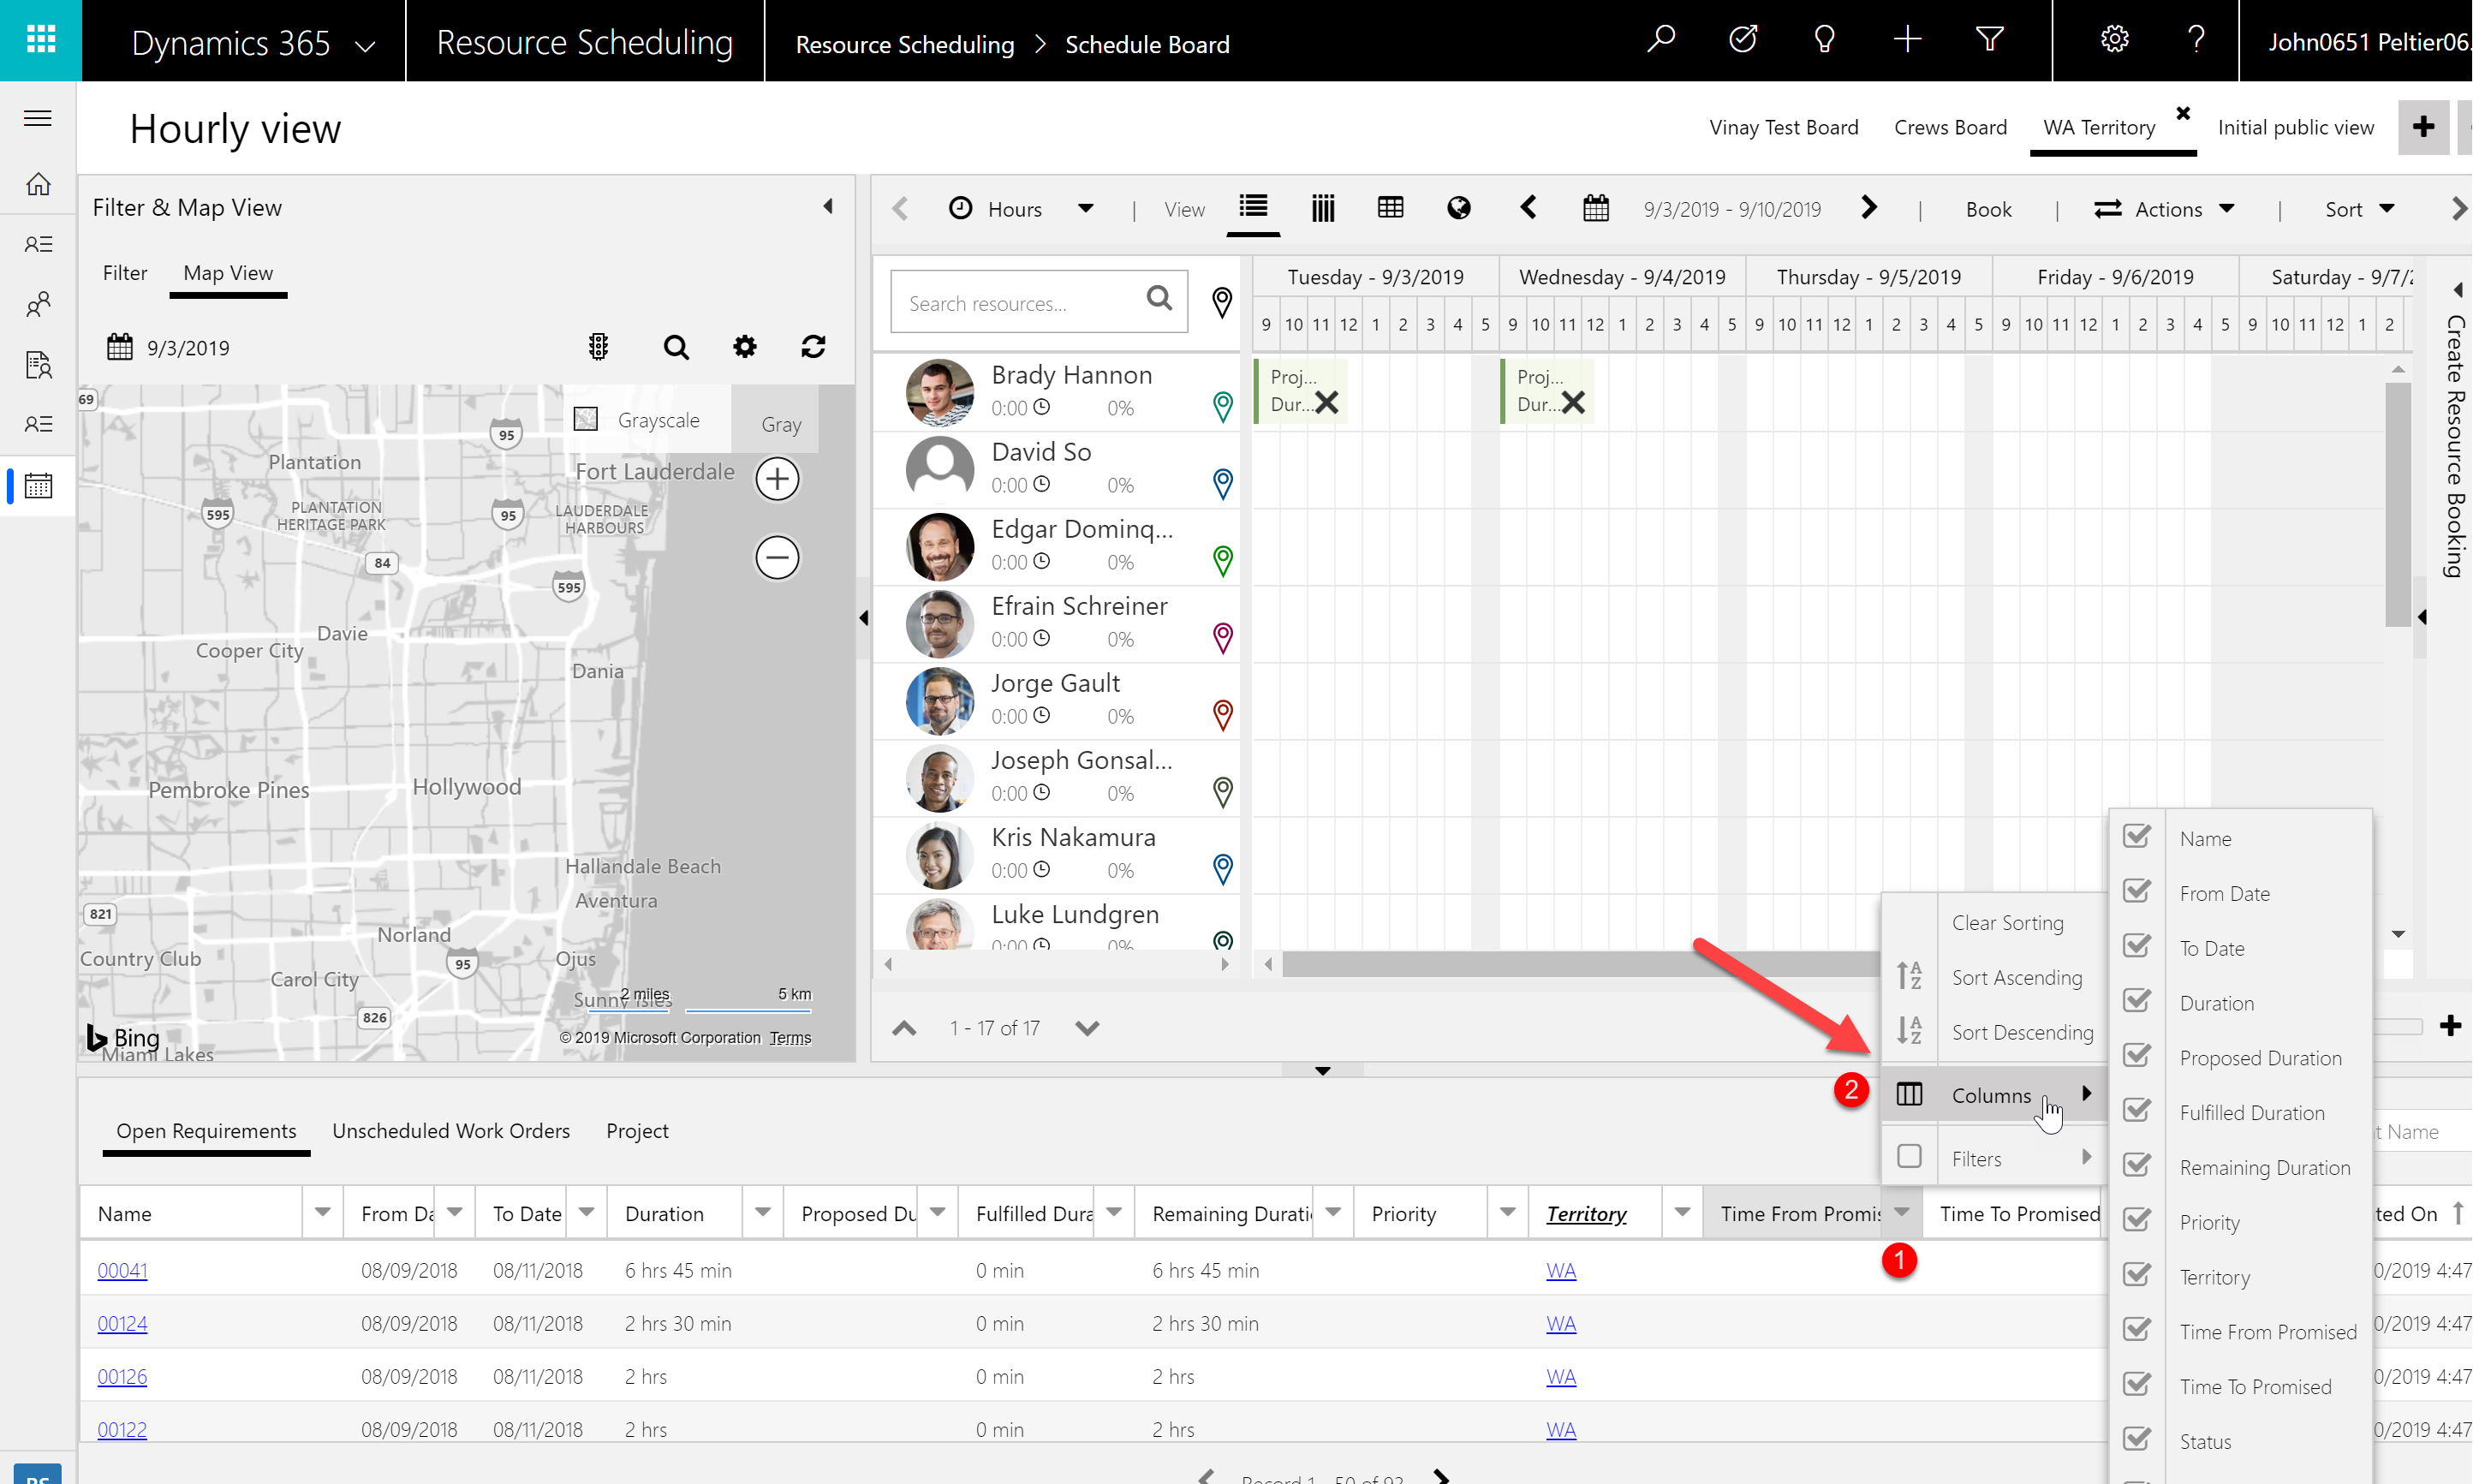
To temporarily remove columns, select the drop-down menu from a column in the Open Requirements tab, select Columns, and un-check whichever column you’d like to remove.
To permanently change which attributes appear in the open requirements view or which requirements appear altogether:
- Make sure you create a view on the resource requirement entity that you would like to use on the schedule board. This can be a personal or system view. Both the filter criteria of the view and the selected columns apply.
- Open the schedule board settings by double clicking the schedule board name.
- Scroll down to the requirements section and change the view for the requirements tab that you currently use, or just add a new requirement view, which will add another requirements tab.
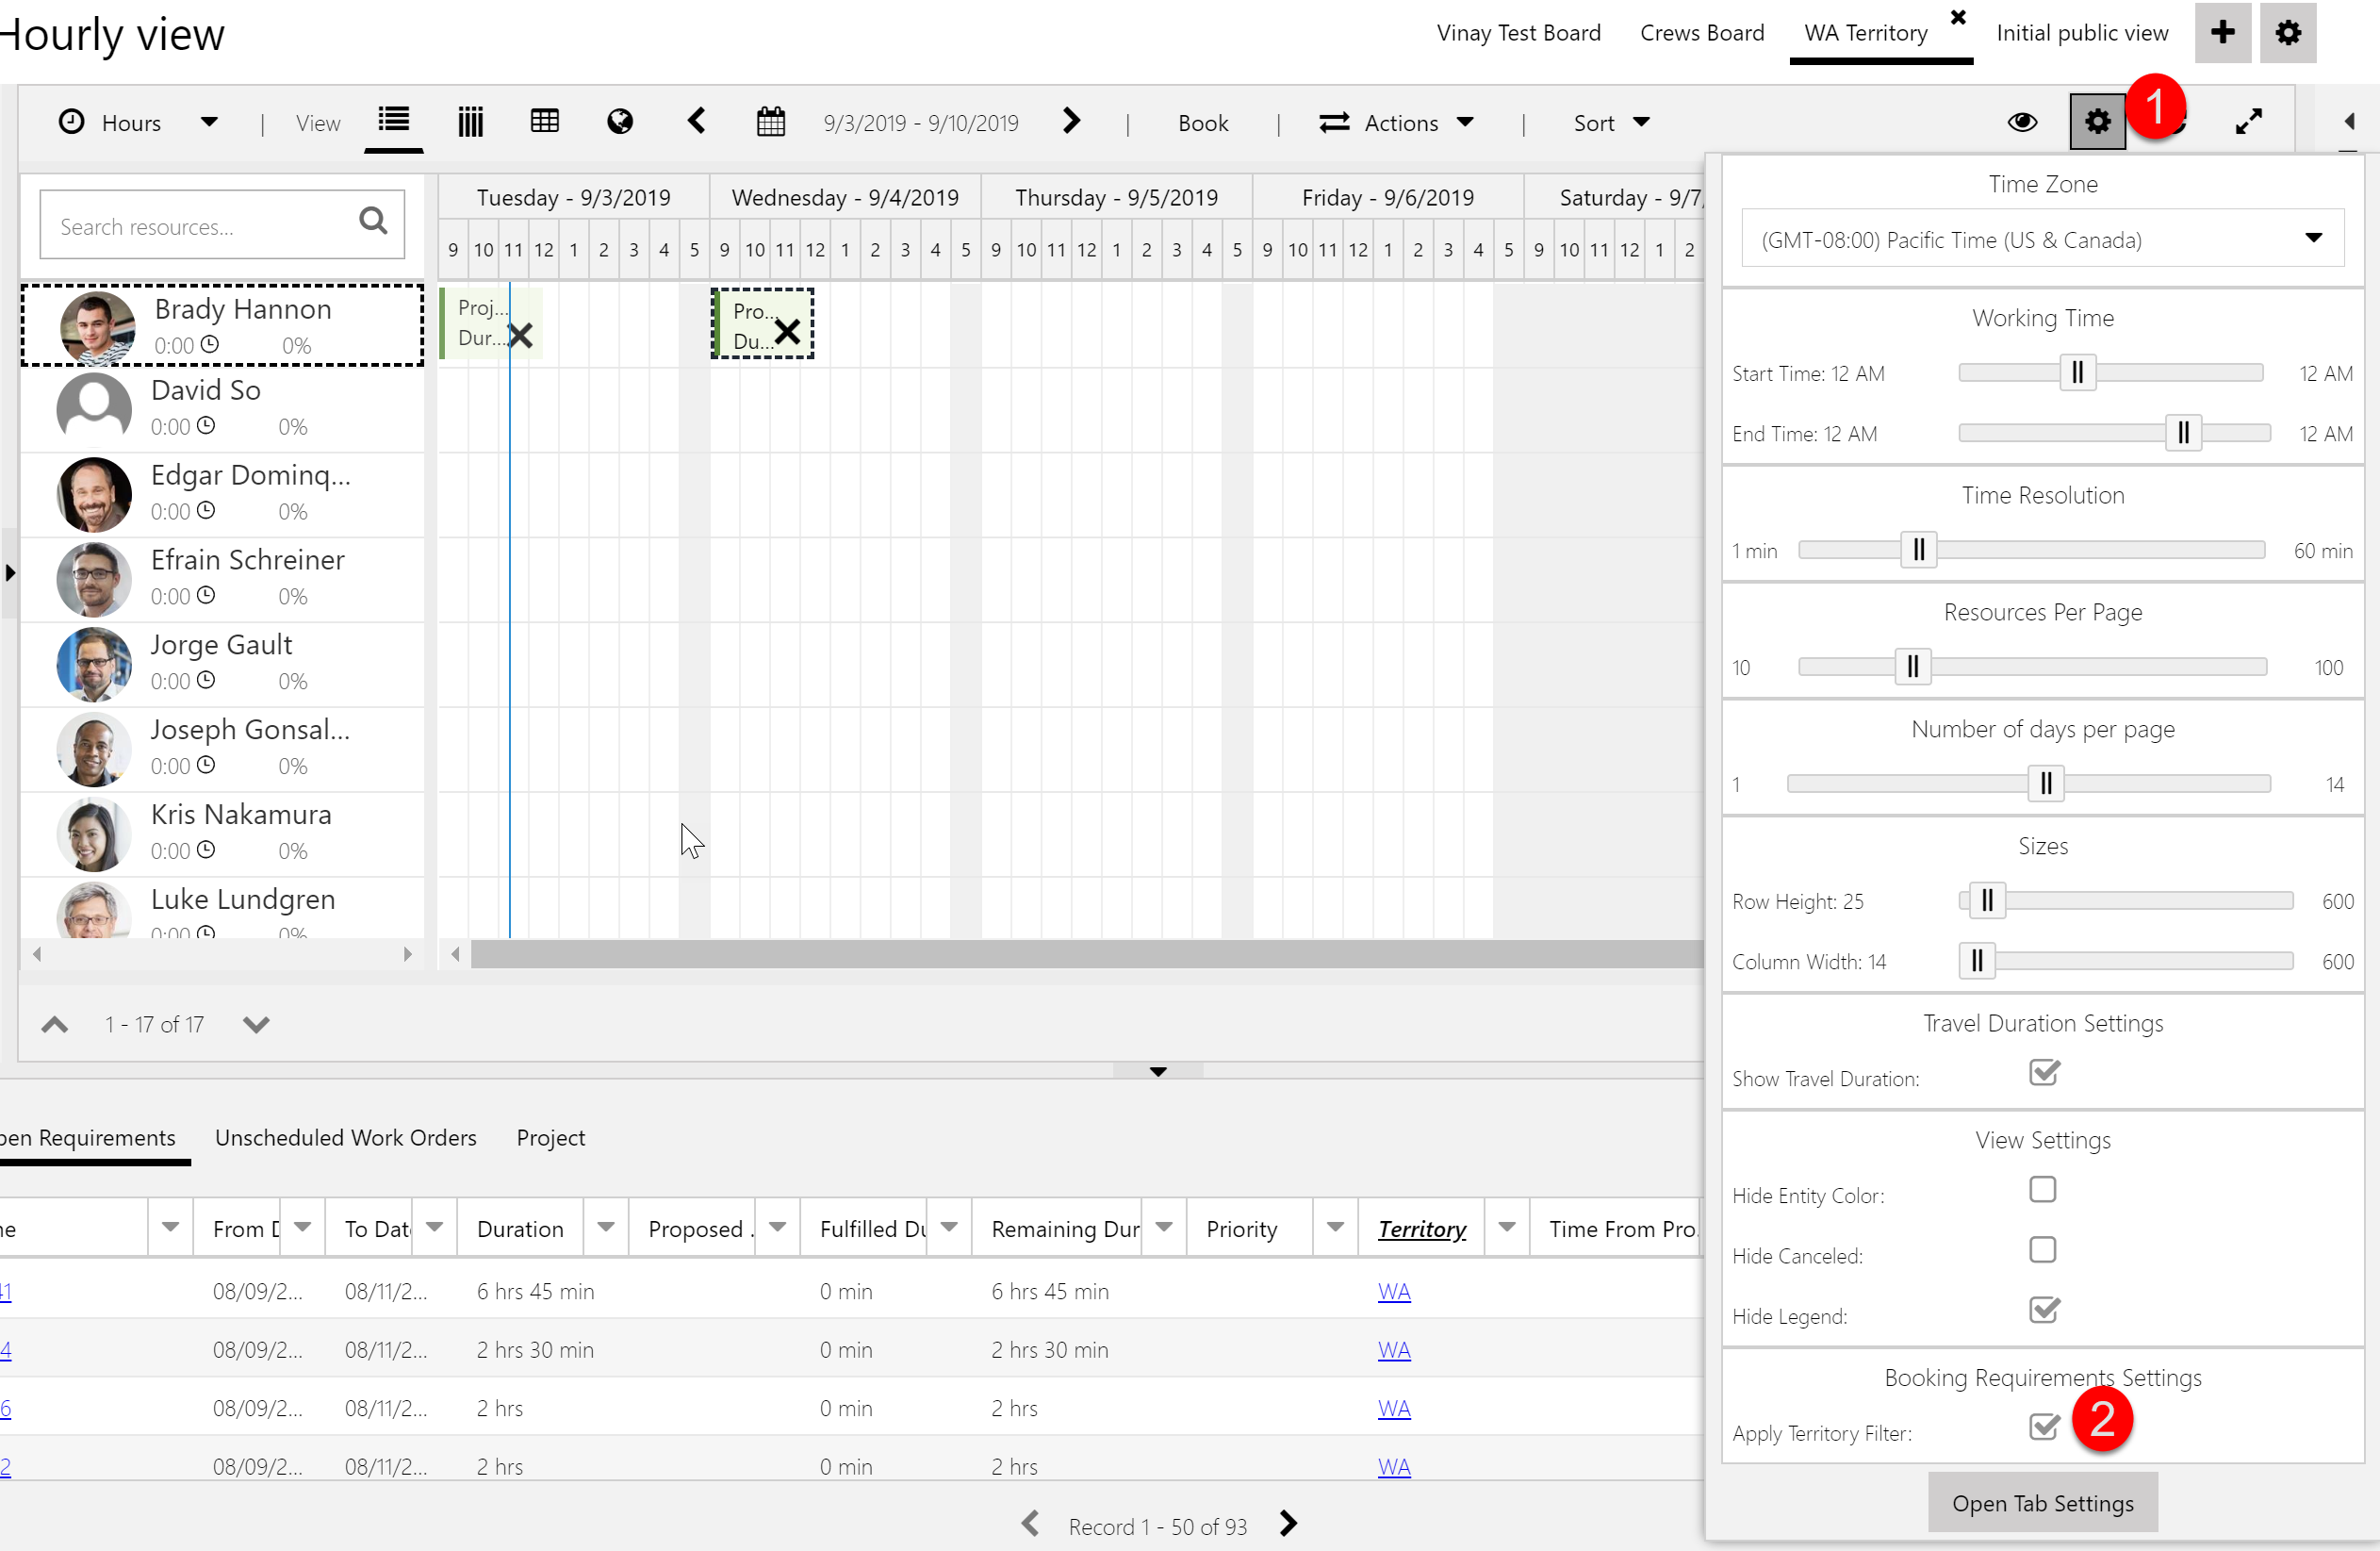
- If the booking requirements view you currently see on the board is not available for you to remove or change, it is because your admin has setup default views on the default board that everyone sees. In this case, you can also remove the default requirements view for your board only by opting to “hide default requirements panels.” Here is a screenshot showing the option to hide the default booking requirements tabs:
You now have complete control over which requirement views show on the bottom of your schedule board without changing any other boards. The requirements will filter based on the filter criteria of the view, and the visible columns will mirror the columns on the view.
Tip 2: Change your booking templates
The text that appears inside your bookings is controlled by booking templates. Templates can be unique per schedule board. For more information, check out our booking template documentation over on Docs.
Tip 3: Change your tooltips
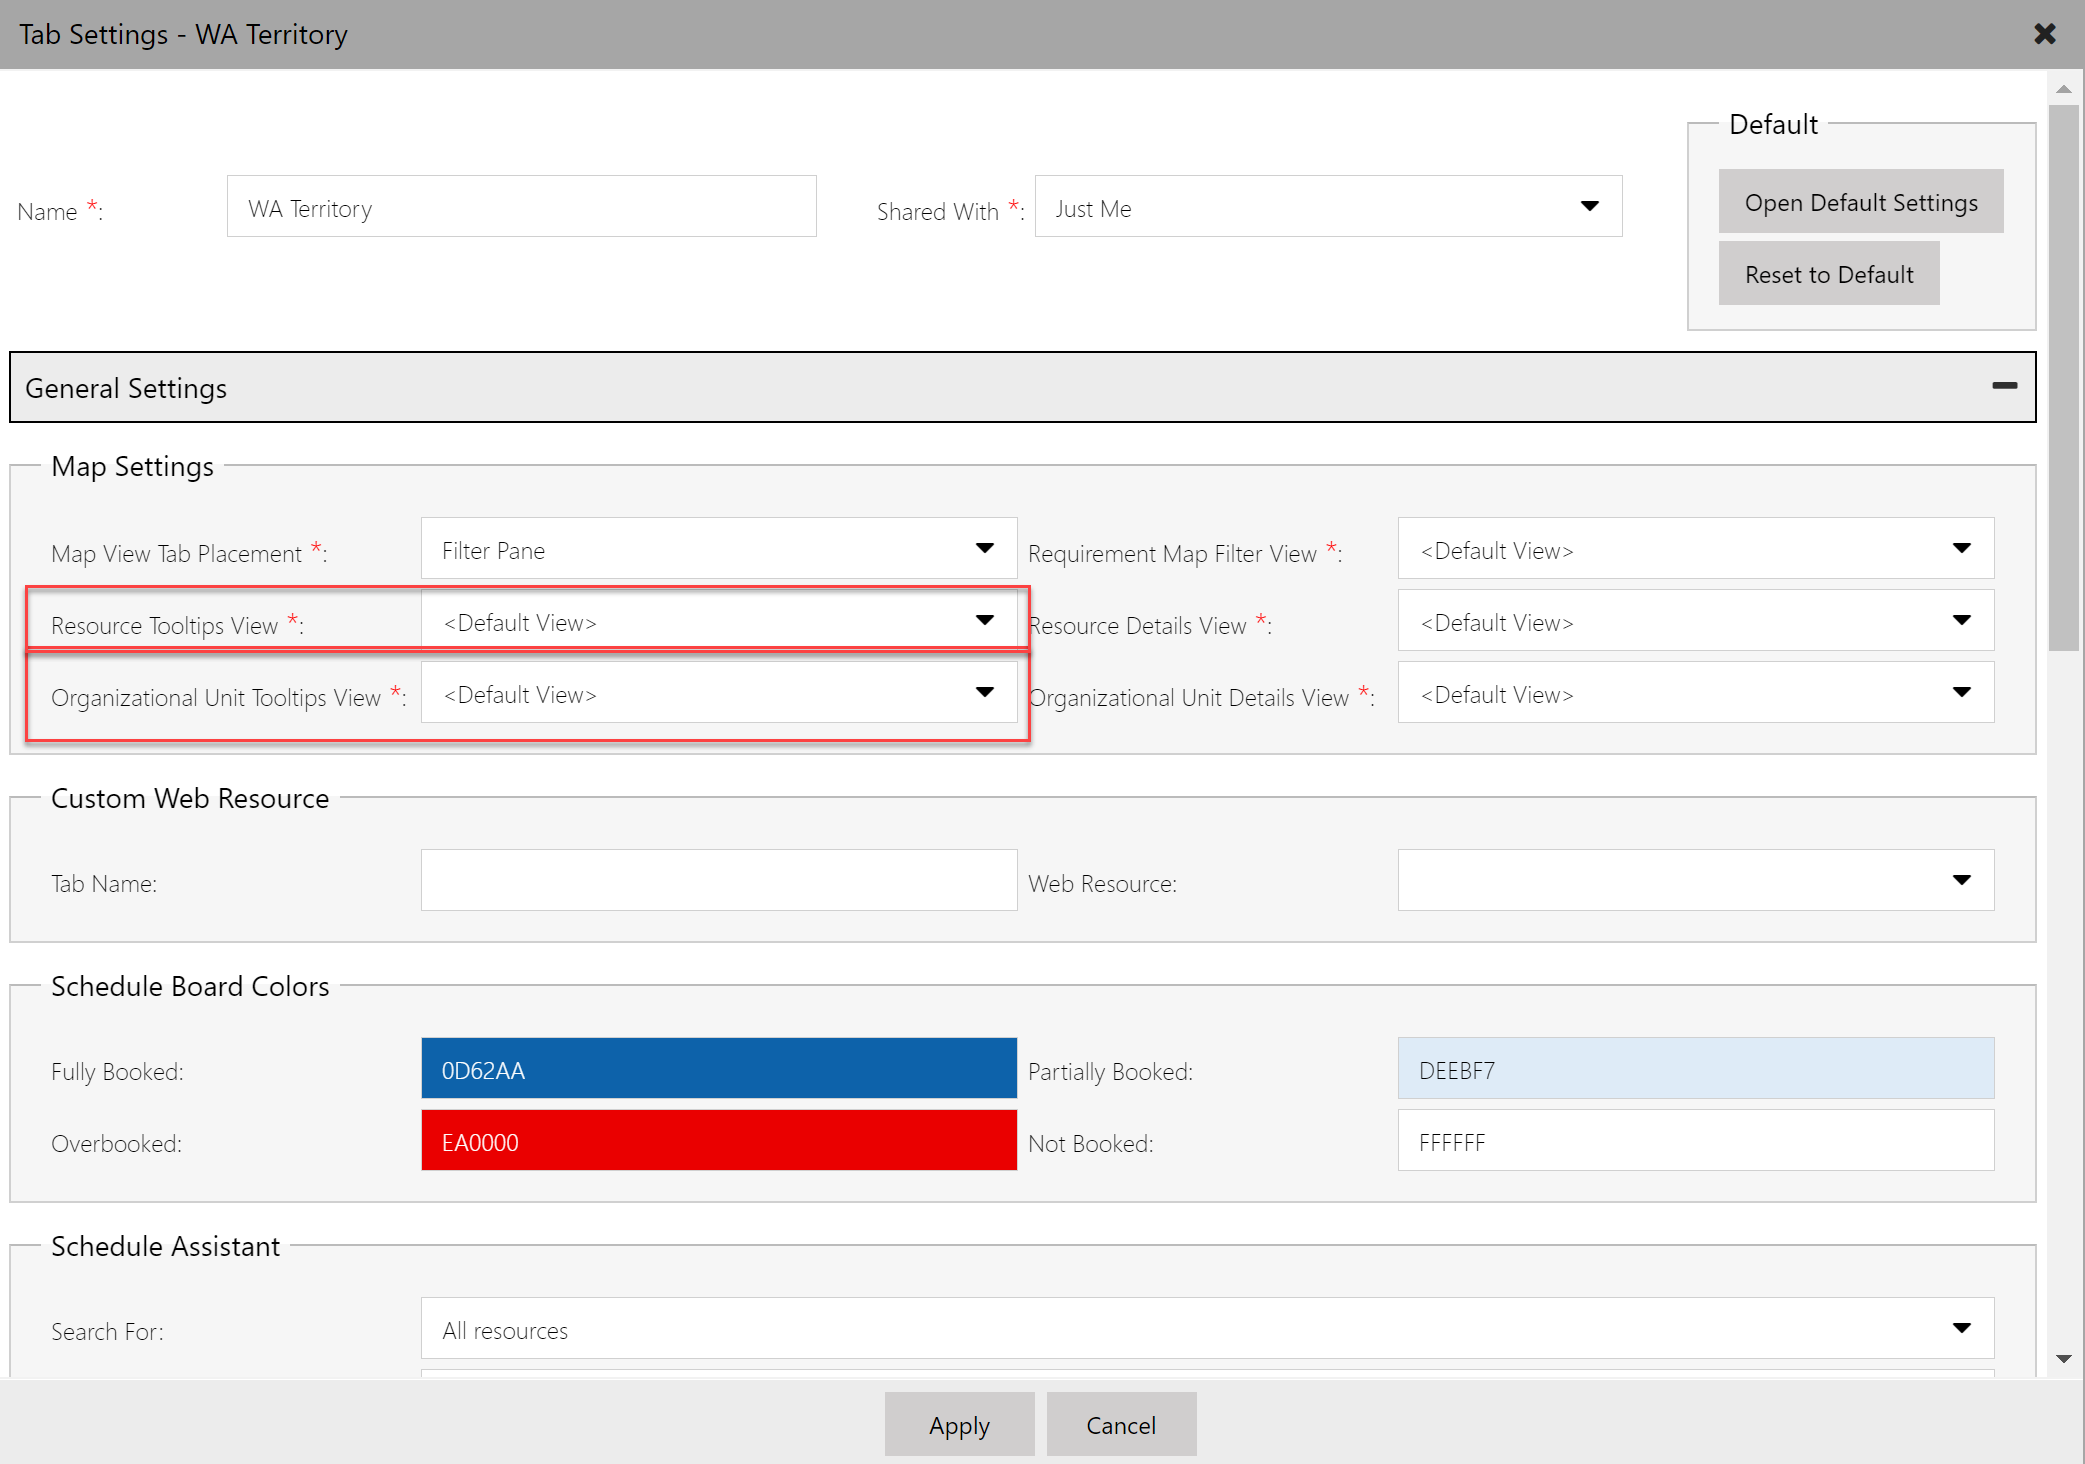
There are various tooltips that appear when hovering over objects on the schedule board, such as bookings and map pins. All of these tooltips are controlled by views and can be changed at the schedule board level.
There are views that drive tooltips with one view, since there is no differentiation between the type of record it is (Project, Case, Work Order, etc), and others that have a different view for each schedulable entity, also known as Booking Setup Metadata.
Tooltips with one view
- Organizational Units: Used when hovering over Organizational Unit map pins (Cannot use personal views; only system views)
- Resources: Used when hovering over resource map pins (Cannot use personal views; only system views)
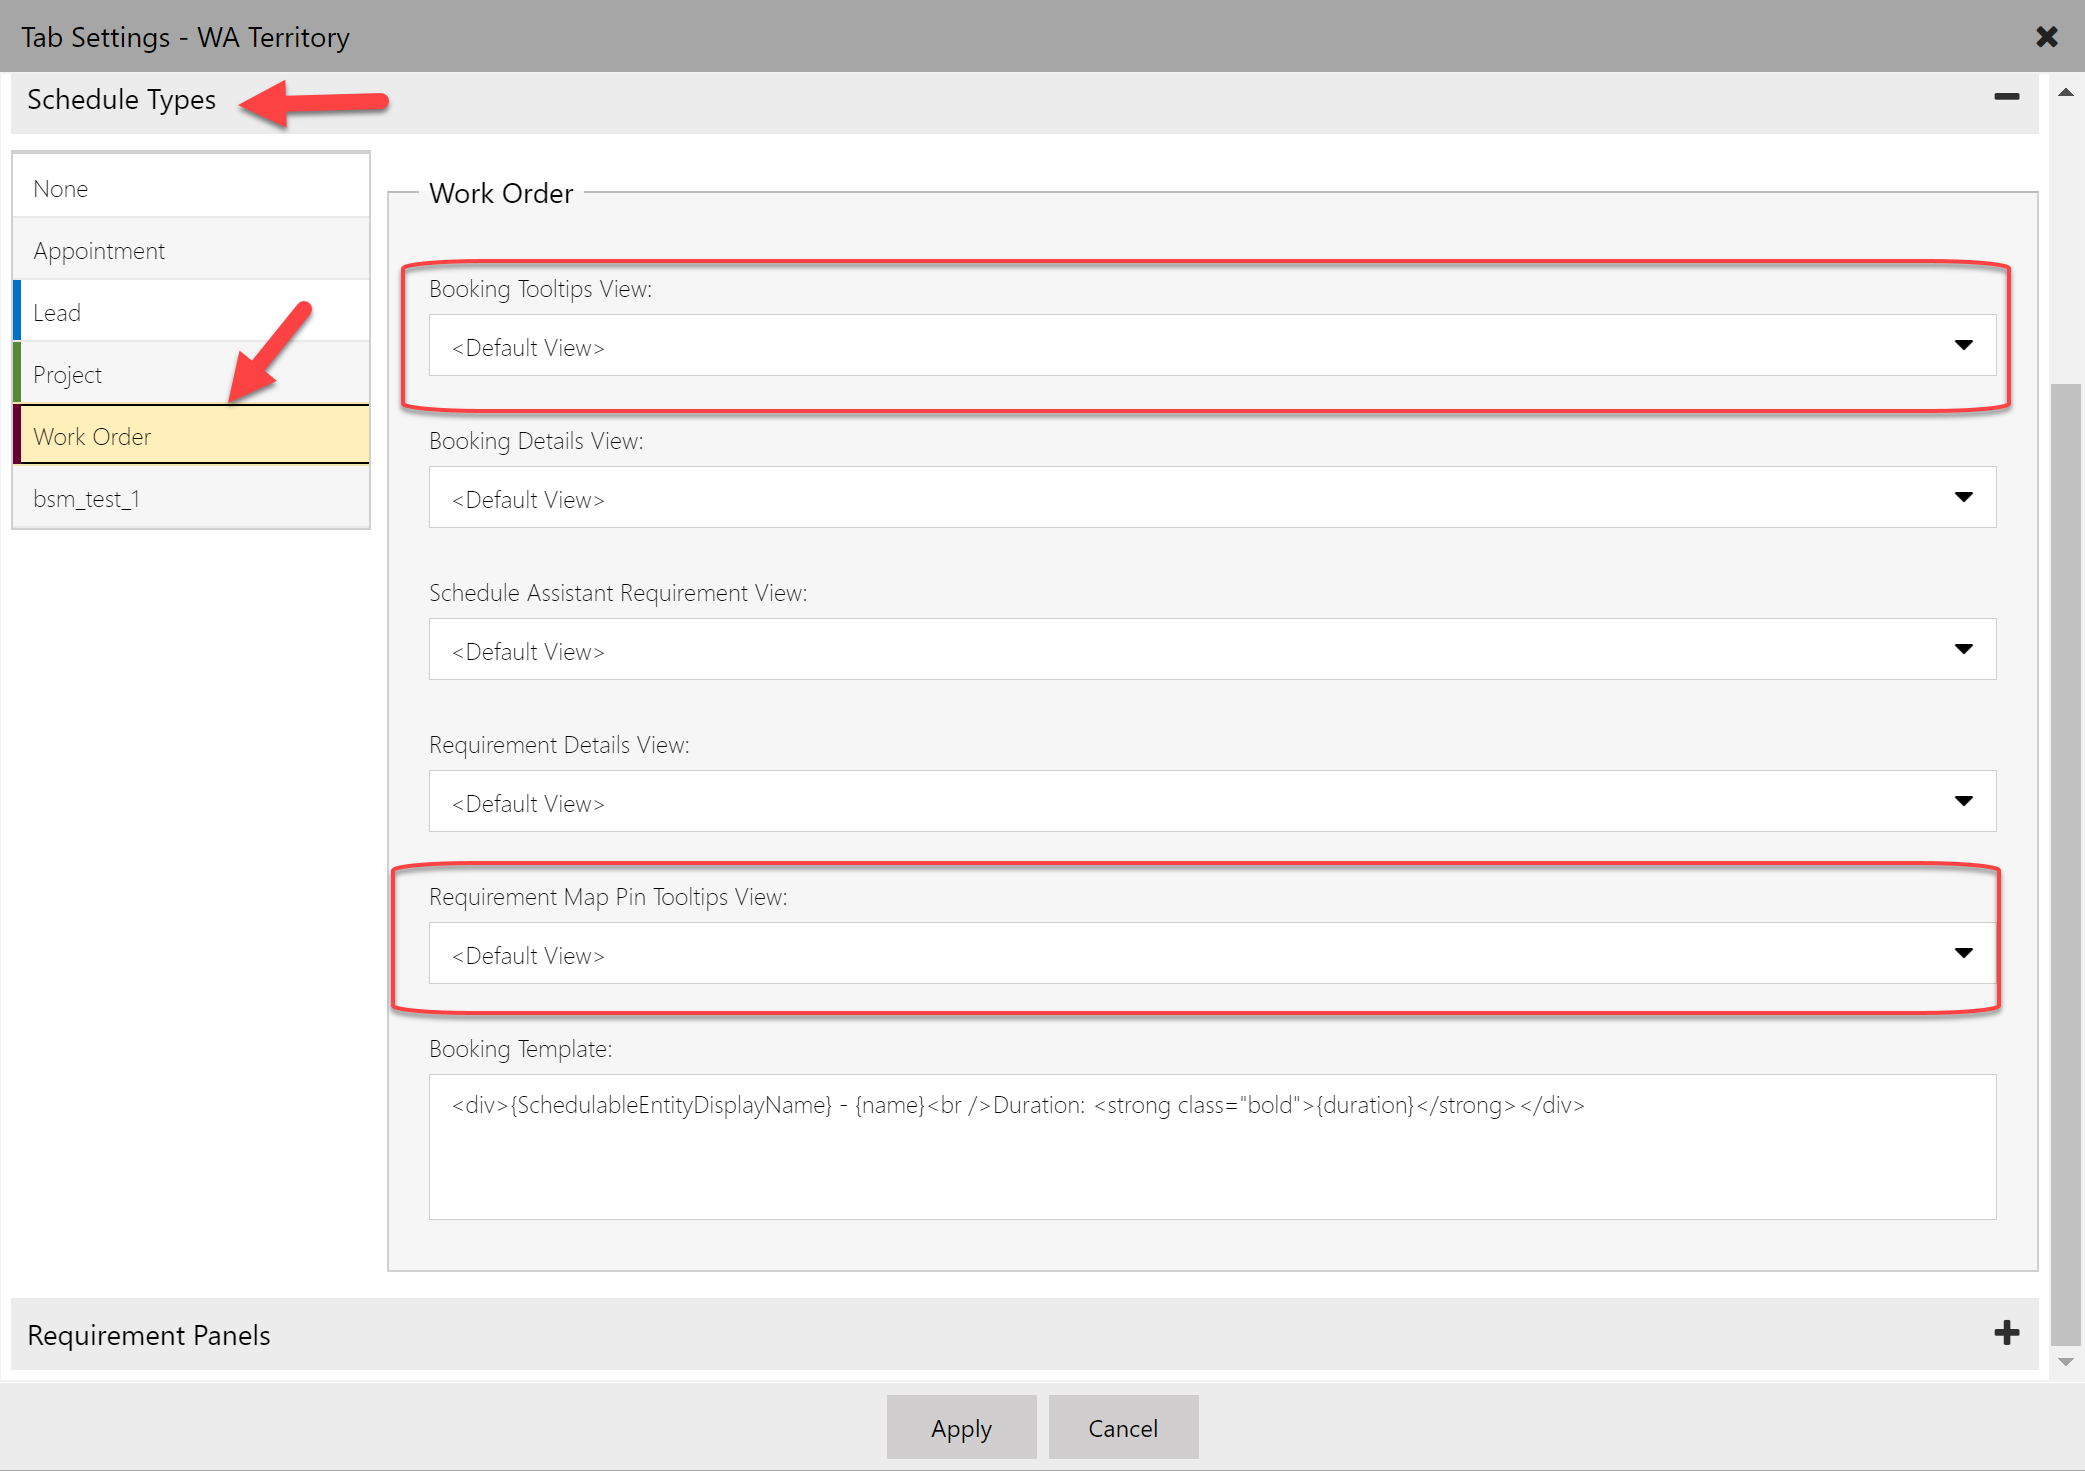
Tooltips with BSM-driven views
Here are a few views driven by BSM where you can have a different view based on the type of entity being scheduled:
- Requirements: Used when hovering over requirement pins on the map (Can use personal or system views)
- Bookings: Used when hovering over a booking pin on the map, or a booking on the board (Cannot use personal views; only system views)
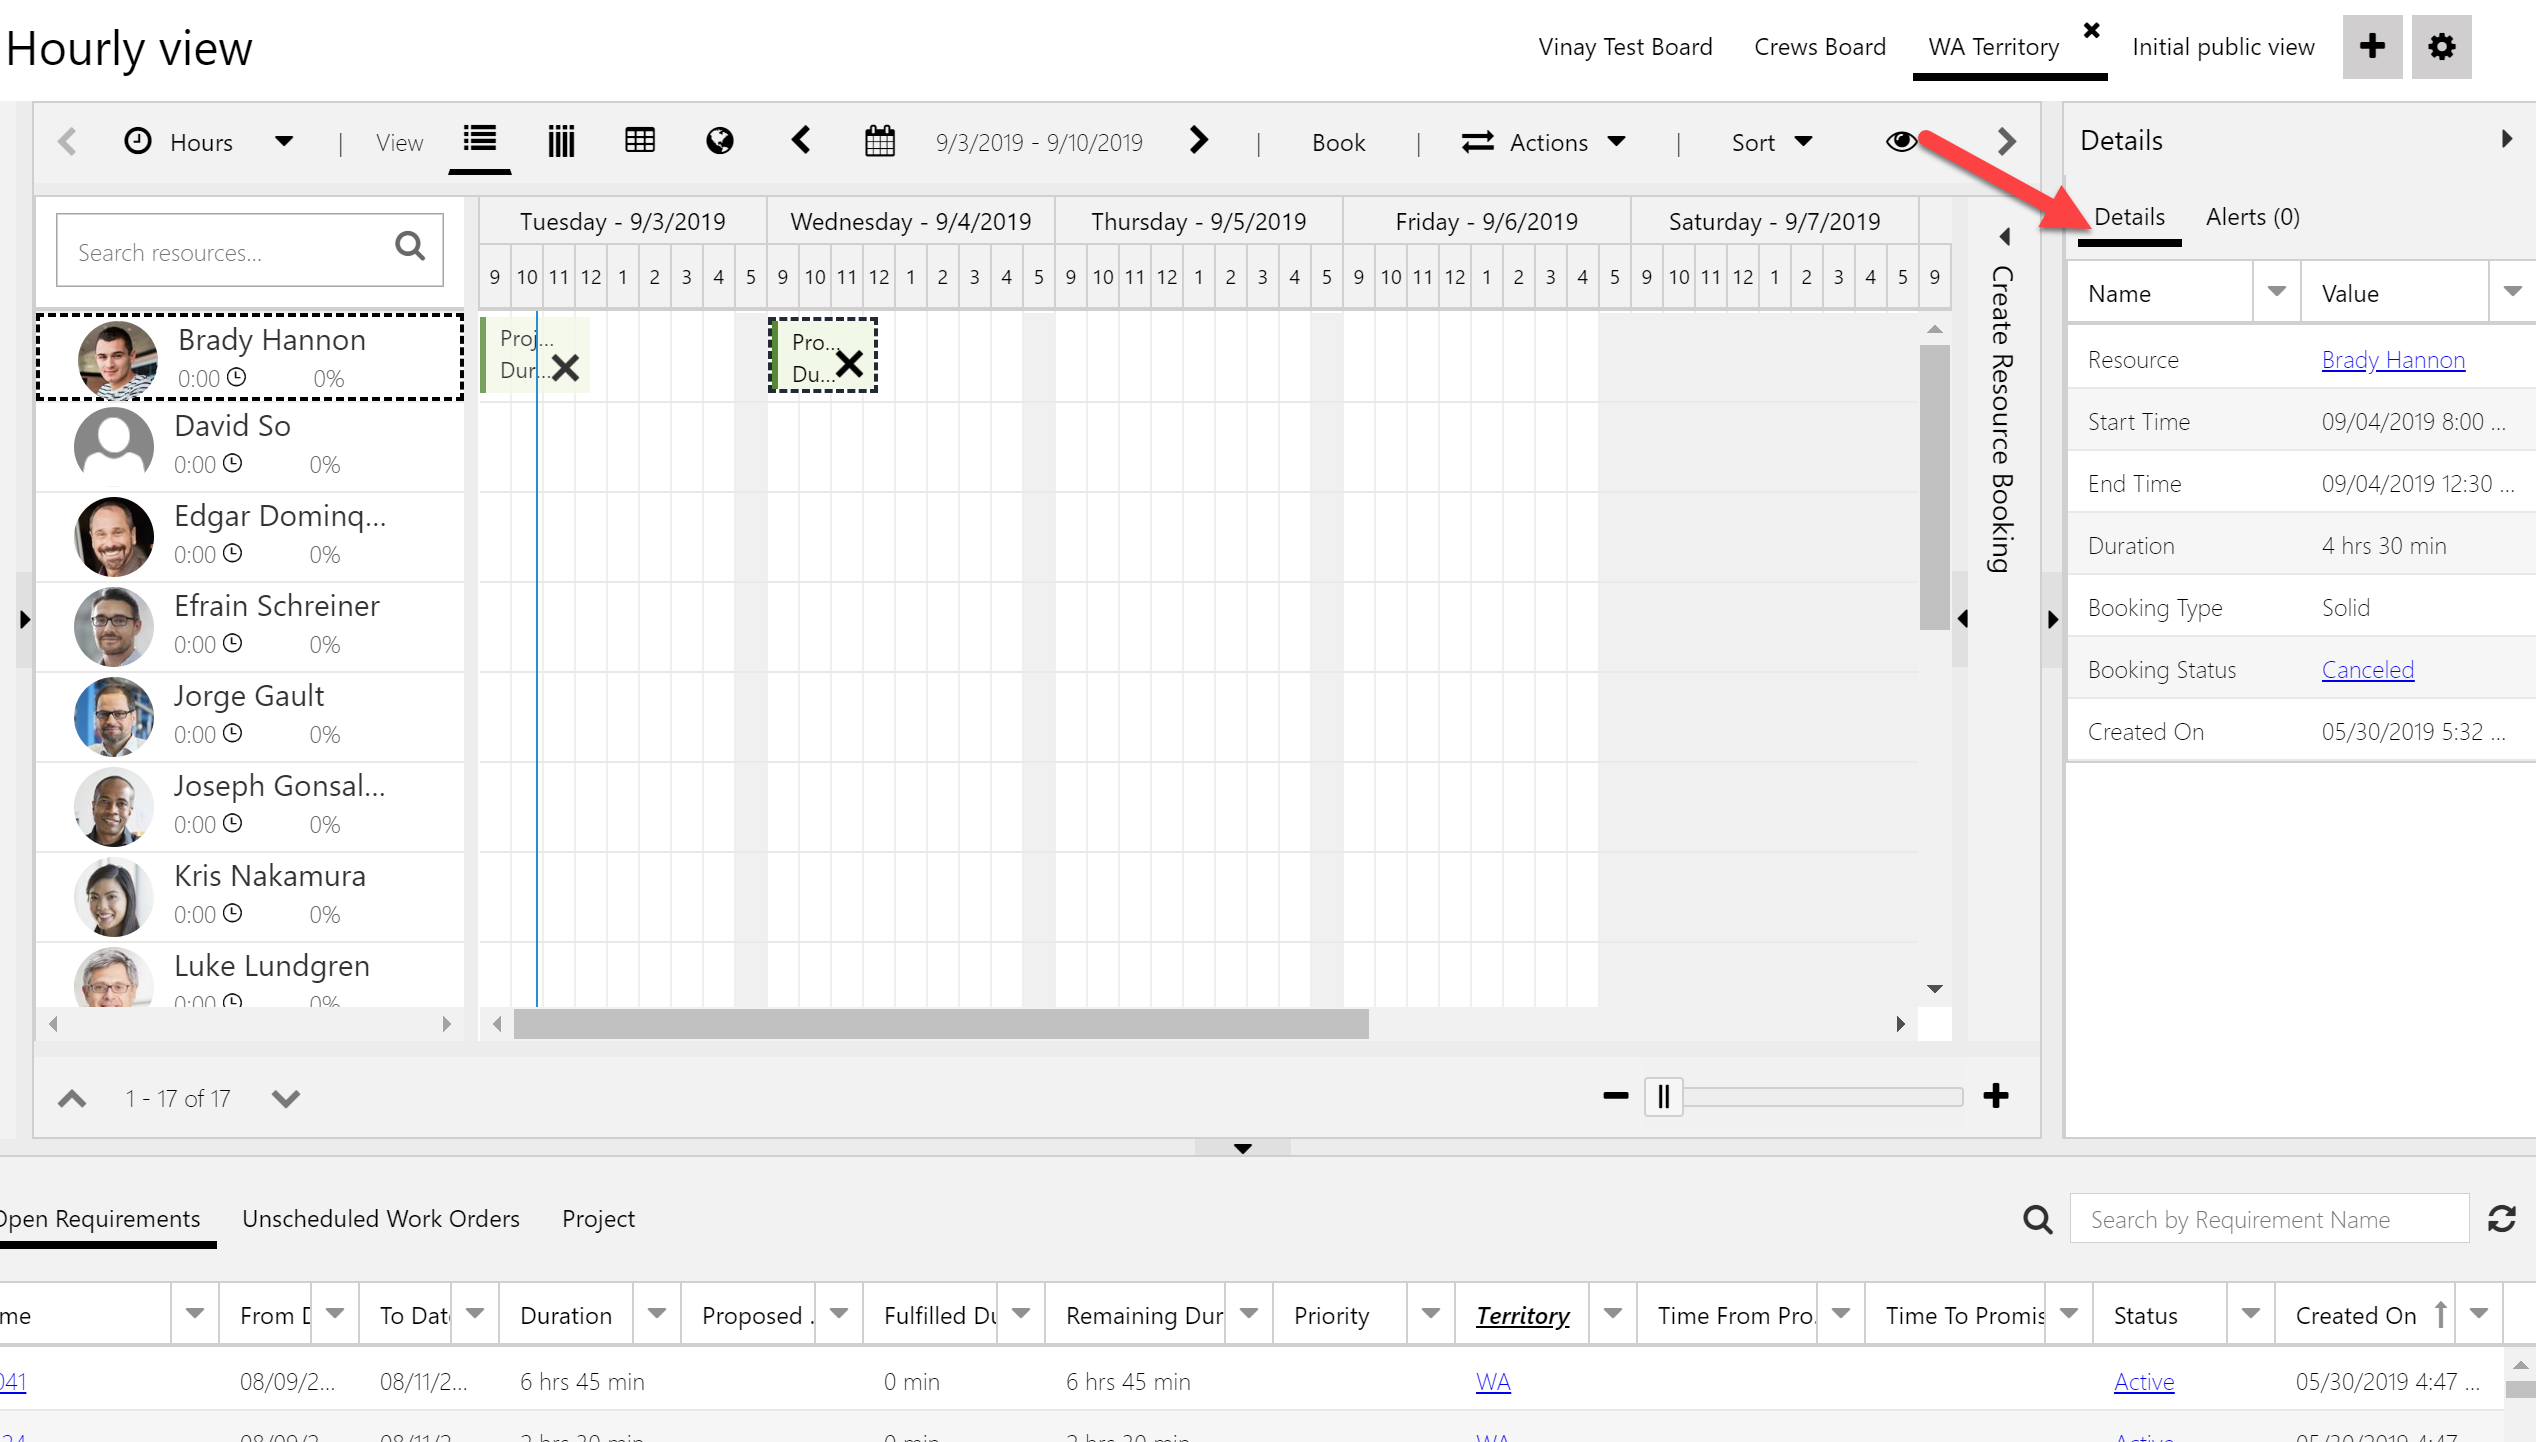
Tip 4: The details pane
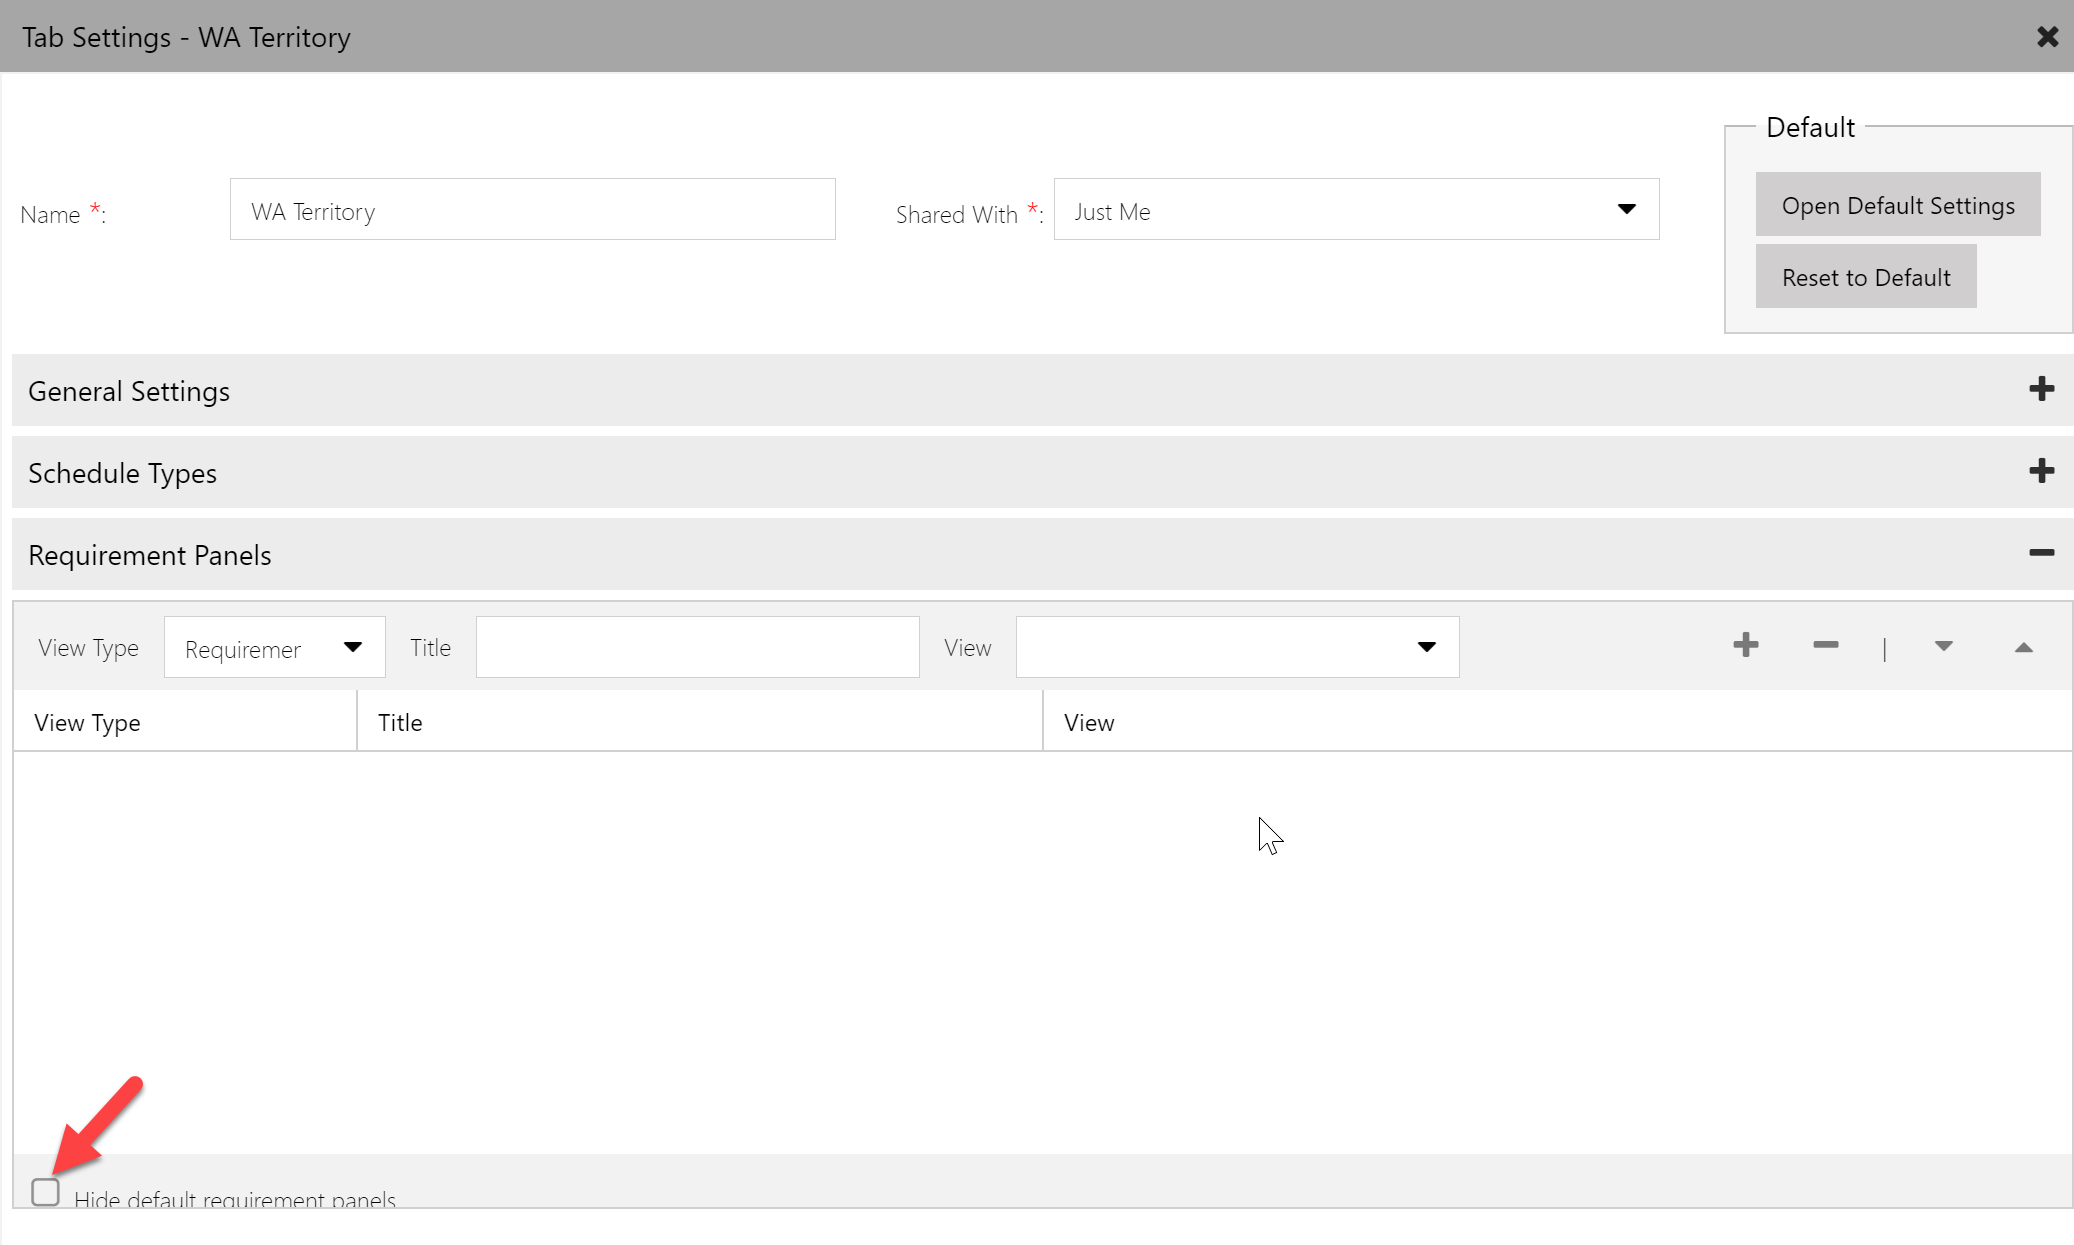
When selecting different objects on the schedule board, if you pop out the details pane, you see information appear when you select an object.
Here is a screenshot of the details pane showing details about the booking for Brady on September 4th:
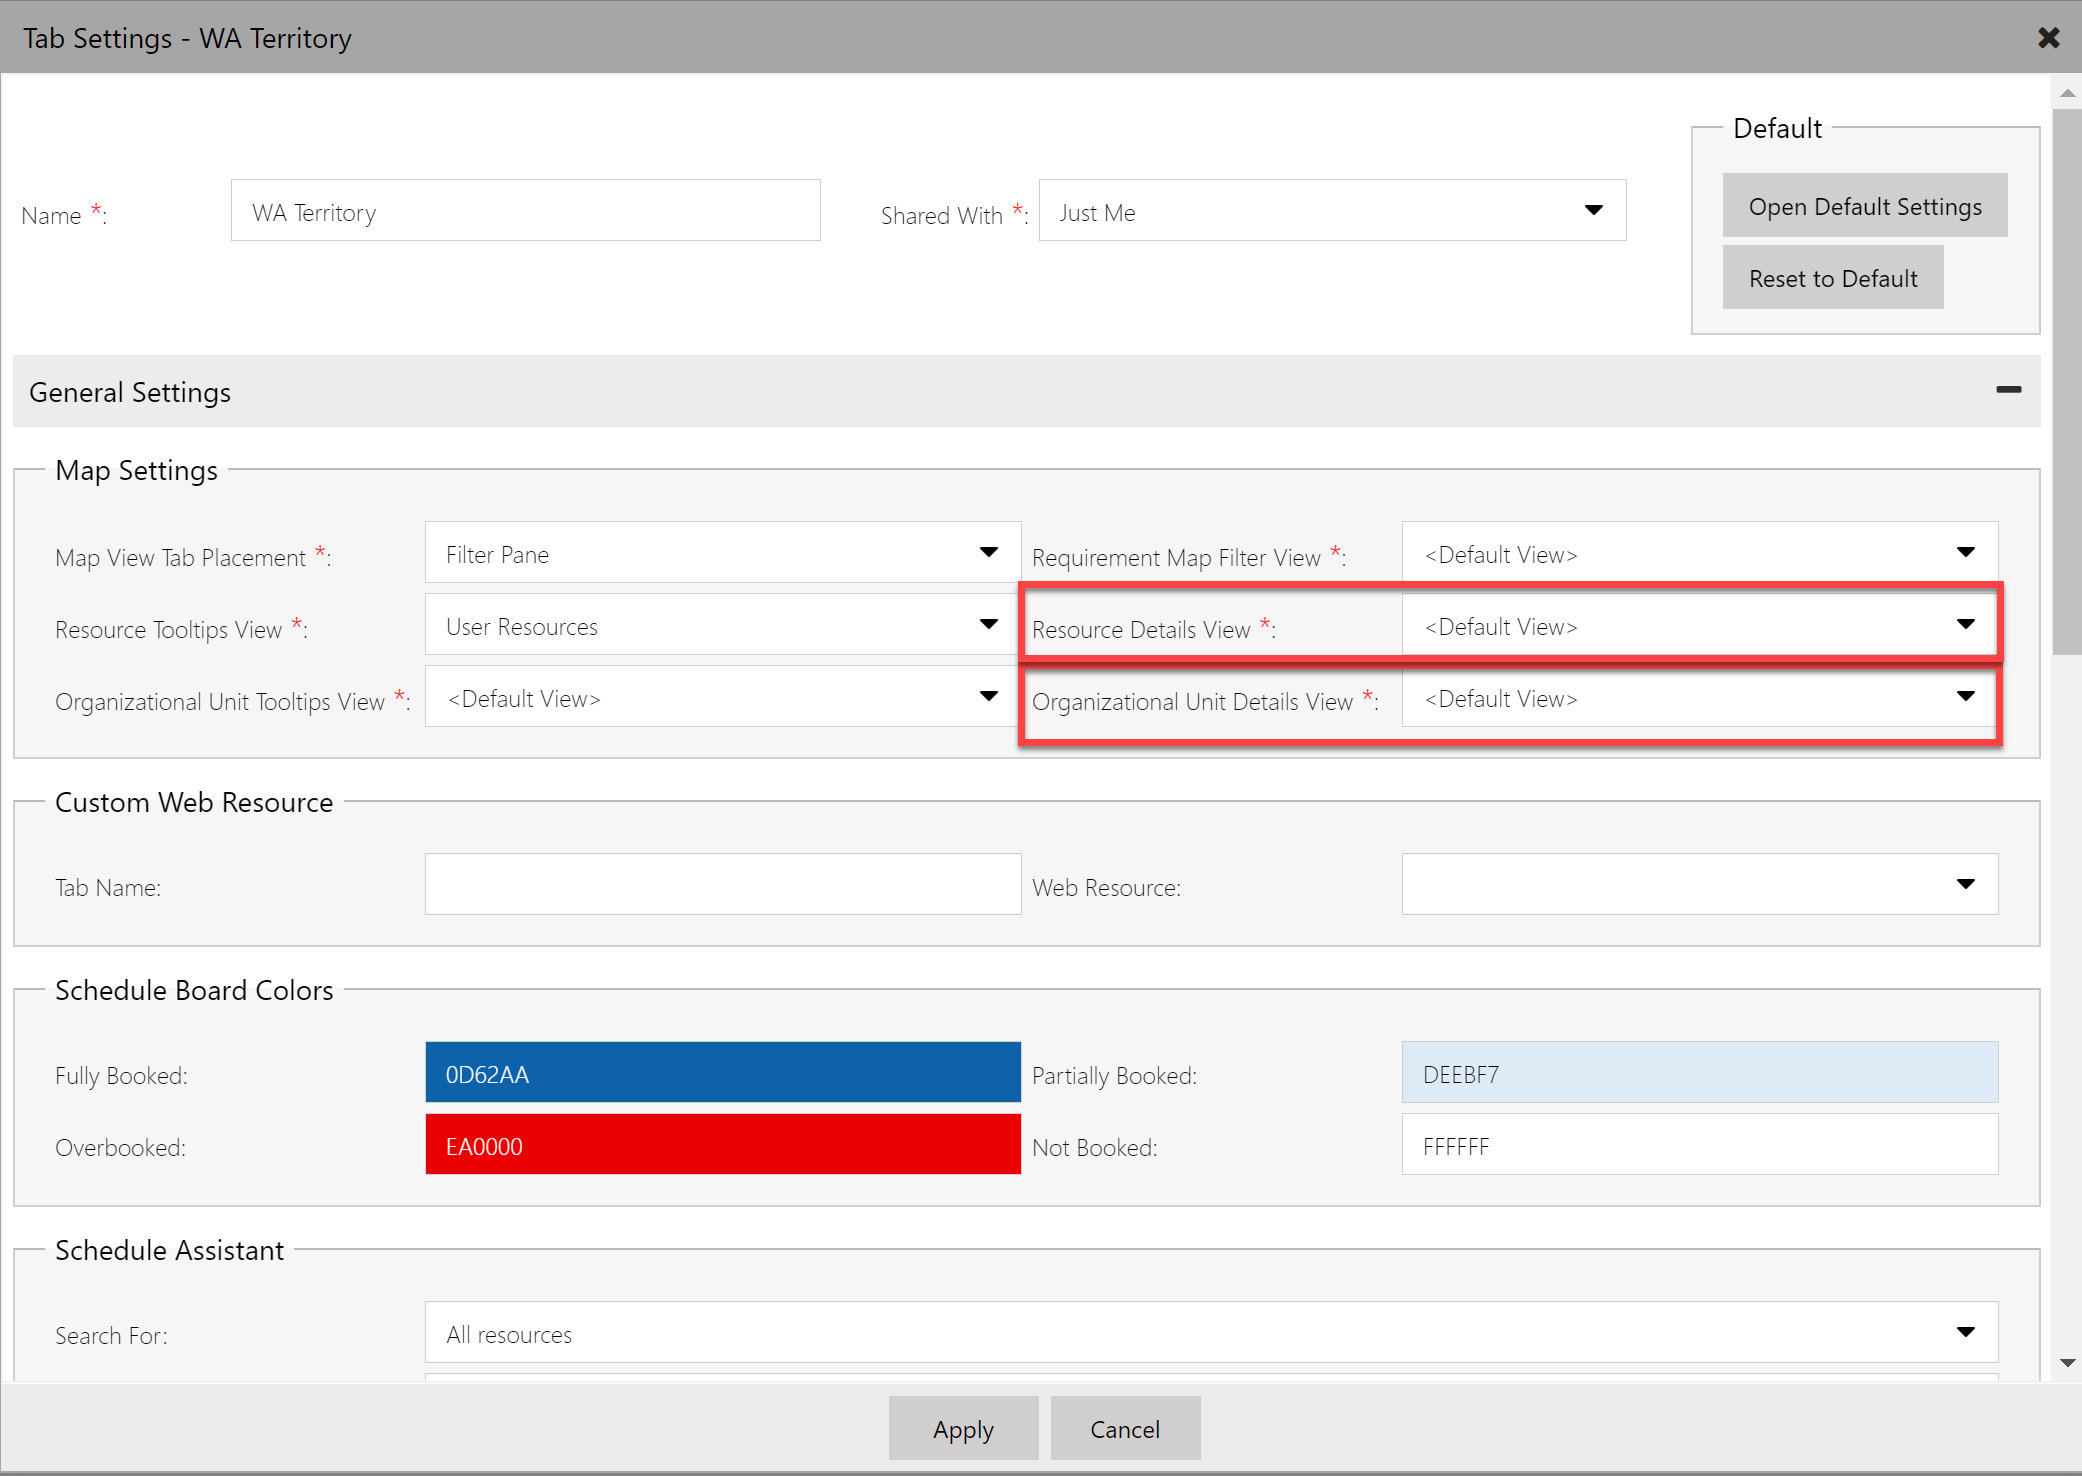
Details panes with one view
- Resources: Used when selecting a resource map pin or the resource card on the board (Cannot use personal views; only system views)
- Organizational Units: Used when selecting an organizational unit map pin (Cannot use personal views; only system views)
Details panes with BSM-driven views
Here are some views driven by BSM where you can have a different view based on the type of record (type of entity being scheduled):
- Bookings: Used when selecting a booking map pin or a booking on the board (Cannot use personal views; only system views)
- Requirements: Used when selecting a requirement map pin or a requirement in the booking requirements panel (Can use personal views or system views)
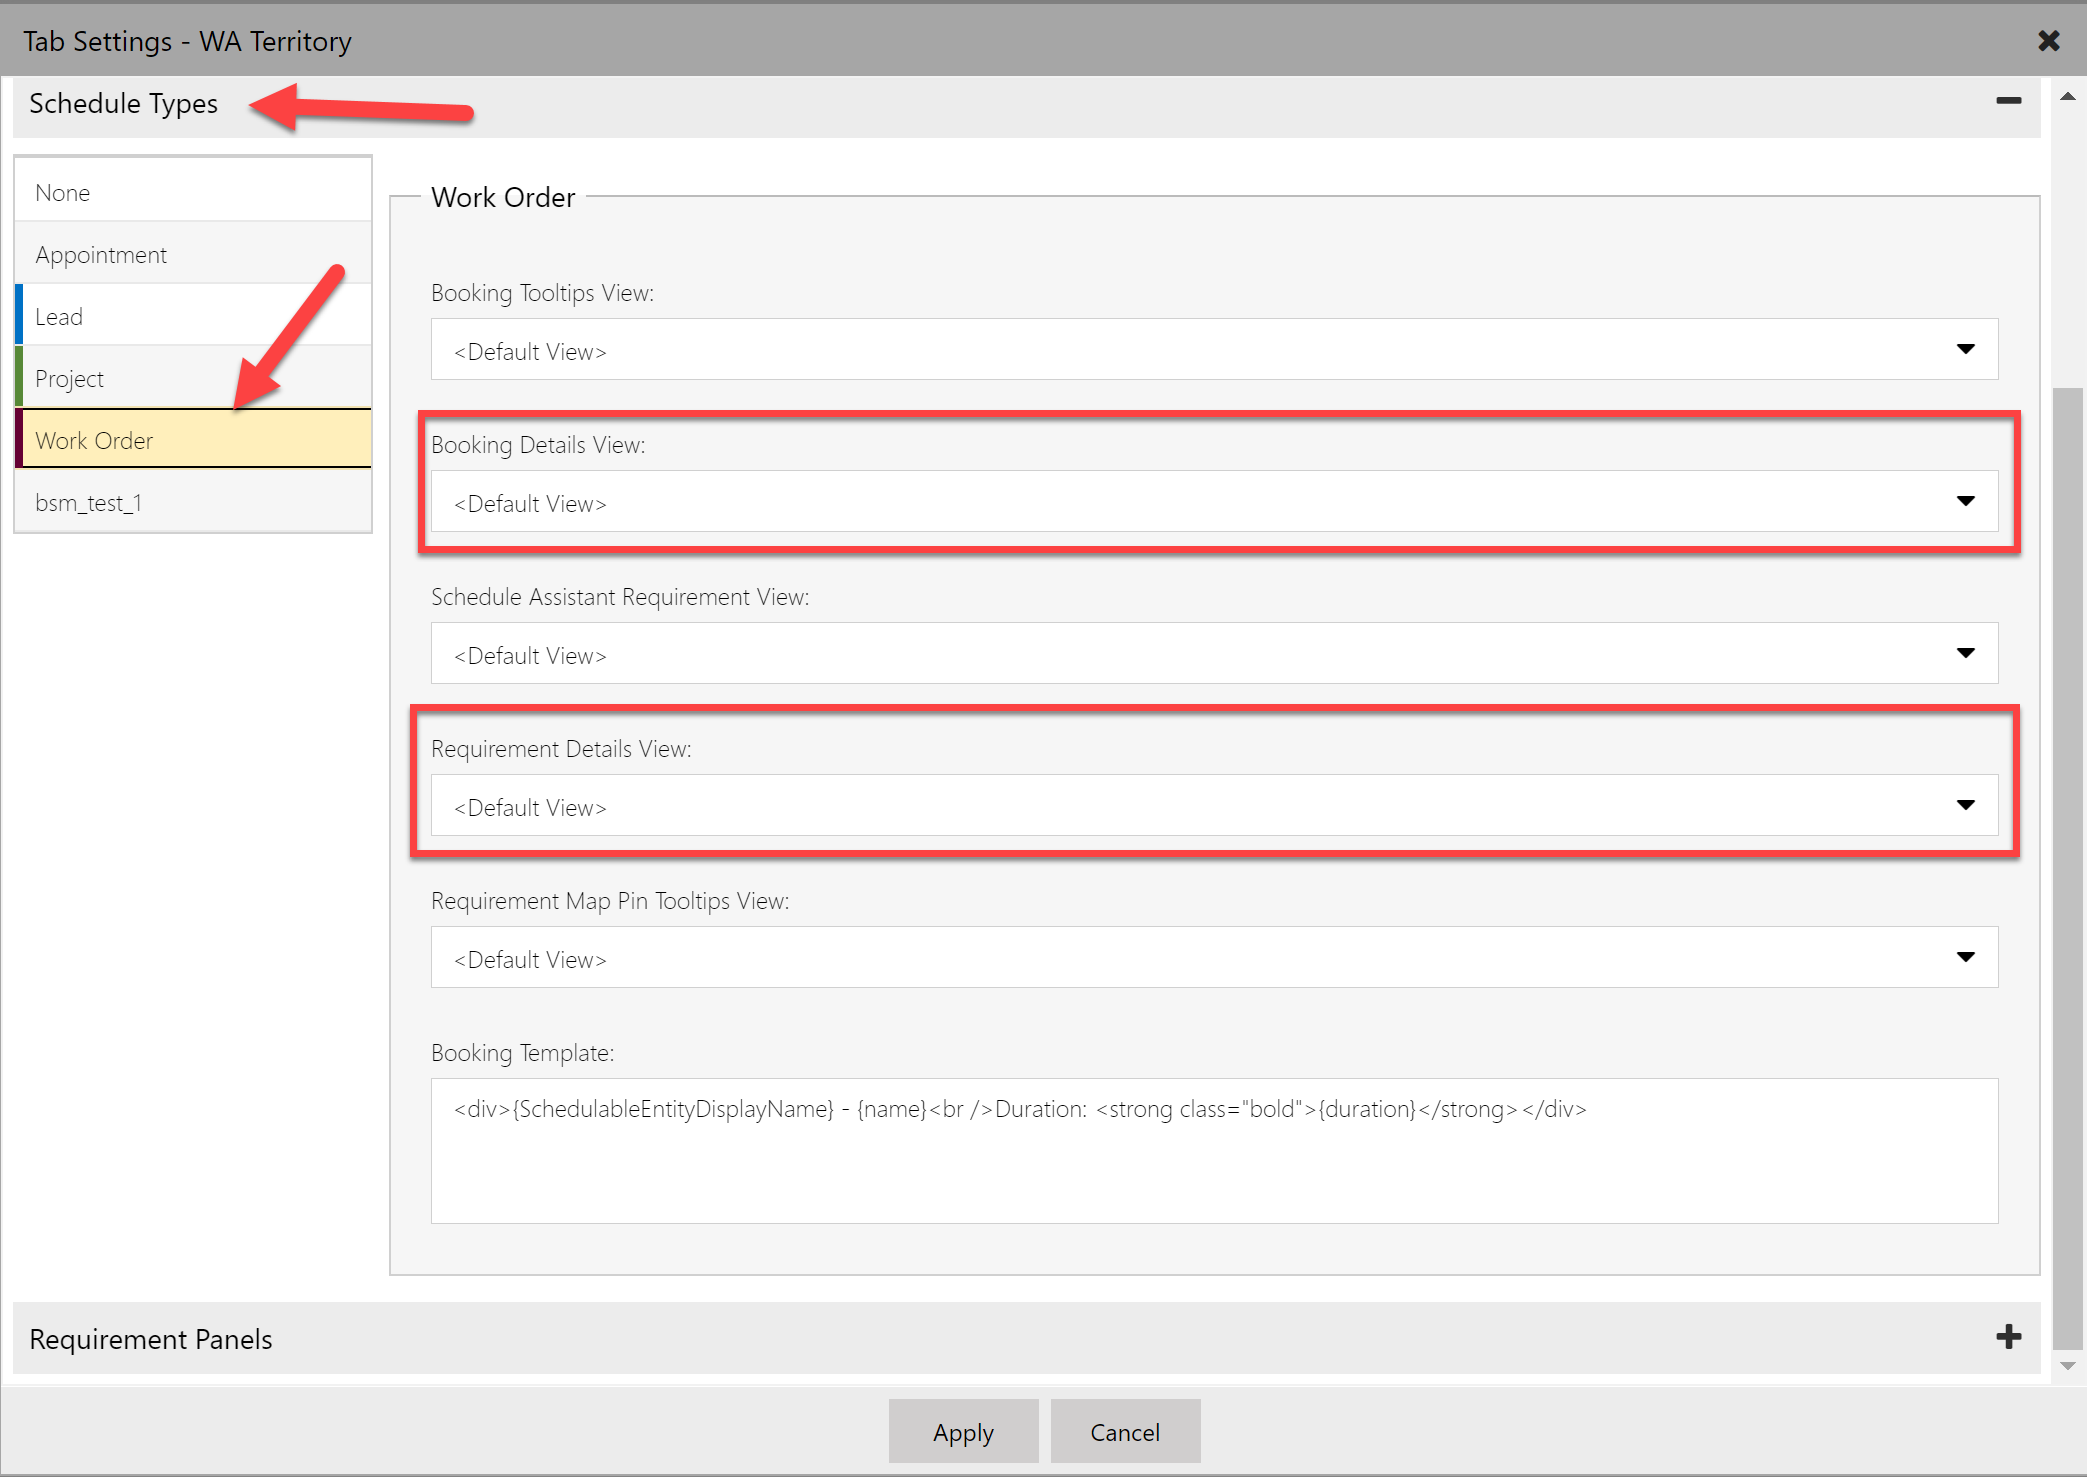
You can create any view on these respective objects. The filter criteria does not matter, but the columns you add to the view are the columns that will appear in the details pane. Create a view and open the schedule board settings. Then modify the views on this board for each object you wish to change. This change only affects users of this board.
Tip 5: Map view filter
Each schedule board has a view that controls which requirements should appear on the map. We don’t just display the requirements from the bottom panel on the map, as you may elect to split your requirements into multiple panels in the booking requirements grid. Yet it’s important to see all the pins on the map so you don’t miss key information. If you would like to change which unscheduled requirements records appear in the map, you can do this per board.
First, create a view. The filter criteria matters, but the columns do not since there is a different view controlling the map pin hover information, as mentioned in Tip 3. Then update the map filter view in the map settings section.
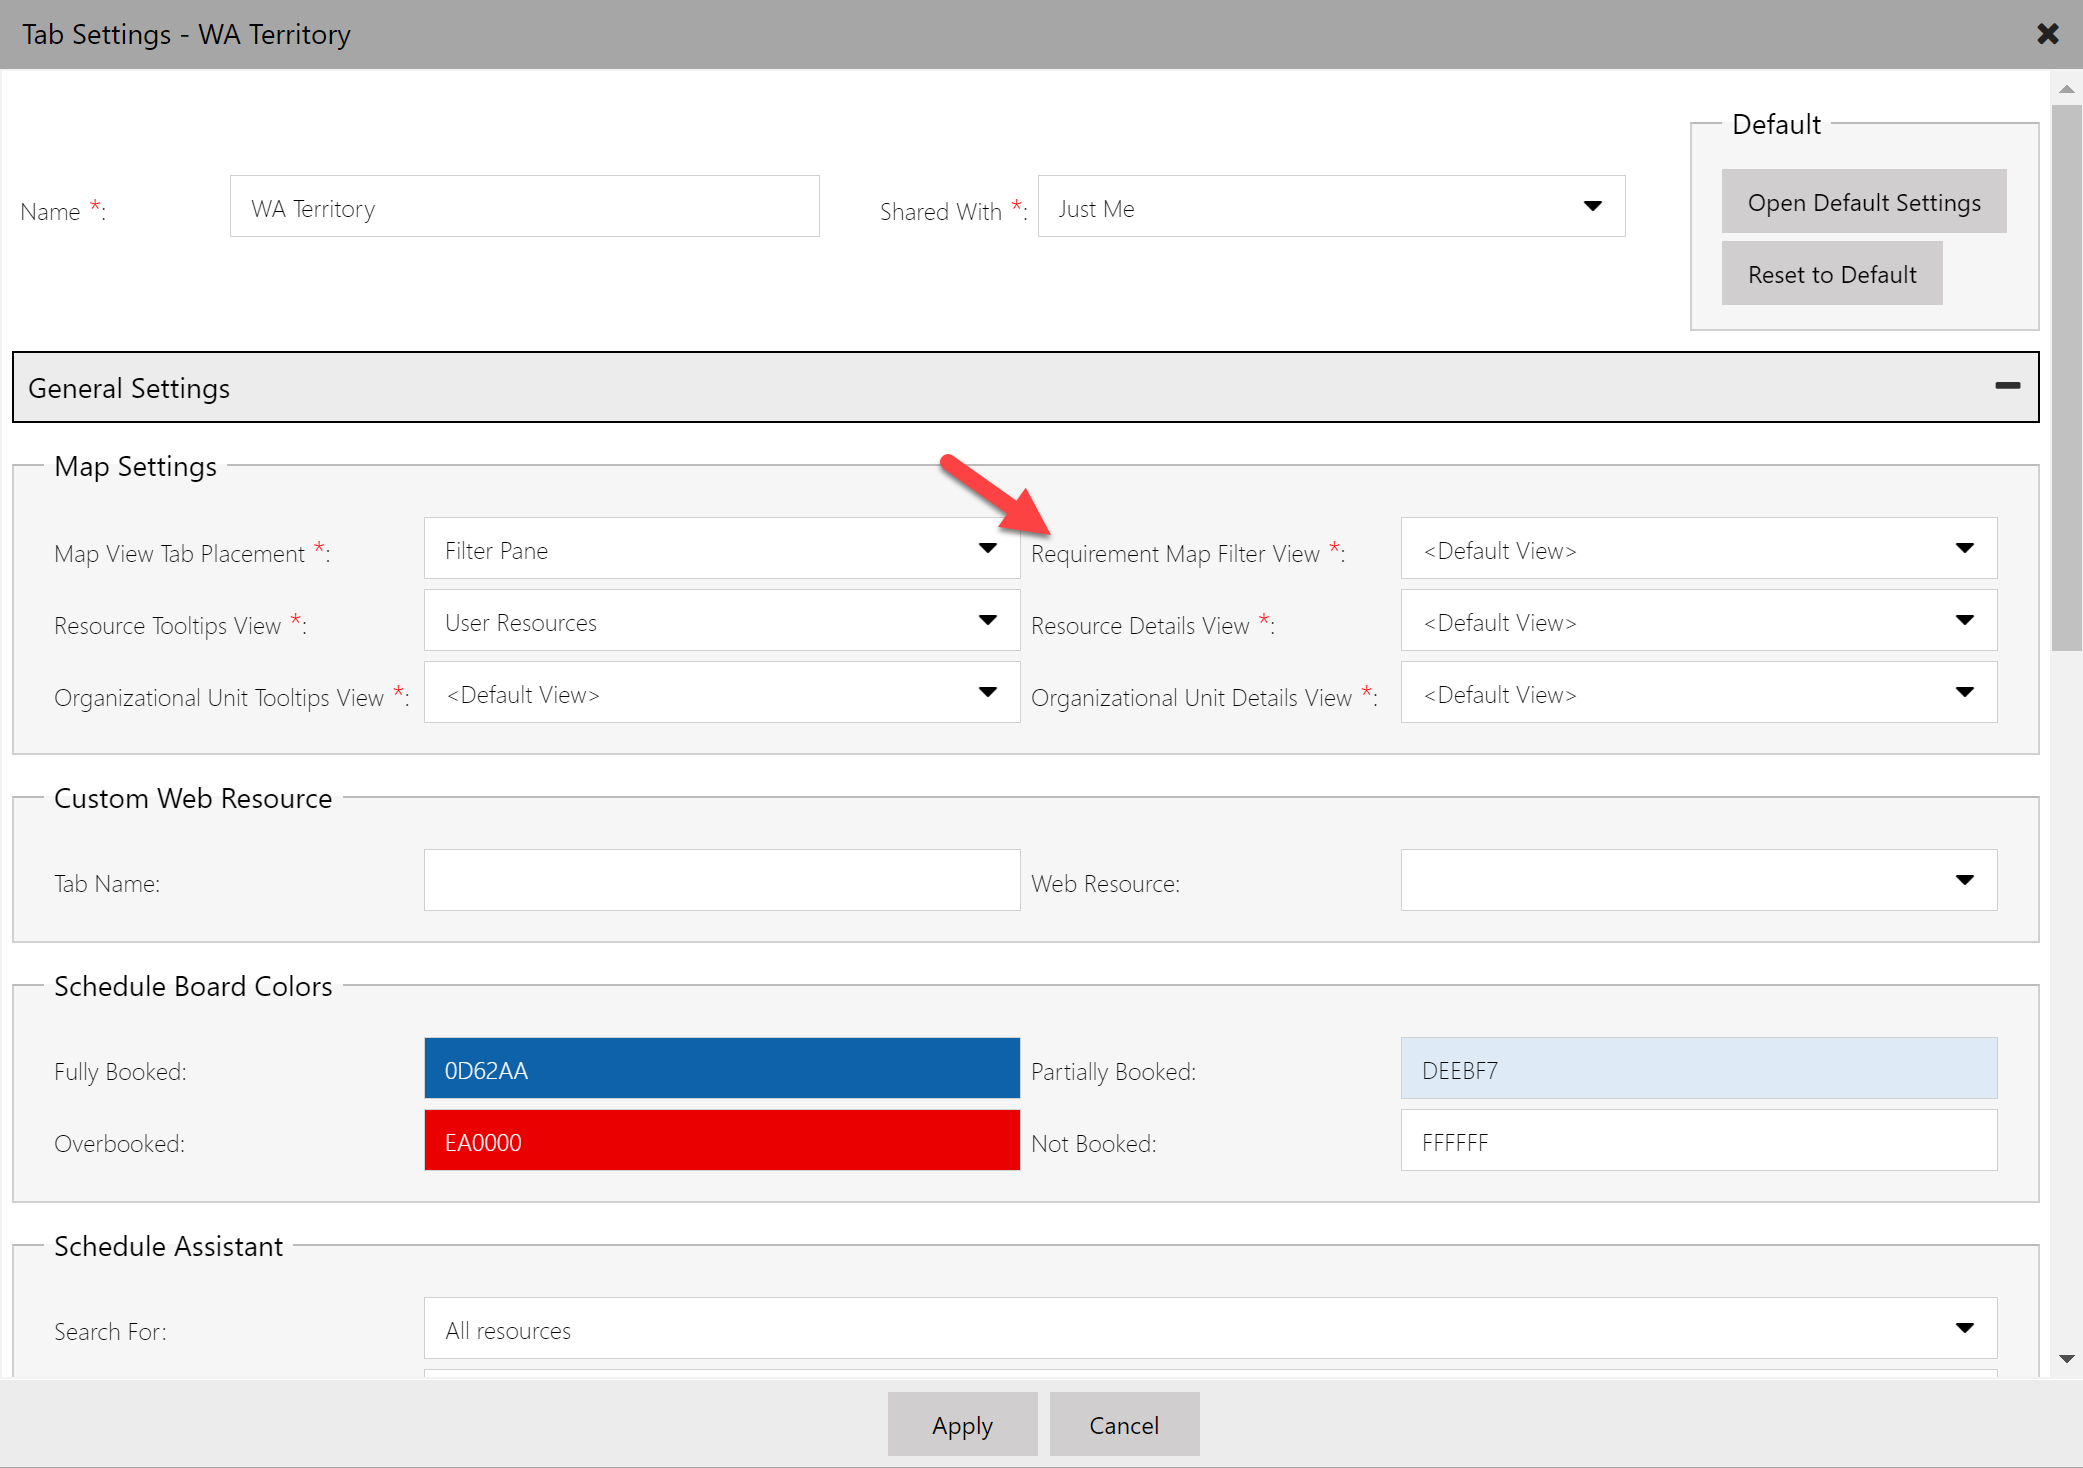
Note: If you choose to use the setting called “apply filter territory,” any territory filter added in the filter panel will apply to the requirements on the map as well. So if you filter by territory X in the filter panel, the territory filter will apply to the view we discussed in this tip. The map will show the pins, which are a subset of the view, and then the territory filter entered in the filter panel.
Tip 6: Adjust booking width
Having trouble seeing the end of the text on your bookings? Just use the pixel slider to increase the pixel width! This will affect the width for anyone using the same schedule board but only that board.
![]()
Important security notes for admins
- Please make sure your users do not have rights to modify the default schedule board. Use the Dynamics 365 security model to enforce this!
- When it comes to making the changes outlined in Tips 1 through 5, you can empower your users to do this on their own, or you can encourage them to tell their admin about the changes they need and someone with higher security rights can make the changes for the users. These changes likely will not happen frequently, but there are pros and cons to both approaches. Whichever users you do empower to make these changes, whether it is a dispatcher or some form of local admin, the person making the changes must have rights to modify those schedule board records. This may be a personal board only one user can use, or a shared board multiple users use. To learn more about shared and personal boards and the security behind this, check out this topic on schedule board tabs.
- There are schedule board settings that immediately take effect even before the board refreshes. These settings are located in the drop-down setting icon on the board.
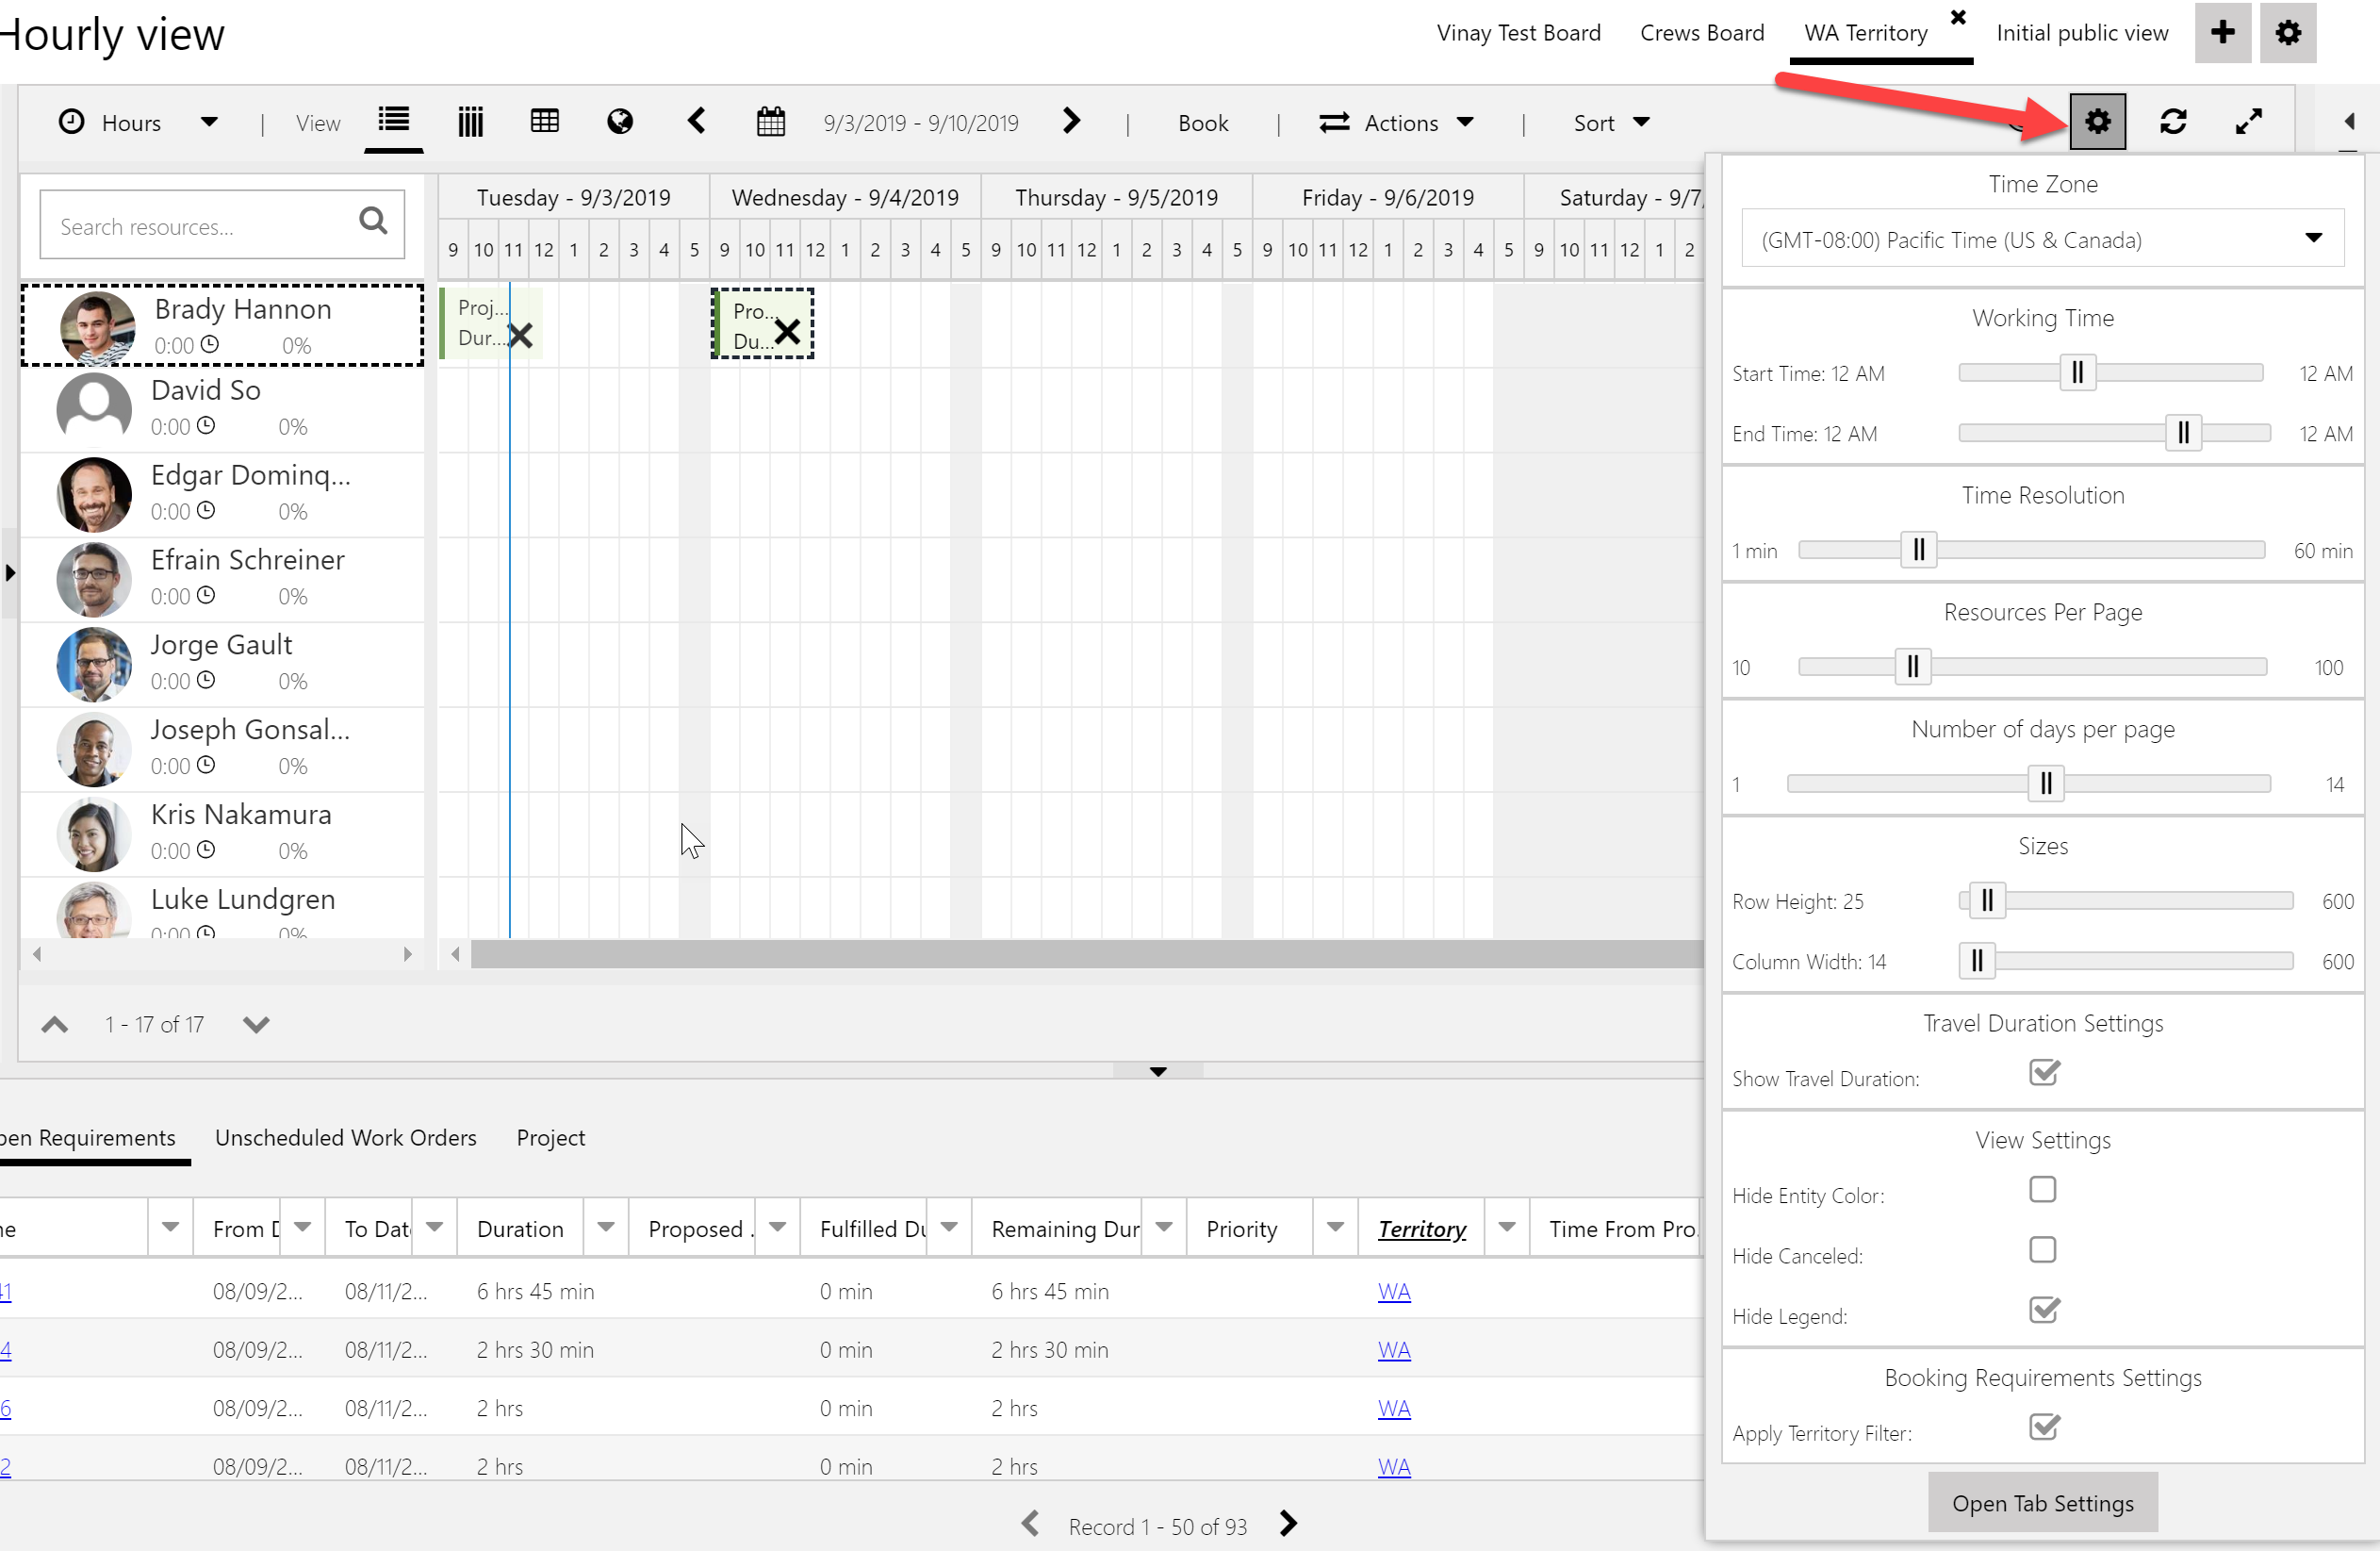
- When a user makes these changes, they will immediately see the changes on the board even before the board refreshes. For example, tip 6 fits into this category. If you want this change to save for this user and all users the next time the board refreshes, the user needs security rights to update this schedule board record.
- Another approach is to setup these settings to levels the user(s) are happy with and not give users rights to update the schedule board settings record. In this case, they can still temporarily tweak these settings, like quickly changing the pixel width, they can still do this and they will instantly see the change, but on next refresh, the settings will revert, and it will not affect other users. If you leverage this approach, users will see a message in the schedule board settings stating that the user does not have privileges to save the changes to the board.
Happy scheduling!
Dan Gittler, Principal PM