Using XMLports With Web Services
As a follow-up on my recent webcast, here is the general walkthrough of how to create an XMLport and use it for sending data to NAV.
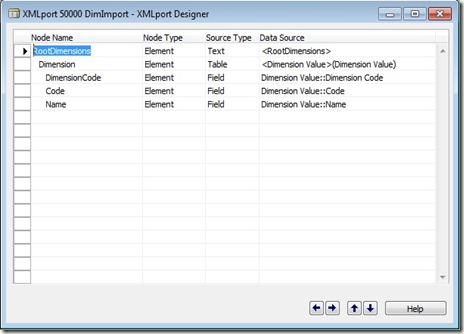
First, what we want to do is create our XMLport and make sure it has the elements and values that we want.
For the root element, I have set maxOccurs = 1 to avoid any confusion.
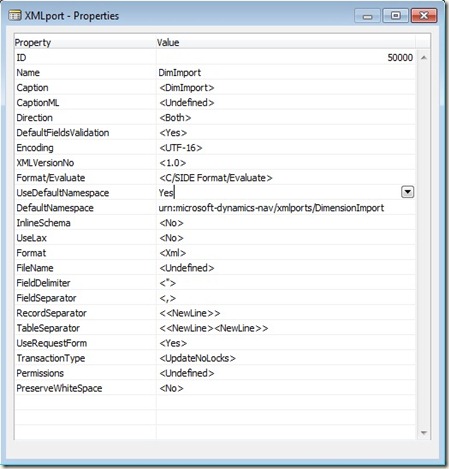
For the general XMLport, the UseDefaultNamespace and the DefaultNamespace values have been edited as seen below.
Other than that, I have no code on my XMLport, but naturally, anything goes that would work on a regular XMLport. Now to the Codeunit:
ImportDim(VAR DimImport : XMLport DimImport) Return : Text[30]
DimImport.IMPORT;
EXIT(‘Import Run’);
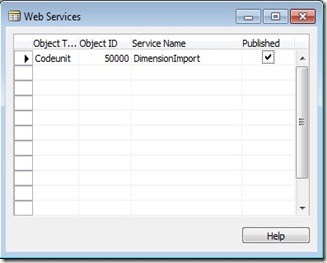
So basically we’re telling the XMLport to run an import and we’re returning to the Web Service that we’ve run. All we need to do now is expose the Web Service using Form 810:
Remember that the actual name of the codeunit does not have to match that of the service name here.
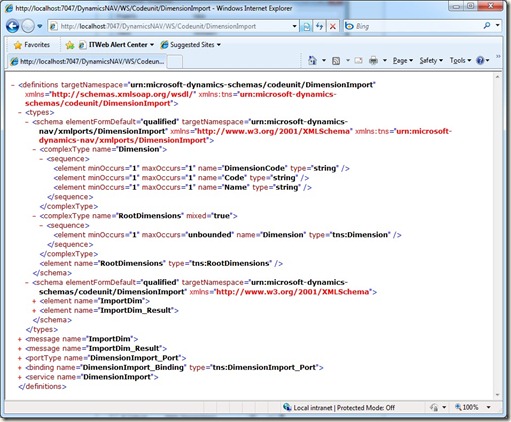
So now we move over to Visual Studio and start working with what we have. The first thing we’ll notice is that the WSDL matches our XMLport.
What we see is both the RootDimensions element which consists of multiple Dimension elements. From there, we can see the definition of the Dimension element the fields we’ve chosen to expose.
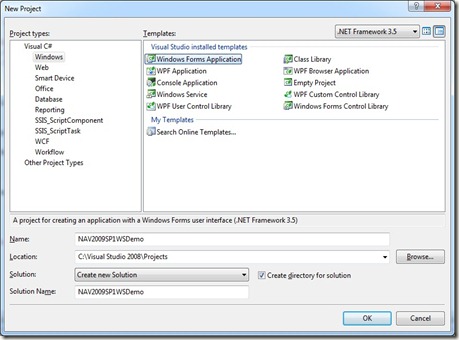
When creating a new project, we will go with a Windows Forms project this time.
And from there we will start off by adding a web reference to http://localhost:7047/DynamicsNAV/WS/Codeunit/DimensionImport .
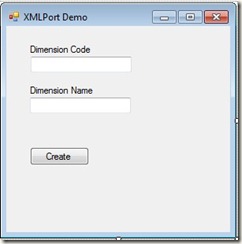
On my new form, I have created two input boxes for the Code and Name of the dimension and a Create button.
And then we have the code on the Create button, along with helpful comments:
using System;
using System.Collections.Generic;
using System.ComponentModel;
using System.Data;
using System.Drawing;
using System.Linq;
using System.Text;
using System.Windows.Forms;
namespace NAV2009SP1WSDemo
{
using WSDI;
public partial class Form1 : Form
{
public Form1()
{
InitializeComponent();
}
private void button1_Click(object sender, EventArgs e)
{
//Make sure the ResultLabel doesn’t have any text on multiple runs
ResultLabel.Text = “”;
//Create a WS reference instance, set credentials and define the company by specifying the URL.
DimensionImport NAVImport = new DimensionImport();
NAVImport.UseDefaultCredentials = true;
NAVImport.Url = “http://localhost:7047/DynamicsNAV/WS/CRONUS%20International%20Ltd/Codeunit/DimensionImport”;
//First we create our root element
RootDimensions RootDim = new RootDimensions()
//Then we create a List to handle our (possible) multiple dimensions
List<Dimension> DimList = new List<Dimension>();
//And then we create a single dimension
Dimension Dim = new Dimension();
if (dimInputCode.Text != “” && dimInputName.Text != “”)
{
//We assign the values from our textboxes to the single dimension
Dim.DimensionCode = “AREA”;
Dim.Code = dimInputCode.Text;
Dim.Name = dimInputName.Text;
//Then we add the single dimension to our list
DimList.Add(Dim);
//To get the list of dimensions “attached” to the root element, we use the following
RootDim.Dimension = DimList.ToArray();
try
{
//Then we send to NAV and show our result
ResultLabel.Text = NAVImport.ImportDim(ref RootDim);
}
catch (Exception ex)
{
//Show a possible exception
ResultLabel.Text = ex.ToString();
}
}
else
{
//Make sure there are values
ResultLabel.Text = “Both values must be filled”;
}
}
}
}
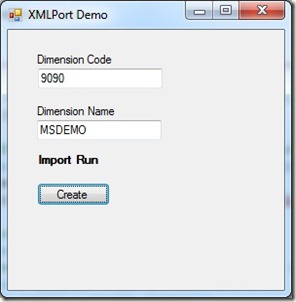
Our wonderful application is now ready to run and all we have to do is press F5:
We have now created our XMLport, exposed it using a codeunit and set data into it from a form based application.
