

AX 2012 Retail: How to enable tracing in AX 2012 Retail
AX 2012 Retail Tracing options
The aim of this blog is to describe the different trace options that exists in AX 2012 Retail. We have seen many request how and were to find information about errors in the retail system.
Topics
· Retail Store Connect (RSC)
- o PreActionlog
- o RSC messages, Scheduler log & Message tree
· Retail Transaction Services (RTS)
- o EventViewer
- o RetailLog
· POS trace
- o RetailLog
· Retail Database Utility log
- o RetailDatabaseUtility.log
· Microsoft Sync Service Trace
- o SyncTrace.log
· Avicode trace
RSC
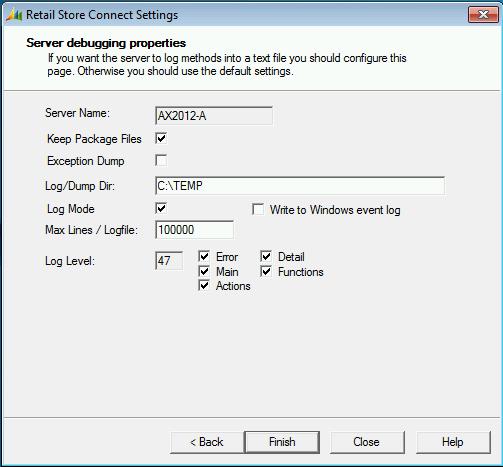
The RSC has several options for tracing.
Start the RSC settings from start/All program files/Dynamics AX 2012/Retail Store Connect/Retail Store Connect Settings
- · We can save the RSC packages and analyze the content of the R and I file
- · We can save the Exception dump happened on the Dbserver.exe
- · We can enable different log level and write it either to file or to the EventViewer
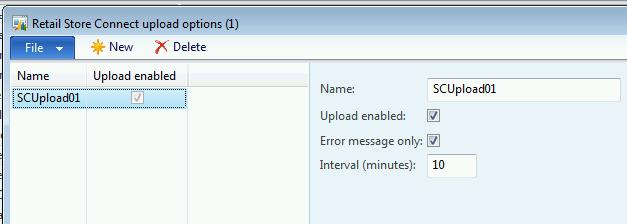
The RSC messages that is stored in the RSC database in the tables IncomingMessages and OutGoingMessages. We can move these records to the AX HQ database by enabling the RSC upload options.
In the AX, we can then see the messages here: Retail\Inquiries\Retail Store Connect messages

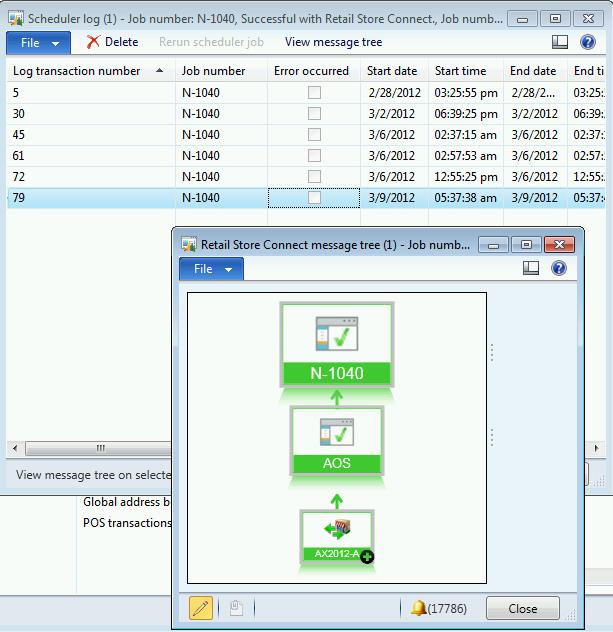
Or for the specific job you can go to Retail\Periodic\Retail Scheduler\Distribution scheduler\ mark one Job , scheduler jobs and scheduler log
Notice in AX 2012 we go the new nice visual presentation with the message tree. This is useful to see were an error occurred.
PreAction log
Before we can run an A-job, we need to run a PreAction to Action function (Create actions).
The messages of this function will be stored here Retail\Periodic\Retail Scheduler\Distribution scheduler\PreAction log

RTS
The Retail Transaction services also have a trace option. The information will be stored in the EventViewer of the RTS, but most detailed information in the store database table RetailLog
C:\Program Files (x86)\Microsoft Dynamics AX\60\Retail Transaction Service\ RetailTransactionService.exe.config
|
<?xml version=”1.0″ encoding=”utf-8″?>
<configuration>
<appSettings>
<add key=”Port” value=”1239″ />
<add key=”UseAX” value=”1″ />
<!–AOSINSTANCE@AOSSERVER:AOSPORT–>
<add key=”ObjectServer” value=”” />
<!– When both IPV4 and IPV6 are available, set to true to use IPV6. Default value is false. –>
<add key=”PreferIPV6″ value=”false” />
</appSettings>
<startup useLegacyV2RuntimeActivationPolicy=”true”>
<supportedRuntime version=”v4.0″ />
</startup>
<system.diagnostics>
<sources>
<!– this registers the listener with traces from a specific source –>
<!– 0-off, 1-error, 2-warn, 3-info, 4-verbose. –>
<source name=”TransactionServiceTracer” switchValue=”Error”>
<listeners>
<add name=”xmlListener”
type=”TransactionServicesLib.EnvironmentVariableXmlTraceListener, TransactionServicesLib, Version=6.0.0.0, Culture=neutral, processorArchitecture=MSIL”
initializeData=”%AppData%\RetailTransactionService.svclog”
traceOutputOptions=”ProcessId, ThreadId, Timestamp” />
<remove name=”Default” />
</listeners>
</source>
</sources>
</system.diagnostics>
</configuration>
|
If the file is not written to the appdata catalog, then change the path to example initializeData=”c:\temp\\RetailTransactionService.svclog”
POS Trace
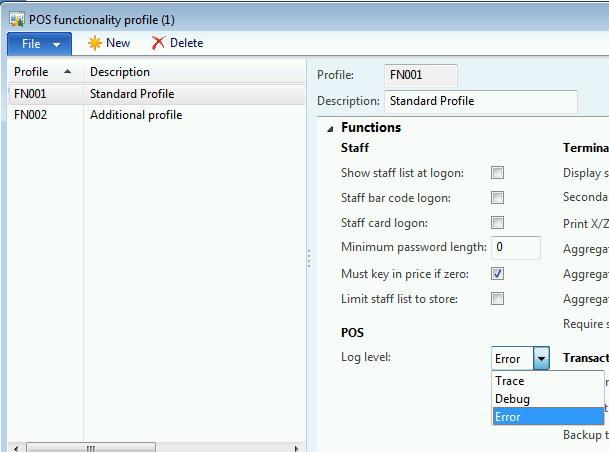
You can enable the POS trace in the functionality profile, which is then replicated to the store database. The information is stored in the RetailLog table
Retail Database Utility log
The database utility is used for installing the store database and offline database. It updates the Pos.exe.config and Microsoft.Dynamics.Retail.Offline.Service.exe.config with the correct information about the databases and POS terminal information.
The trace file generated in this trace is useful for debugging installation issues.
Add the lines in Black to your configuration file and choose the trace level.
The trace is located in the same folder as the config file.
C:\Program Files (x86)\Microsoft Dynamics AX\60\Retail Database Utility\RetailDatabaseUtility.exe.config
|
<?xml version=”1.0″ encoding=”utf-8″ ?>
<configuration>
<configSections>
<sectionGroup name=”userSettings” type=”System.Configuration.UserSettingsGroup, System, Version=4.0.0.0, Culture=neutral, PublicKeyToken=b77a5c561934e089″ >
<section name=”Microsoft.Dynamics.Retail.Pos.DatabaseUtility.Properties.Settings” type=”System.Configuration.ClientSettingsSection, System, Version=4.0.0.0, Culture=neutral, PublicKeyToken=b77a5c561934e089″ allowExeDefinition=”MachineToLocalUser” requirePermission=”false” />
</sectionGroup>
</configSections>
<connectionStrings />
<userSettings>
<Microsoft.Dynamics.Retail.Pos.DatabaseUtility.Properties.Settings>
<setting name=”OfflineServerName” serializeAs=”String”>
<value />
</setting>
<setting name=”OfflineDatabaseName” serializeAs=”String”>
<value />
</setting>
<setting name=”StoreServerName” serializeAs=”String”>
<value />
</setting>
<setting name=”StoreDatabaseName” serializeAs=”String”>
<value />
</setting>
<setting name=”StoreID” serializeAs=”String”>
<value />
</setting>
<setting name=”TerminalID” serializeAs=”String”>
<value />
</setting>
<setting name=”DataAreaID” serializeAs=”String”>
<value />
</setting>
<setting name=”DatabaseAccessUserGroup” serializeAs=”String”>
<value></value>
</setting>
<setting name=”CreateDBAccessUserGroup” serializeAs=”String”>
<value>False</value>
</setting>
</Microsoft.Dynamics.Retail.Pos.DatabaseUtility.Properties.Settings>
</userSettings>
<system.diagnostics>
<switches>
<!– 0-off, 1-error, 2-warn, 3-info, 4-verbose. –>
<add name=”SyncTracer” value=”3″ />
</switches>
<trace autoflush=”true”>
<listeners>
<add name=”FileListener” type=”System.Diagnostics.TextWriterTraceListener” initializeData=”RetailDatabaseUtility.log”/>
</listeners>
</trace>
</system.diagnostics>
</configuration>
|
Microsoft Sync Service Trace
The Microsoft sync service that handles the synchronization from the store database and the offline database can be modified, so it creates a trace file of the process.
The trace is located in the same folder as the config file.
C:\Program Files (x86)\Microsoft Dynamics AX\60\Retail POS\RetailOffline\ Microsoft.Dynamics.Retail.Offline.Service.exe.config
|
<?xml version=”1.0″ encoding=”utf-8″ ?>
<configuration>
<configSections>
<sectionGroup name=”applicationSettings” type=”System.Configuration.ApplicationSettingsGroup, System, Version=4.0.0.0, Culture=neutral, PublicKeyToken=b77a5c561934e089″ >
<section name=”Microsoft.Dynamics.Retail.Offline.Service.Properties.Settings” type=”System.Configuration.ClientSettingsSection, System, Version=4.0.0.0, Culture=neutral, PublicKeyToken=b77a5c561934e089″ requirePermission=”false” />
</sectionGroup>
</configSections>
<connectionStrings>
<add name=”Microsoft.Dynamics.Retail.Offline.Service.Properties.Settings.LocalDBConnectionString”
connectionString=”” />
<add name=”Microsoft.Dynamics.Retail.Offline.Service.Properties.Settings.RemoteDBConnectionString”
connectionString=”Data Source=MSSQL\AX;Initial Catalog=MS;Integrated Security=SSPI;Persist Security Info=false;Pooling=false;TrustServerCertificate=true;Encrypt=TRUE” />
</connectionStrings>
<applicationSettings>
<Microsoft.Dynamics.Retail.Offline.Service.Properties.Settings>
<setting name=”SyncInterval” serializeAs=”String”>
<value>00:00:10</value>
</setting>
<setting name=”MemoryDataCacheSizeKB” serializeAs=”String”>
<value>25600</value>
</setting>
<setting name=”SyncInParallel” serializeAs=”String”>
<value>True</value>
</setting>
<setting name=”StoreID” serializeAs=”String”>
<value>0001</value>
</setting>
<setting name=”TerminalID” serializeAs=”String”>
<value>00011</value>
</setting>
</Microsoft.Dynamics.Retail.Offline.Service.Properties.Settings>
</applicationSettings>
<system.diagnostics>
<switches>
<!– 0-off, 1-error, 2-warn, 3-info, 4-verbose. –>
<add name=”SyncTracer” value=”1″ />
</switches>
<trace autoflush=”true”>
<listeners>
<add name=”Tracing” type=”System.Diagnostics.TextWriterTraceListener” initializeData=”SyncTrace.log” />
</listeners>
</trace>
</system.diagnostics>
</configuration>
|
AVICODE
This tool is a .NET monitoring tool that we can use on the POS to see which functions called an example the duration of these calls. This is very useful for performance optimization on the POS
|
The general idea is to use the Avicode code profiler to give us information on performance bottlenecks, etc. Here are the instructions
– Install either the avicode agent in 64-bit or 32-bit installer which you can read about here http://technet.microsoft.com/en-us/library/gg182752.aspx. it should be a part of SCOM
–
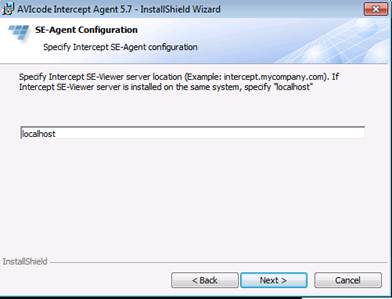
– When going through the install, you can just leave the location of the Avicode SE-viewer at localhost (see screenshot #1 below). We won’t be sending the results to an Avicode server but will be generating local files.
– After installing, there should be this directory: “C:\Program Files\AVIcode\Intercept\Agent\v5.7.491” – make a backup of the Configuration directory. Copy these files into the folder instead
– Go to Windows Services and restart the “Intercept Service” to make sure the configuration is re-read
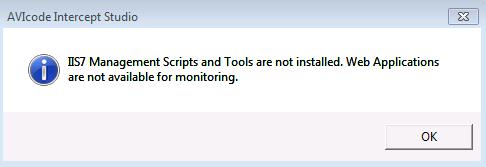
– Under your start menu, launch “Intercept Management Console”. Click OK on the IIS7 scripts error (screenshot 2) if you don’t have IIS installed.
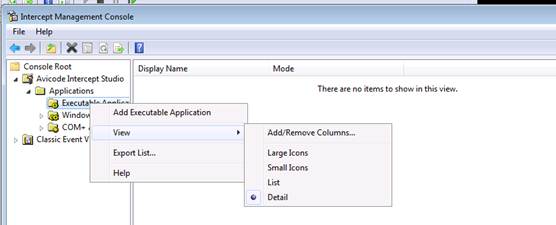
– Right-click on “Executable Applications” and select “Add Executable Application” to start the wizard (screenshot 3).
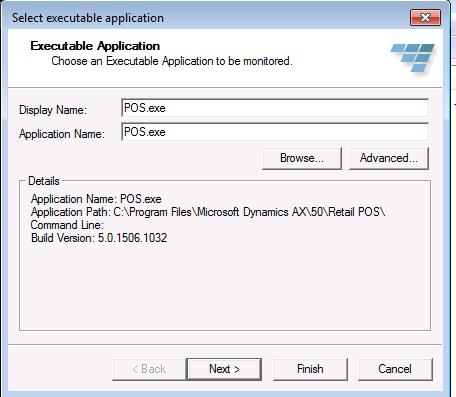
– Browse to POS.exe on your machine (#4) and hit next.
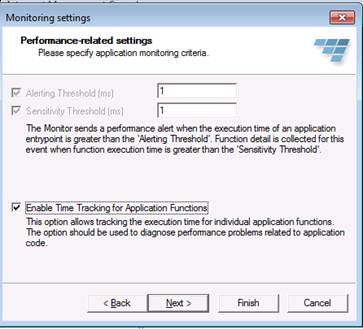
– Change the thresholds to 1 (we’ll report everything) and enable Time Tracking (#5). Hit next.
– Select All Exceptions and mark Collect Parameters (#6). Next and Finish.
– Click OK on the message about restarting the application.
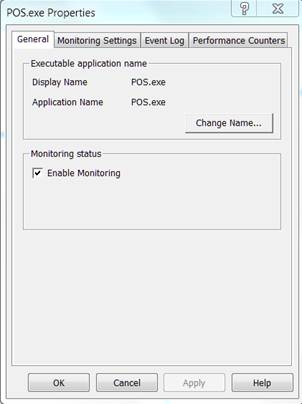
– Monitoring should now be enabled for everything the POS.exe does. If you want to temporarily turn it off until you get to a place in the app that you’re interested in, you can do that and then just turn it on when you’re ready to start monitoring. Right click on the POS.exe entry in the tree and select properties. There is a checkbox to enable or disable monitoring (#7).
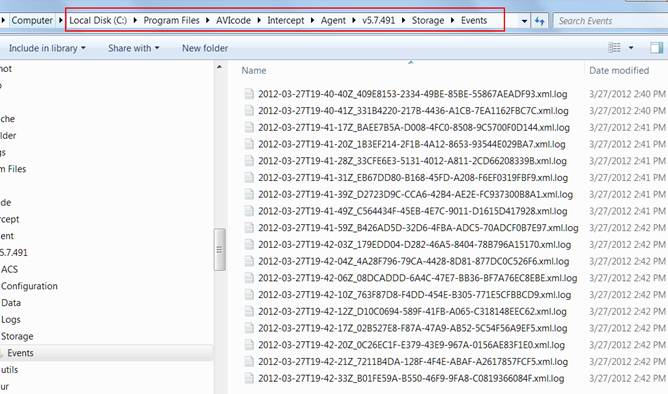
– After you’re done repro’ing the issue, turn off monitoring or just exit the POS.exe. Your log files should be in Storage\Events directory. There should be about 10 or so XML files (#8). Zip those up and send them to me!
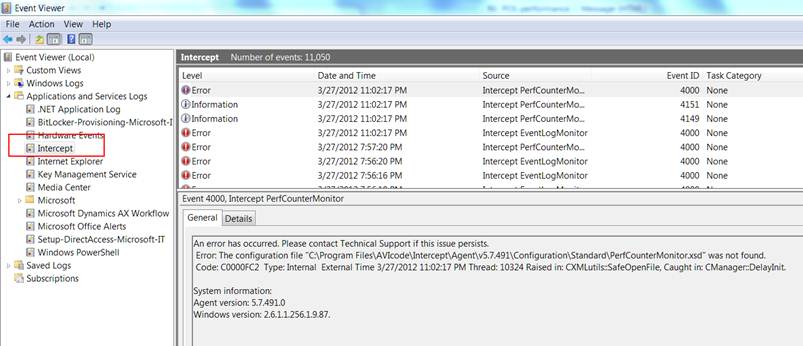
– If you don’t have any files in that directory, look for events in Event Viewer > Applications and Services Logs > Intercept (screenshot #9) for clues.
Screenshots:
#1
#2
#3
#4
#5
#6
#7
#8
#9
|
Author: Kim Truelsen
Date: 7/8-2012


