
Installing the AX 2012 R3 Async Server to a Clustered SQL Server Environment
A while back I had a request to install the Microsoft Dynamics AX 2012 R3 Async Server against a SQL Server Cluster. Since the Demo VM’s available are all one-box setup’s I thought this would be a good challenge. As it turns out I was right, in order to install against a SQL Server Cluster we have to make a few slight modifications to installation. Since we have to modify the installation we are going to have to install and configure the Async Server via the PowerShell Installation method. If you are not familiar with this method then please check out the Installation Document on TechNet at: http://technet.microsoft.com/EN-US/library/dn741219.aspx
For this particular install we are running the following:
- 3 SQL Nodes on the default SQL Instance (you can use a named instance if you desire) all ready setup and configured
- Windows Clustering Service to act as a our load balancer/failover which is all ready setup and configured
- Our cluster virtual name that we are installing/connecting to is: AGCluster.Contoso.com
- We are only going to be installing the Website against a Single IIS instance. (I’ll cover installing against an IIS Load Balanced site later)
- Remember the installing user must have permissions to access the SQL Server and create Databases.
To begin:
- Launch your AX 2012 R3 media
- Select to Install the Microsoft Dynamics AX 2012 R3 Async Server
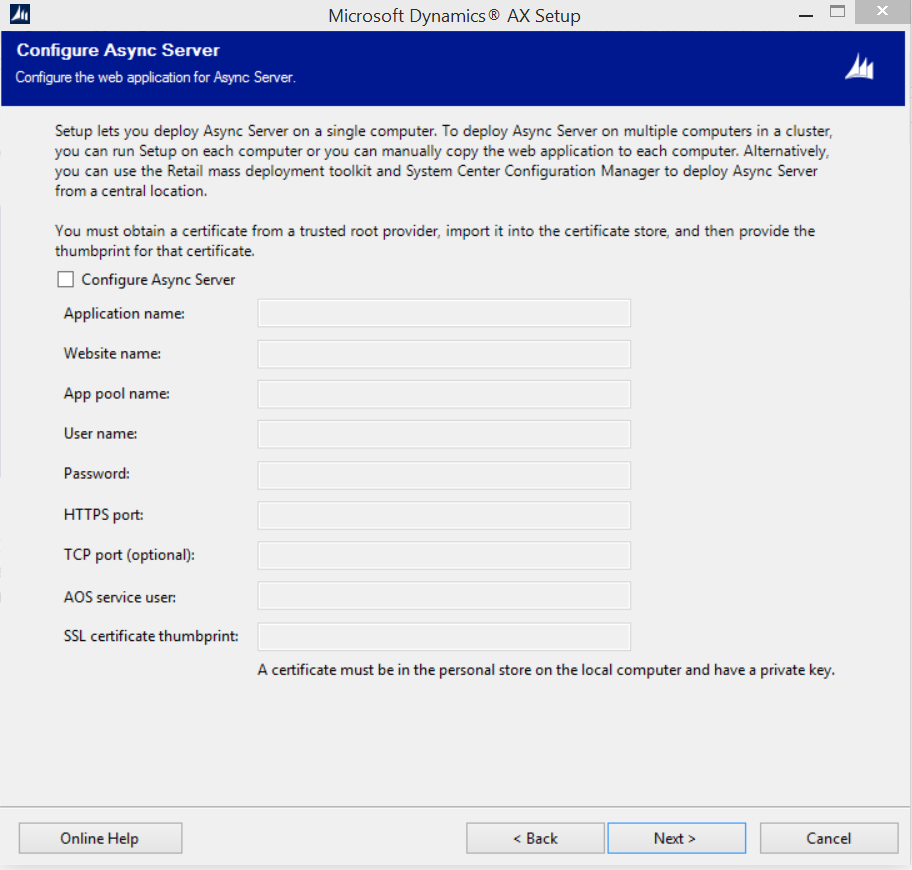
- When you reach the Configure Async Server Window > UnMark the “Configure Async Server” option
4. Click next to proceed with the Installation until it completes
5. After your installation completes, open Windows File Explorer and browse to your Async Server install directory. (The default for this is: C:\Program Files
(x86)\Microsoft Dynamics AX\60\CDX\Async Server\Tools unless you selected to install AX to a different drive)
6. Within the Tools folder we need to modify both the SS-Settings.xml and SS-Topology.xml files before we can proceed with the PowerShell Install.
A. First we are going to start with the SS-Settings.xml file. Since we are going to do a Single IIS Server we can follow the instructions on the TechNet Installation page for most of the xml file. However there are a few key fields that we need to pay special attention to. They are listed below:
HQMessageDatabaseServerName
HQMessageDatabaseServerNamedInstanceName
HQMessageDatabase
InstallDatabase
InstallSynchService
WebApplicationServiceBinarySourceFolder
In order to install the Async Server against a SQL Cluster we are going to have to do a split install. A split install means we are only installing the database portion or IIS portion as one time. So let’s quickly break down what each of these settings will do.
HQMessageDatabaseServerName <———– This is the name of the machine hosting a single SQL Server, for a SQL Cluster this is the name of the Virtual Cluster Address. Since in this example our cluster is called AGCluster.Contoso.com, we are going to set this value to be AGCluster.
HQMessageDatabaseServerNamedInstanceName <———- This is going to be the name of our SQL Named Instance, if you’re not using a named Instance then set this to the value of SQL Cluster name.
HQMessageDatabase <———– This is will be the name of our Message Database for the Async Server. Don’t confuse this with the Async Client Message database. These are two separate databases.
InstallDatabase <—————— By setting this to true, we are going to create the above message database, create the local Windows Groups on SQL Server machine and assign the appropriate permissions to the database for these groups. Setting it to false skips this part of the installation code. Because we need to do a split install, we are going to set this value to be true.
InstallSynchService <————– By settings this to true, we are going to install and create all of the IIS website components, this is what creates the files on the file system. Please keep in mind when you set this to true, the Installer uses the server specified in HQMessageDatabaseServerName as the name of the IIS Machine to install on. Setting this to false will skip this part of the installation. Since our IIS Service will not be installed on a SQL Virtual Cluster, we are going to set this value too false for the install.
WebApplicationServiceBinarySourceFolder <———— This is the folder where you installed the Async Server to. One good point here, the Installer is expecting the folder label package to be include in path. This is because during the IIS install we need to update the Web.config file that was created in here.
For a SQL Cluster install our values in the SS-Settings.xml file will look like the following:
<Setting key=”HQMessageDatabaseServerName” value=”AGCluster” />
<Setting key=”HQMessageDatabaseServerNamedInstanceName”
value=”AGCluster” />
<Setting key=”HQMessageDatabase” value=”AsyncServerMessageDatabase” />
<Setting key=”InstallDatabase” value=”true” />
<Setting key=”InstallSynchService” value=”false” />
<Setting key=”WebApplicationServiceBinarySourceFolder” value=”C:\Program Files (x86)\Microsoft Dynamics AX\60\CDX\Async Server\package” />
Remember to save your changes, and place the file back in the Tools folder so your PowerShell Script can use it.
B. Now we need to modify the SS-Topology.xml file for a single SQL server, or One-box install we wouldn’t normally need to edit this file. However the reason for making changes to this file is because of how our installer interrupts the Settings.xml file. As mentioned earlier the Install Database section tries to create a Windows Users Group on the machine that we specified in the HQMessageDatabaseServerName field. Since we are pointing our SQL Server to a Virtual Cluster Name that isn’t an actual Machine the installer will fail when it tries to create the Windows Groups. The below error message is what you will end up seeing:
Exception : System.Management.Automation.MethodInvocationException: Exception calling “Create” with “1”
argument(s): “Create failed for Login ‘agcluster\RetailHQMessageDBUsers’. ” —>
Microsoft.SqlServer.Management.Smo.FailedOperationException: Create failed for Login
‘agcluster\RetailHQMessageDBUsers’. —>
Microsoft.SqlServer.Management.Common.ExecutionFailureException: An exception occurred while
executing a Transact-SQL statement or batch. —> System.Data.SqlClient.SqlException: Windows
NT user or group ‘agcluster\RetailHQMessageDBUsers’ not found. Check the name again.
at Microsoft.SqlServer.Management.Common.ConnectionManager.ExecuteTSql(ExecuteTSqlAction
action, Object execObject, DataSet fillDataSet, Boolean catchException)
To avoid the above error, we need to tell the Installer not to create our Groups or assign users to groups. Instead we will manually create our groups and assign users to them. There’s a very import point I need to cover here about how the Installer reads and uses the SS-Topology.xml file. The PowerShell installer is designed to replace any values between the characters [ and ] with the value we specified in the SS-Settings.xml file.
Using our example when the installer reads the line <ServerName>[HQMessageDatabaseServerName]</ServerName> out of the SS-Topology.xml file it replaces [HQMessageDatabaseServerName] with the value of “AGCluster”. As you can see through the SS-Topology.xml file we are installing or creating everything against the machine we specified in the Settings file. For a one box or Single SQL Server install this is great, since we are going to be doing a Split Install we need to trick the installer into skipping the User Group creation and Permissions assignment. The nice part here is that this is pretty easy to do, we just need to comment out the sections of this file that refer to our Groups. Since this is a standard XML document to comment out these sections we just start with a “<!– ” and end our comment with a “–>” As you can see from the highlighted sections below there are basically three sections that we need to comment out.
<Settings>
<InstallDatabase>[InstallDatabase]</InstallDatabase>
<InstallSynchService>[InstallSynchService]</InstallSynchService>
<Databases>
<Database id=”HQMessageDB” install=”true” dropifexists=”false”>
<ServerName>[HQMessageDatabaseServerName]</ServerName>
<ServerNamedInstanceName>[HQMessageDatabaseServerNamedInstanceName]</ServerNamedInstanceName>
<DatabaseName>[HQMessageDatabase]</DatabaseName>
<Installation>
<InstallationType>SqlScripts</InstallationType>
<InstallationValue>..\Database\HQMessageDatabase.sql</InstallationValue>
</Installation>
<!– <WindowsLogin id=”RetailHQMessageDBUsers” GroupName=”[HQMessageDatabaseServerName]\RetailHQMessageDBUsers” CreateIfNotExists=”true” MappedSqlRoleName=”db_datareader” />
//<WindowsLogin id=”RetailHQMessageDBUsers” GroupName=”[HQMessageDatabaseServerName]\RetailHQMessageDBUsers” CreateIfNotExists=”true” MappedSqlRoleName=”db_datawriter” />
<WindowsLogin id=”RetailHQMessageDBUsers” GroupName=”[HQMessageDatabaseServerName]\RetailHQMessageDBUsers” CreateIfNotExists=”true” MappedSqlRoleName=”db_executor” />
<WindowsLogin id=”AOSServiceUser” UserName=”[AOSServiceUser]” MappedSqlRoleName=”db_datareader” />
<WindowsLogin id=”AOSServiceUser” UserName=”[AOSServiceUser]” MappedSqlRoleName=”db_datawriter” />
<WindowsLogin id=”AOSServiceUser” UserName=”[AOSServiceUser]” MappedSqlRoleName=”db_executor” /> –>
</Database>
</Databases>
<WindowsGroupMemberShips>
<!– <add MachineName=”[HQMessageDatabaseServerName]” GroupName=”RetailHQMessageDBUsers” UserName=”[AppPoolUser]” /> –>
</WindowsGroupMemberShips>
<SynchServerInstance>
<WebAppPool id=”SynchServiceAppPool”>
<Name>[AppPoolName]</Name>
<ProcessModel_IdentityType>Custom</ProcessModel_IdentityType>
<ProcessModel_UserName>[AppPoolUser]</ProcessModel_UserName>
</WebAppPool>
<WebSite>
<Name>[WebSiteName]</Name>
<PhysicalPath>[WebSiteWorkingFolder]</PhysicalPath>
<ApplicationPoolXPath>Settings/SynchServerInstance/WebAppPool[@id=’SynchServiceAppPool’]</ApplicationPoolXPath>
<PortSSL>[WebSiteHttpsPort]</PortSSL>
<PortTcp>[WebSiteTcpPort]</PortTcp>
<ServerCertificateThumbprint>[WebSiteSSLCertificateThumbprint]</ServerCertificateThumbprint>
<ServerCertificateRootStore>[WebSiteSSLCertificateRootStore]</ServerCertificateRootStore>
<ServerCertificateStore>[WebSiteSSLCertificateStore]</ServerCertificateStore>
<WebApplication>
<Name>[WebApplicationName]</Name>
<PhysicalPath>[WebApplicationWorkingFolder]</PhysicalPath>
<ApplicationPoolXPath>Settings/SynchServerInstance/WebAppPool[@id=’SynchServiceAppPool’]</ApplicationPoolXPath>
<ServiceBinarySourceFolder>[WebApplicationServiceBinarySourceFolder]</ServiceBinarySourceFolder>
<AppSettings>
<!– <PropertyForConnectionString Key=”ConnectionString” DatabaseXpath=”Settings/Databases/Database[@id=’HQMessageDB’]” LoginId=”RetailHQMessageDBUsers” /> –>
</AppSettings>
</WebApplication>
</WebSite>
</SynchServerInstance>
</Settings>
Now simply Save the SS-Topology file back to your Tools folder.
7. Now we simply need to run the PowerShell Installation commands as documented in TechNet: http://technet.microsoft.com/EN-US/library/dn741219.aspx
When it completes you should see the below message.
![]()
8. Before we can install the IIS Side of the Application we create our Users, Groups and assign appropriate permissions. This part is actually pretty easy as all of our information will be coming from the SS-Settings.XML and SS-Topology.xml file’s that we modified earlier. If we look at the sections we commented out in the Topology.xml file we can see that we are trying to make the following Windows Login Group
<WindowsLogin id=”RetailHQMessageDBUsers” GroupName=”[HQMessageDatabaseServerName]\RetailHQMessageDBUsers” CreateIfNotExists=”true” MappedSqlRoleName=”db_datareader” />
//<WindowsLogin id=”RetailHQMessageDBUsers” GroupName=”[HQMessageDatabaseServerName]\RetailHQMessageDBUsers” CreateIfNotExists=”true” MappedSqlRoleName=”db_datawriter” />
<WindowsLogin id=”RetailHQMessageDBUsers” GroupName=”[HQMessageDatabaseServerName]\RetailHQMessageDBUsers” CreateIfNotExists=”true” MappedSqlRoleName=”db_executor” />
<WindowsLogin id=”AOSServiceUser” UserName=”[AOSServiceUser]” MappedSqlRoleName=”db_datareader” />
<WindowsLogin id=”AOSServiceUser” UserName=”[AOSServiceUser]” MappedSqlRoleName=”db_datawriter” />
<WindowsLogin id=”AOSServiceUser” UserName=”[AOSServiceUser]” MappedSqlRoleName=”db_executor” />
<add MachineName=”[HQMessageDatabaseServerName]” GroupName=”RetailHQMessageDBUsers” UserName=”[AppPoolUser]” />
<PropertyForConnectionString Key=”ConnectionString” DatabaseXpath=”Settings/Databases/Database[@id=’HQMessageDB’]” LoginId=”RetailHQMessageDBUsers” />
Based on the above lines we can see that we are trying to create a Local User Group on the SQL Server named “RetailHQMessageDBUsers” Since we have more than 1 SQL Server Node, and we want to ensure a seamless cluster failover, we should create a Domain User Group called “RetailHQMessageDBUsers” instead of a local group. The second part of this then assigning the SQL permissions of DB_dataReader/DataWriter/Exectutor to the Group for the Async Message Database that we created. The next part of this code is Adding the User that runs the AOS account to the Async Server Message Database with the same permissions. Next we add the account running our IIS Application Pool to the Group we created, and finally we update the Web.config file with the Async Server Message Database and the Group Name.
In order to proceed we need to do the following:
A. Create an Active Direcetory User group named “RetailHQMessageDBusers”
B. Add the Domain Account running the Application Pool to our User Group
C. In SQL Server Management Studio add a user Login for the Group “RetailHQMessageDBusers” and give it the permissions to the Async Server Message Database.
D. In SQL Server Management Studio add the AOS Account as a login and give it Permissions to the Async Server Message Database.
** For the Connection String portion we can set this after we install the IIS Web Parts section.
9. Now that we’ve created the correct permissions we can install the IIS Portion of the Async Server. *****Remove all the <!– and –> we entered into the SS-Topology.xml file earlier.
10. Edit the SS-Settings.xml file and change the following:
A. InstallDatabase == False.
B. IntallSynchService == True
C. HQMessageDatabaseServerName == Name of Machine that is hosting IIS.
D. HQMessageDatabaseServerNamedInstanceName == “”
Your SS-Settings.xml file should now look like this: (Remember to populate all of the additional Website Values as listed in Technet)
<Setting key=”HQMessageDatabaseServerName” value=”MYIISMachine” />
<Setting key=”HQMessageDatabaseServerNamedInstanceName” value=”” />
<Setting key=”HQMessageDatabase” value=”AsyncServerMessageDatabase” />
<Setting key=”InstallDatabase” value=”false” />
<Setting key=”InstallSynchService” value=”true” />
<Setting key=”WebApplicationServiceBinarySourceFolder” value=”C:\Program Files (x86)\Microsoft Dynamics AX\60\CDX\Async Server\package” />
11. Save your changes to the SS-Settings.xml file
12. Edit the SS-Topologyl.xml file, and modify the below sections so that the Installer will user our Domain User Group and not a Local User Group. Remember by removing the [ ] we are forcing the installer to use the value we entered here.
<WindowsLogin id=”RetailHQMessageDBUsers” GroupName=”YOURDOMAINNAME\RetailHQMessageDBUsers” CreateIfNotExists=”true” MappedSqlRoleName=”db_datareader” />
//<WindowsLogin id=”RetailHQMessageDBUsers” GroupName=”YOURDOMAINNAME\RetailHQMessageDBUsers” CreateIfNotExists=”true” MappedSqlRoleName=”db_datawriter” />
<WindowsLogin id=”RetailHQMessageDBUsers” GroupName=”YOURDOMAINNAME\RetailHQMessageDBUsers” CreateIfNotExists=”true” MappedSqlRoleName=”db_executor” />
13. Save your changes to the SS-Topology.xml file
14. Finally on the machine that is going to be hosting IIS, run the PowerShell install commands the same as before. This will then install the IIS Components and configure the Website.
15. Once the installation finishes, located the Web.config file in C:\Program Files (x86)\Microsoft Dynamics AX\60\CDX\Async Server\Package
16. Locate the below Section and verify it is point to your SQL Cluster, if not update it as below.
<connectionStrings>
<add name=”HQMessageDBConnectionString” connectionString=”Server=AGCluster;Database=AsyncServerMessageDatabase;Trusted_Connection=Yes;Encrypt=true;TrustServerCertificate=true” />
</connectionStrings>
Although it a bit of manual work to setup the end result is definitely worth it. As always I hope you found this information useful in your R3 Implement endeavors.


