
Integrating the Shipping Carrier Interface in AX 2012 with UPS WorldShip – Part 1
In this blog series, we will walk through the steps to configure Microsoft Dynamics AX 2012 to integrate with UPS WorldShip using the Shipping carrier interface located in Inventory and warehouse management. This integration will enable Dynamics AX 2012 to send sales order shipment information automatically into UPS WorldShip for processing. Once processed, UPS will send the shipping transaction information back to Dynamics AX.
To start this series off, we will begin by installing UPS WorldShip on a workstation.
A. Install UPS WorldShip
- Run USP WorldShip setup.
- Click the Next (button)
- If prompted to reboot, click Next (button) to reboot your computer.

- Once your computer reboots you should see the UPS WorldShip Setup (form)
- In the UPS WorldShip Setup (form), select the Application language (I am using English)
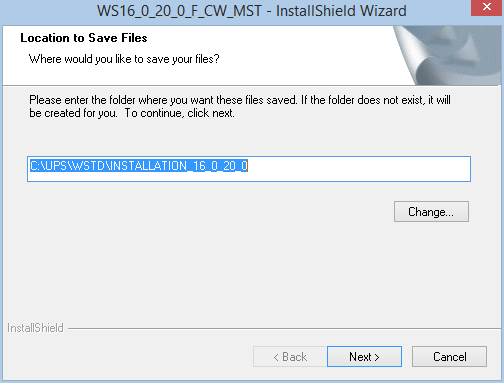
- Determine what directory you would like to install UPS WorldShip
- Select the Country/Territory of the installation
- Select Add shortcut to UPS WorldShip on desktop
- Click on the Next (button)

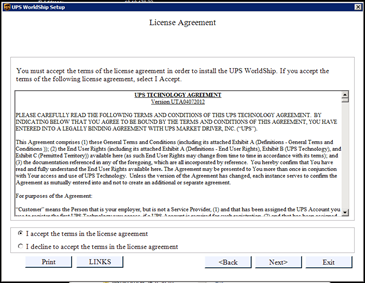
- Read through the License terms
- Click on the I accept the terms of the license agreement (radio button) if you accept the terms of the license agreement.
- Click on the Next (button)
- In the current iteration of UPS WorldShip, there are three different types of configurations that one can deploy in you environment. The installation types are as follows:
- Single Workstation – Use this installation type if this WorldShip system will not be connected to any other WorldShip workstations.

- Workgroup Admin (LAN Admin) – Use this type of installation if you want to allow other Workgroup clients (LAN Remotes) in a Workgroup to connect to this workstation. Only one Workgroup Admin is allowed per workgroup.
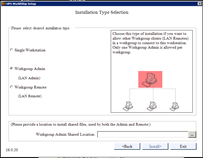
- Workgroup Remote (LAN Admin) – Choose this type of installation if you want the workstation to connect to a Workgroup Admin (LAN Admin) workstation.

- In this example, we will be installing UPS WorldShip in Single Workstation mode.
- Click the Single Workstation (radio).
- Click the Next (button)
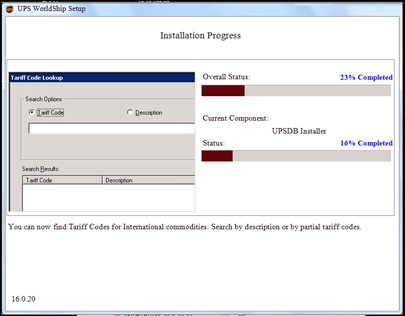
- Once the installation is complete, you will be prompted to reboot your system.
- Click the Reboot Now (button)

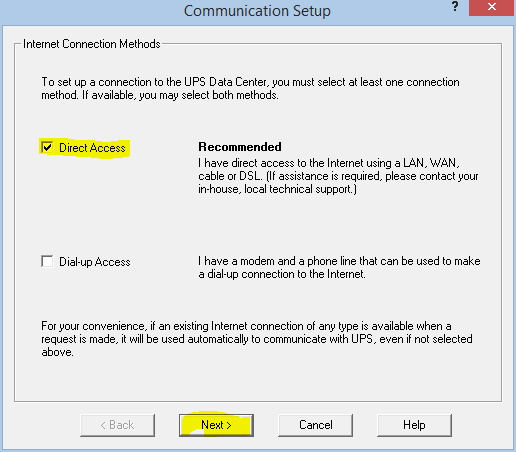
- Select your internet connection type (mine is Direct Access)
- Click the Next (button)
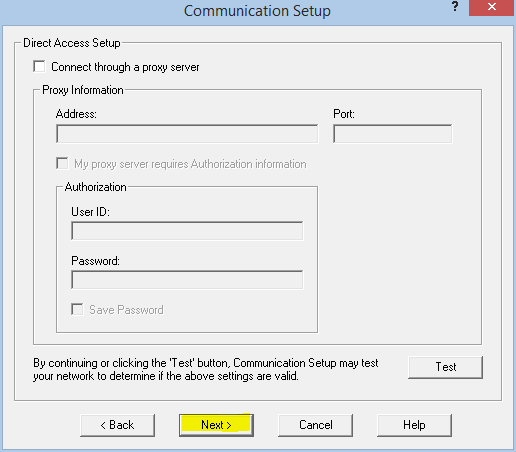
- Configure your direct access connection
- Click the Next (button)
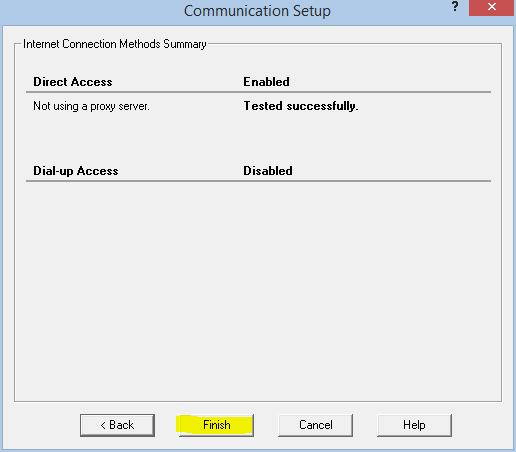
- If the configuration is correct, you should receive the following Dialog stating: “Successfully connected using Direct Access.”
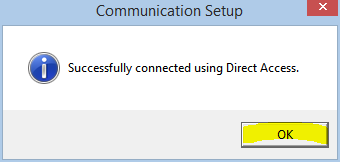
- Click the Finish (button) to complete the setting up the communication setup.
- Enter in your UPS account information and click the Finish (button)

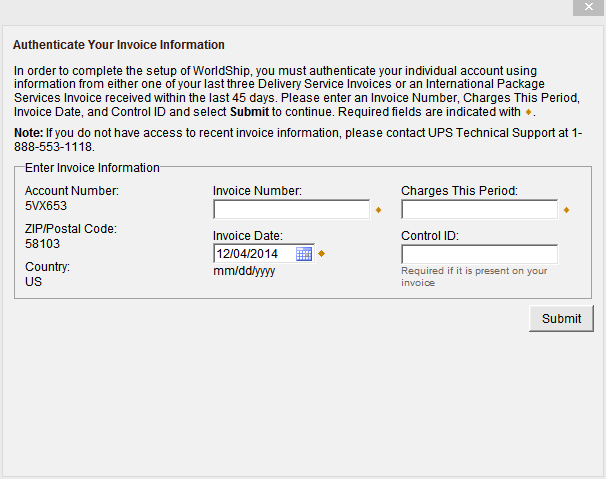
- Authenticate your UPS account by providing the information UPS is requesting and click the Submit (button)
UPS WorldShip should now be fully installed on your workstation. In the next installment of this series, we will configure the Shipping Carrier interface in Microsoft Dynamics AX 2012.
Now that we have all that out of the way, let’s move on to Part 2 to define ODBC import mapping between UPS WorldShip and Dynamics AX 2012
Best regards,
John Bengson


