
As adoption of containers grows, we are getting more asks around running Jenkins on Azure Kubernetes Service (AKS.) To run Jenkins on a VM on Azure, you can use our solution template in Azure Marketplace. If you want to run Jenkins on AKS, I am happy to announce that you can now consider Jenkins X on AKS.
AKS is a fully managed Kubernetes container orchestration service that simplifies deployment and operation. With dynamic scaling of your application infrastructure, you get the confidence and agility you need without investing in a whole team to manage your Kubernetes cluster.
Jenkins X is a Jenkins subproject. It’s Jenkins on Kubernetes – an opinionated CI/CD solution for modern cloud applications. Jenkins X helps by giving you:
- Automated CI and CD – default configuration for build agents and pipelines are automatically created; you don’t need to have deep Jenkins knowledge
- Environment promotion – management of environments and promotion of new versions are automated via GitOps
- Preview environments – you get faster feedback before code merge to master and speed up delivery of changes
Combining the benefits of both AKS and Jenkins X, developers can truly focus on coding instead of spending time to set up their CI/CD infrastructure which could be daunting and time consuming.
Setting up Jenkins X on AKS
- To run Jenkins X on Azure, start by getting the jx command line tool.
- To create the AKS cluster, run:
jx create cluster aks
I prefer to create my AKS cluster separately so that it is easy for me to clean up after I am done.
Create an Azure resource group:
az group create -n yourResourceGroup -l yourRegion
Create a cluster with 6 nodes:
az aks create -g yourResourceGroup -n yourAKS --node-count 6
Install Jenkins X:
jx install
(select AKS as your provider)
- Once installation completes, you will get the admin/password to your Jenkins static server. Use jx console to open your Jenkins dashboard.
In your Azure resource group, you should see your AKS cluster, as well as an Azure Container Registry for managing images for your application.
Testing a Spring Book app
- Follow these steps to create a Spring Boot App. Run:
jx create spring -d web -d actuator
Once the git repo and webhook are created, build is triggered automatically.
You can see the build log by doing:
jx get build logs
To get the URL, run:
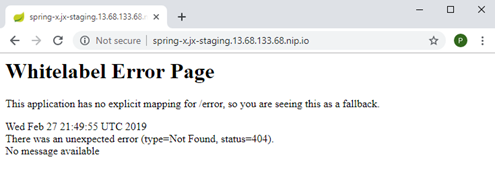
jx open –env staging
You will see the default Spring Boot whitelabel error page since a home page is missing.
To create an issue, run:
jx create issue -t 'add a homepage'
In VS Code,
- Create a new branch.
- Add a home page index.html under src\main\resources\static.
- Commit your update and submit the PR.
In GitHub,
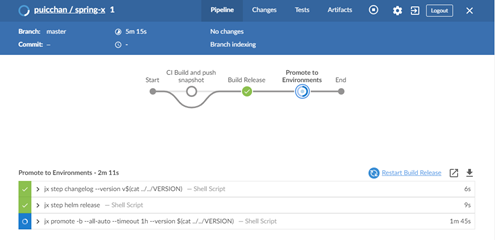
- While the build is in progress, you can click the details link to check progress.

![jenkins x branch]()
- Once build is complete, a PR preview environment is available for you to verify your fix.

![verify the fix]()
Cleaning up
- To clean up, simply delete your Azure resource group
az group delete -y --no-wait -n yourResourceGroup
Jenkins X is evolving rapidly. The jx version I used to walk through the above is 1.3.933.
Try it out and give us feedback either via comment below or email us at Jenkins Azure Support. Let us know what additional Azure integrations you’d like to see in Jenkins X.